How to Make a Tiny Home Bathroom Feel Twice Its Size
If you have ever stepped into a tiny home bathroom and felt like you were inside a phone booth, you are not alone. Most tiny home bathrooms range from just 15 to 30 square feet, which is roughly the size of a walk-in closet in a conventional house. That kind of square footage forces you to rethink everything you know about bathroom design. The good news is that a small footprint does not have to mean a cramped, uncomfortable experience. With the right combination of layout planning, fixture choices, and visual tricks, your tiny home bathroom can feel surprisingly open and fully functional. The key is being intentional with every single decision, from the type of toilet you install to the direction your floor tiles are laid.
In this article, you will find 25 real, practical ideas organized into five categories that cover everything from spatial layouts and space-saving fixtures to clever storage, visual illusions, and bold design choices. Each idea includes specific recommendations for colors, materials, lighting, and accessories, along with honest budget context and limitations you should know about before committing. Whether you are building a tiny home from scratch or renovating an existing micro bathroom, these ideas will help you squeeze the most function and personality out of every square inch.
Smart Layouts That Maximize Every Square Foot
You have probably spent more time than you would like to admit staring at a 4-by-6-foot rectangle on a floor plan, trying to figure out where on earth a shower, toilet, and sink could all possibly fit. That frustration is one of the most common experiences in tiny home building, and the layout you choose will make or break how your bathroom actually feels day to day. These first five ideas focus on the structural and spatial decisions that set the foundation for everything else.
1. The Full Wet Bath Design
A wet bath treats the entire bathroom as a single waterproof zone where the shower, toilet, and sink all share the same open space without any partition or shower enclosure. This is one of the most space-efficient layouts available for tiny homes, and it works especially well in bathrooms under 20 square feet. The walls and floor are fully waterproofed using membrane systems like Schluter KERDI or liquid-applied barriers, then finished with large-format porcelain tiles in a soft gray or warm white to keep the space feeling clean and airy. A rainfall showerhead mounted directly overhead, paired with a handheld wand on a slide bar, keeps the design simple and uncluttered. For lighting, a single recessed LED ceiling light rated for wet locations provides bright, even illumination. The practical tip here is to make sure your floor has a proper slope toward the drain, because standing water is the fastest path to mold in a wet bath. Budget-wise, waterproofing materials and installation typically run $1,500 to $3,000 depending on whether you DIY or hire a professional, which makes this a mid-range investment that pays off in usable space.

2. Corner Sink Configuration
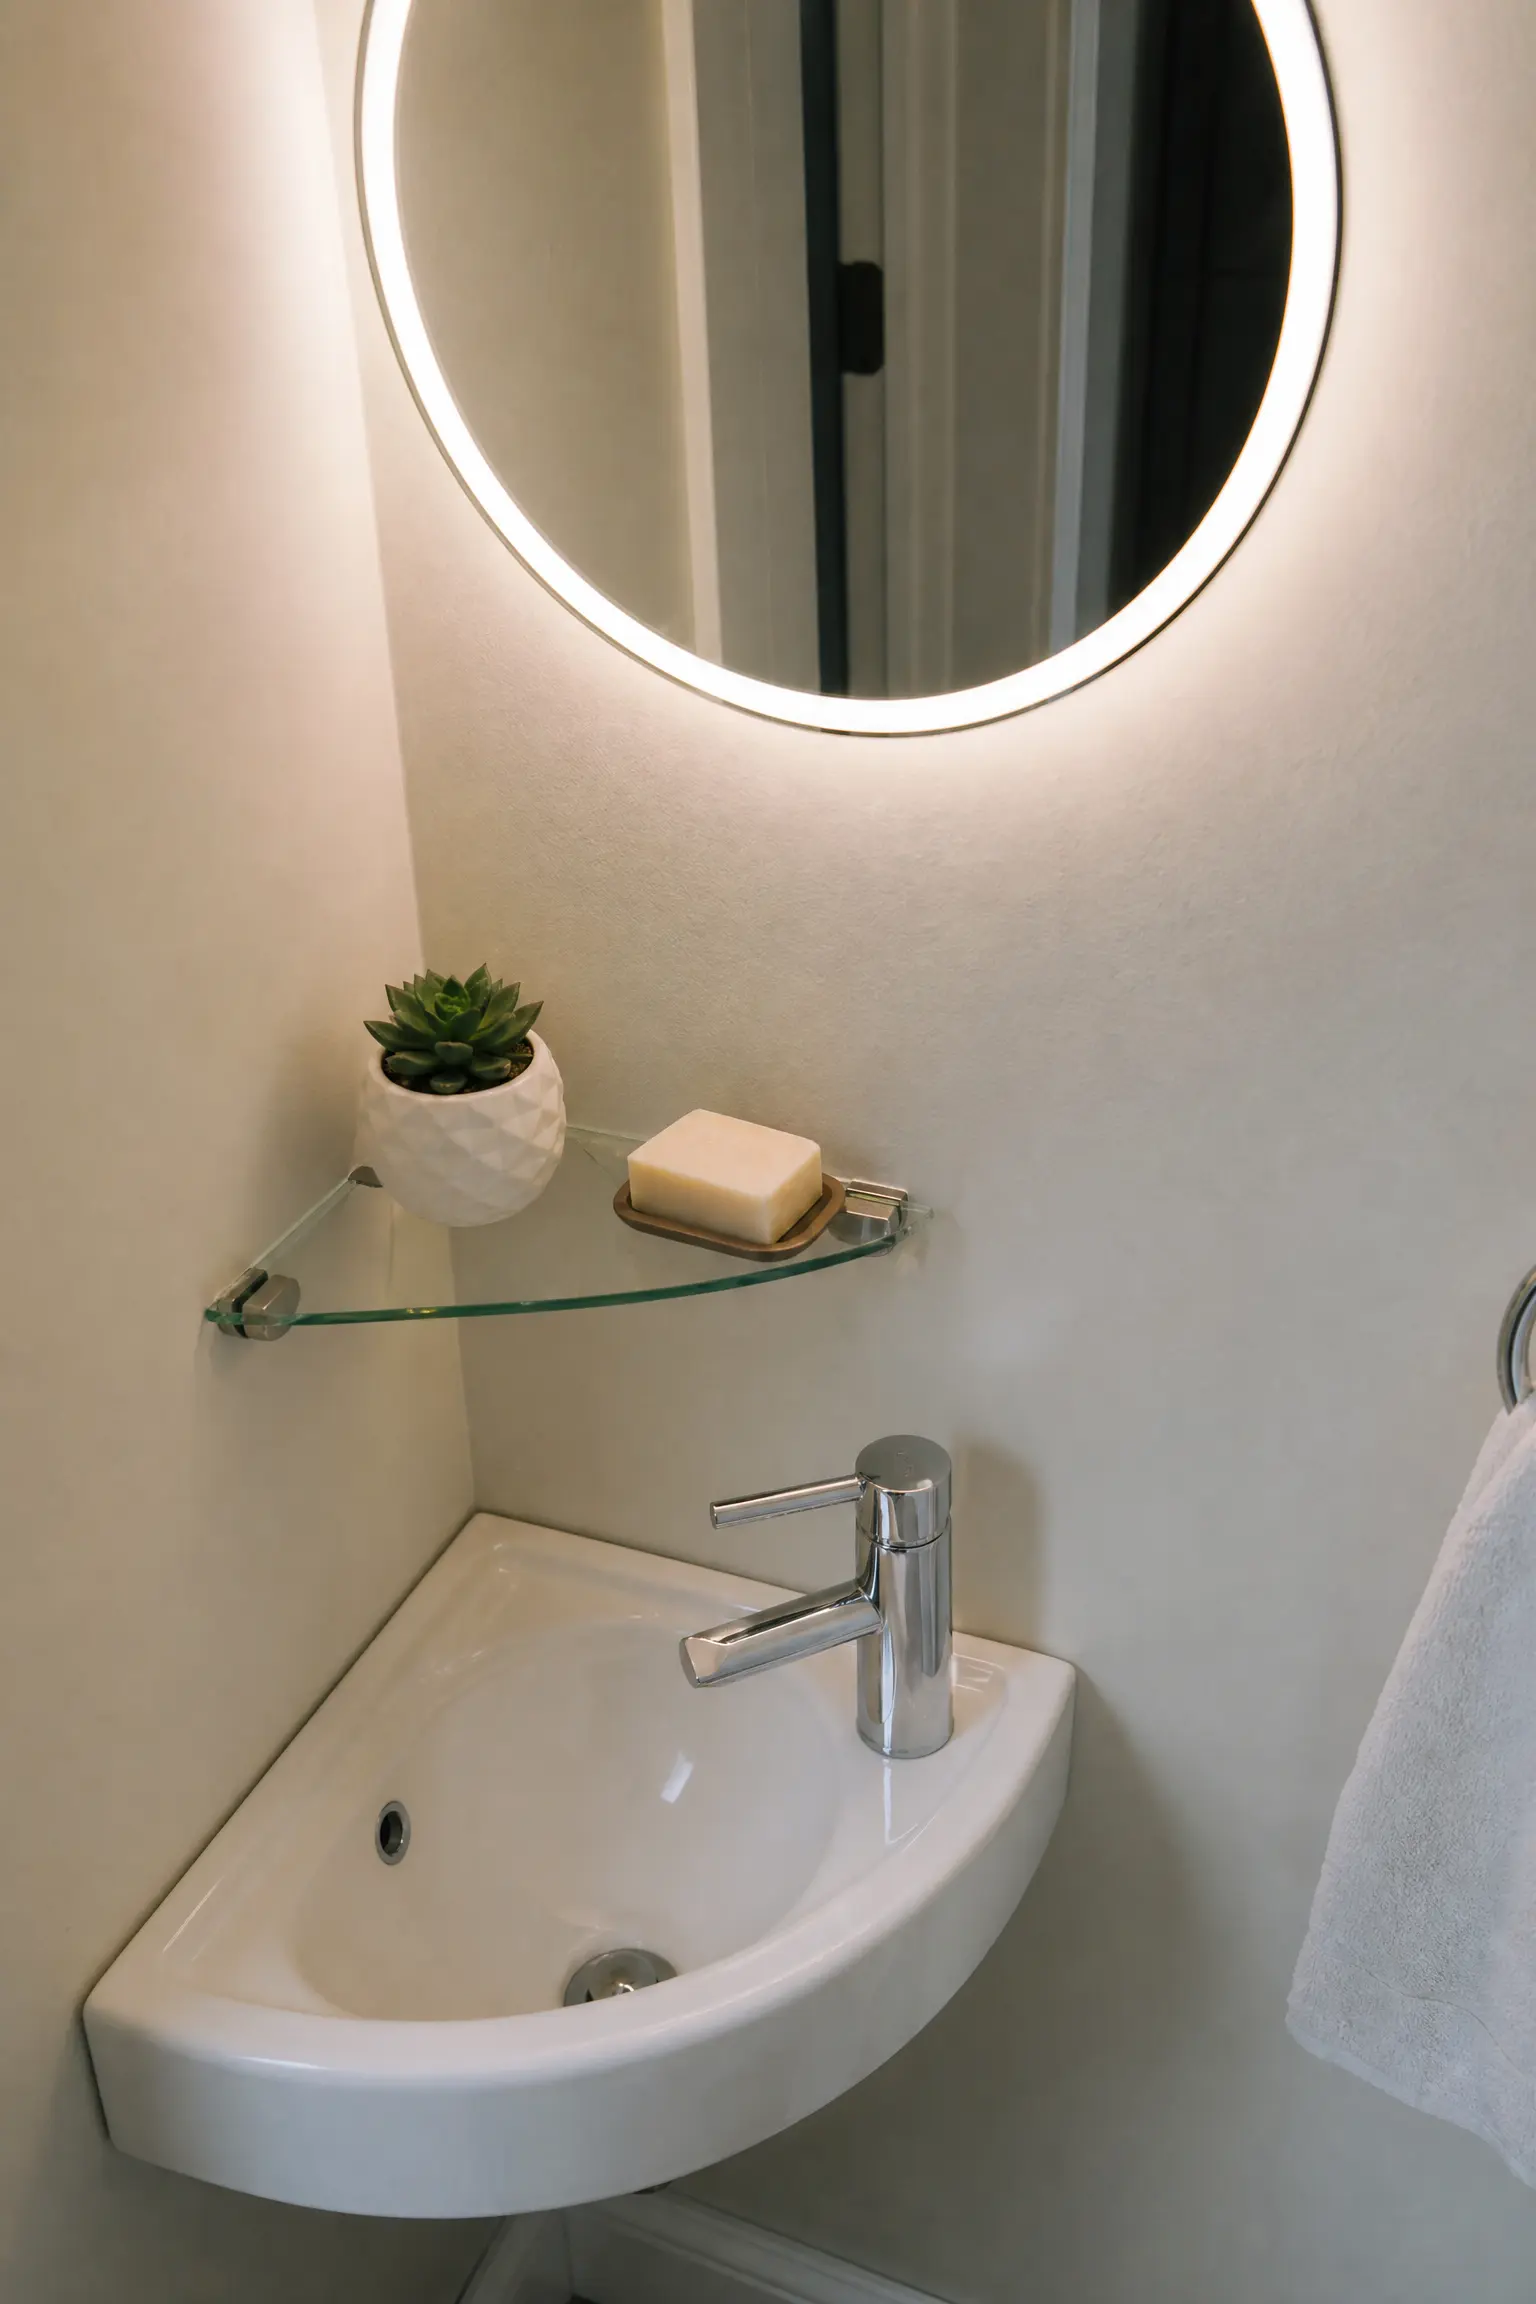
When you position the sink in a corner rather than flat against a wall, you free up a surprising amount of floor space in the center of the bathroom. A triangular or quarter-round porcelain basin in white or bone tucks neatly into a 90-degree corner, leaving enough room for a comfortable path between the toilet and shower. Pair the basin with a small chrome or brushed nickel single-handle faucet and mount a round mirror directly above it with an integrated LED ring for both task lighting and a modern look. The wall behind the sink is a great spot for a single floating glass shelf to hold soap and a small succulent. Corner sinks are an affordable option, with most models ranging from $80 to $250, though the trade-off is limited counter space, so you will need to plan additional storage elsewhere. This layout works best in bathrooms that are closer to square in shape rather than long and narrow.
3. Pocket Door Installation
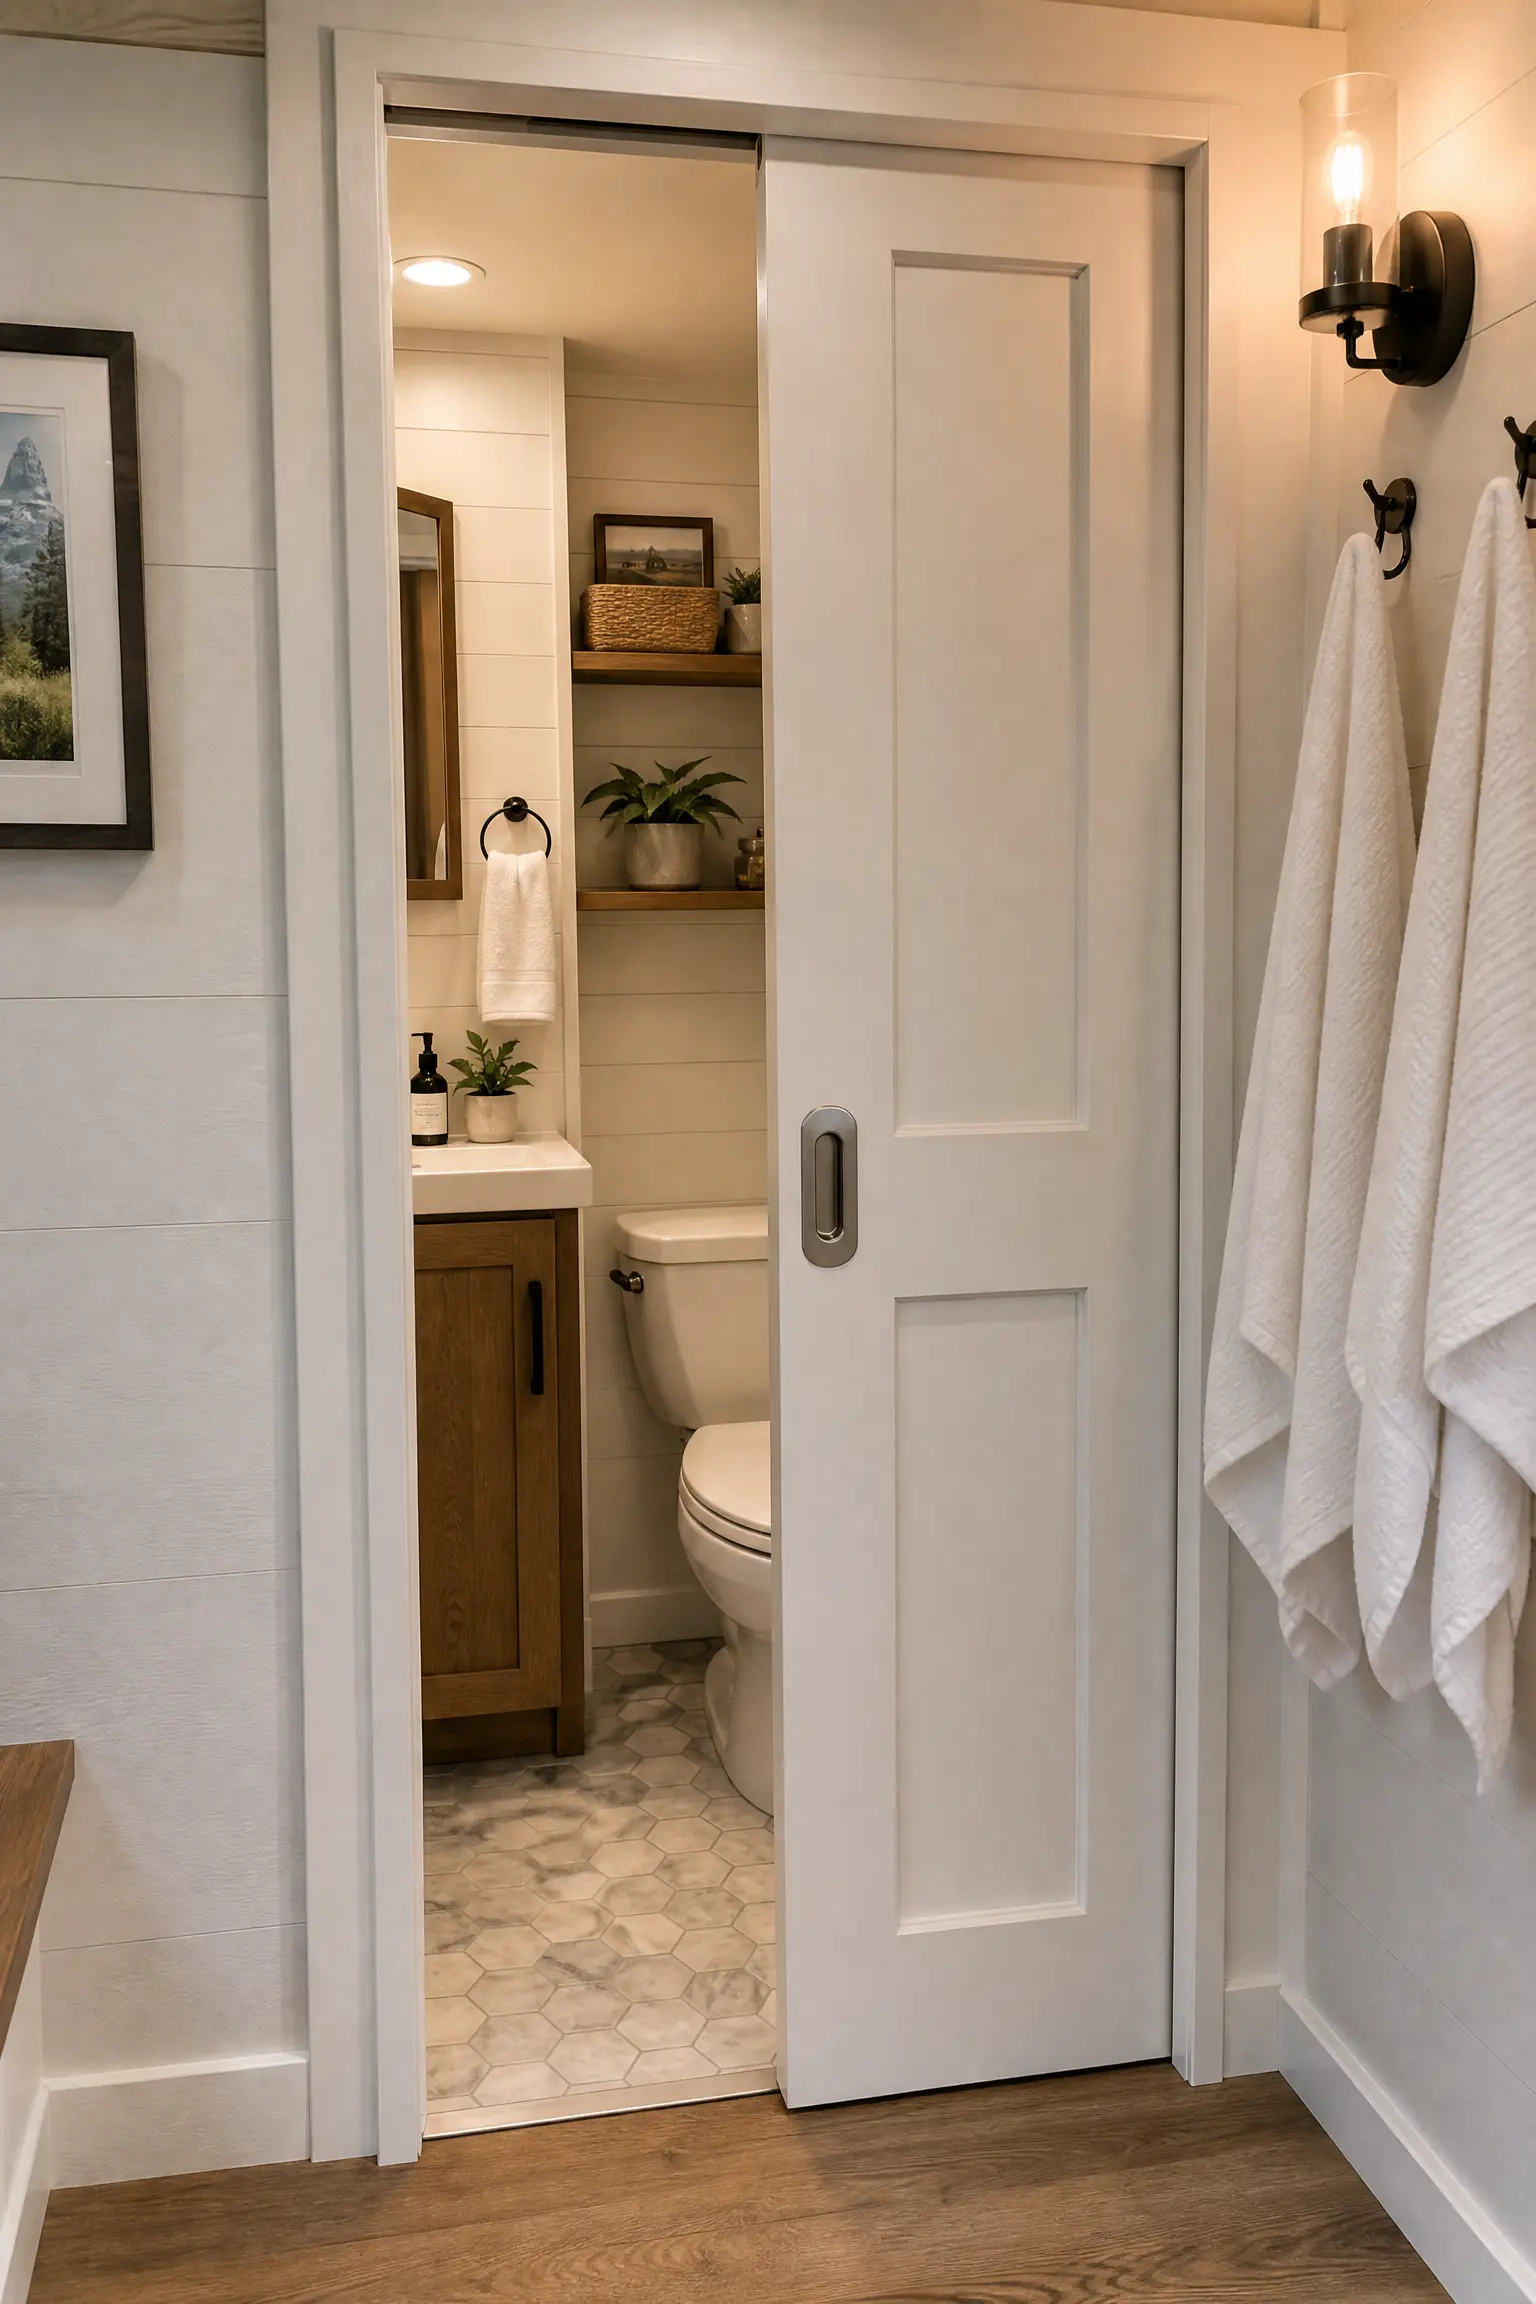
Swapping a traditional swing door for a pocket door instantly reclaims the 6 to 9 square feet that a door arc consumes when it opens. In a tiny home bathroom, that recovered space can mean the difference between feeling cramped and having room to actually move. Choose a pocket door with a smooth birch or white-painted finish to keep the visual weight minimal, and install a simple recessed pull handle in satin nickel rather than a protruding knob. The area behind where the old door used to swing is now available for a small storage cabinet or towel hooks. A warm LED wall sconce beside the door frame adds a welcoming glow and draws the eye to the newly opened floor space. The limitation worth noting is that pocket doors require a clear wall cavity to slide into, so you need to verify there is no plumbing or electrical running through that wall before committing. A pocket door kit with hardware typically costs $150 to $400, making this one of the more affordable upgrades on this list.
4. Diagonal Floor Tile Layout
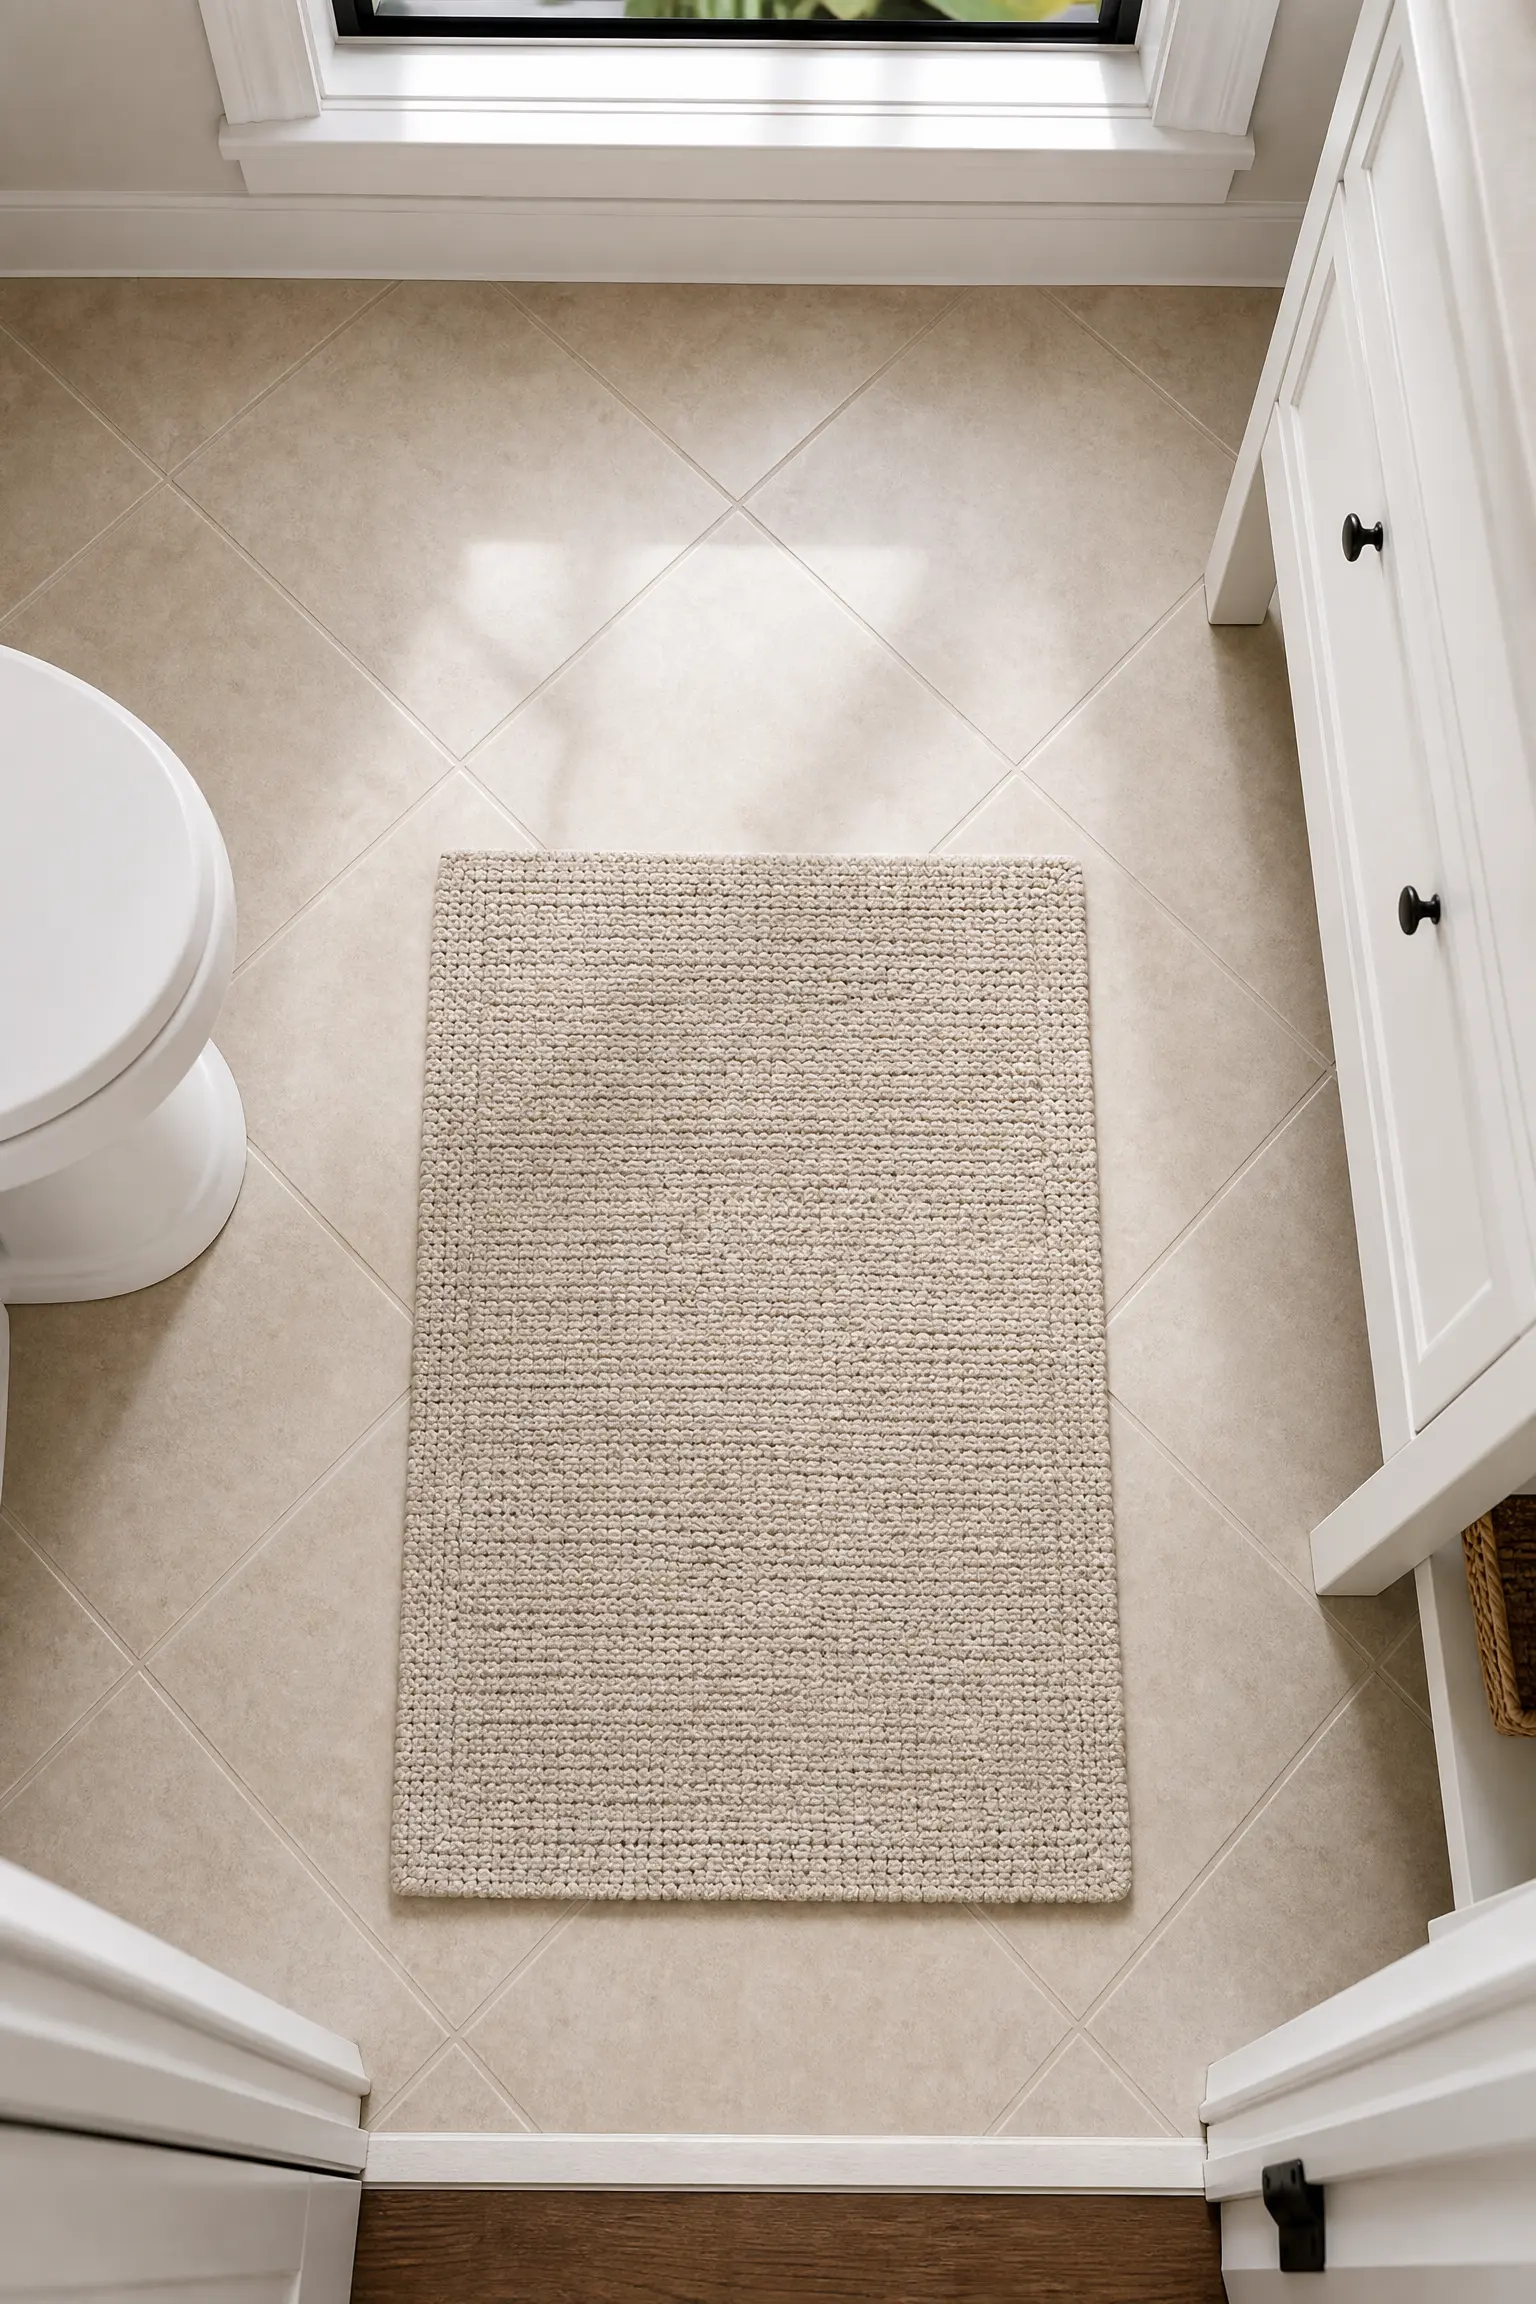
Laying rectangular or square floor tiles on a 45-degree diagonal creates a visual trick that makes narrow tiny bathrooms appear wider than they actually are. The angled lines draw the eye outward toward the walls rather than straight down the length of the room, which disrupts the “bowling alley” effect common in narrow layouts. Choose a matte-finish ceramic tile in a light sand, pale greige, or soft white, and keep the grout color similar to the tile to minimize visual interruption. If your bathroom has a window, natural light bouncing off the diagonal pattern enhances the widening illusion. A small woven cotton bath mat placed at the center of the floor adds texture without covering too much of the pattern. The main limitation is that diagonal layouts generate more tile waste during cutting, typically 15 to 20 percent more than a standard straight lay, so order extra. Standard ceramic floor tiles for a tiny bath run $50 to $150 in material costs, keeping this firmly in the affordable category.
5. Linear One-Wall Layout
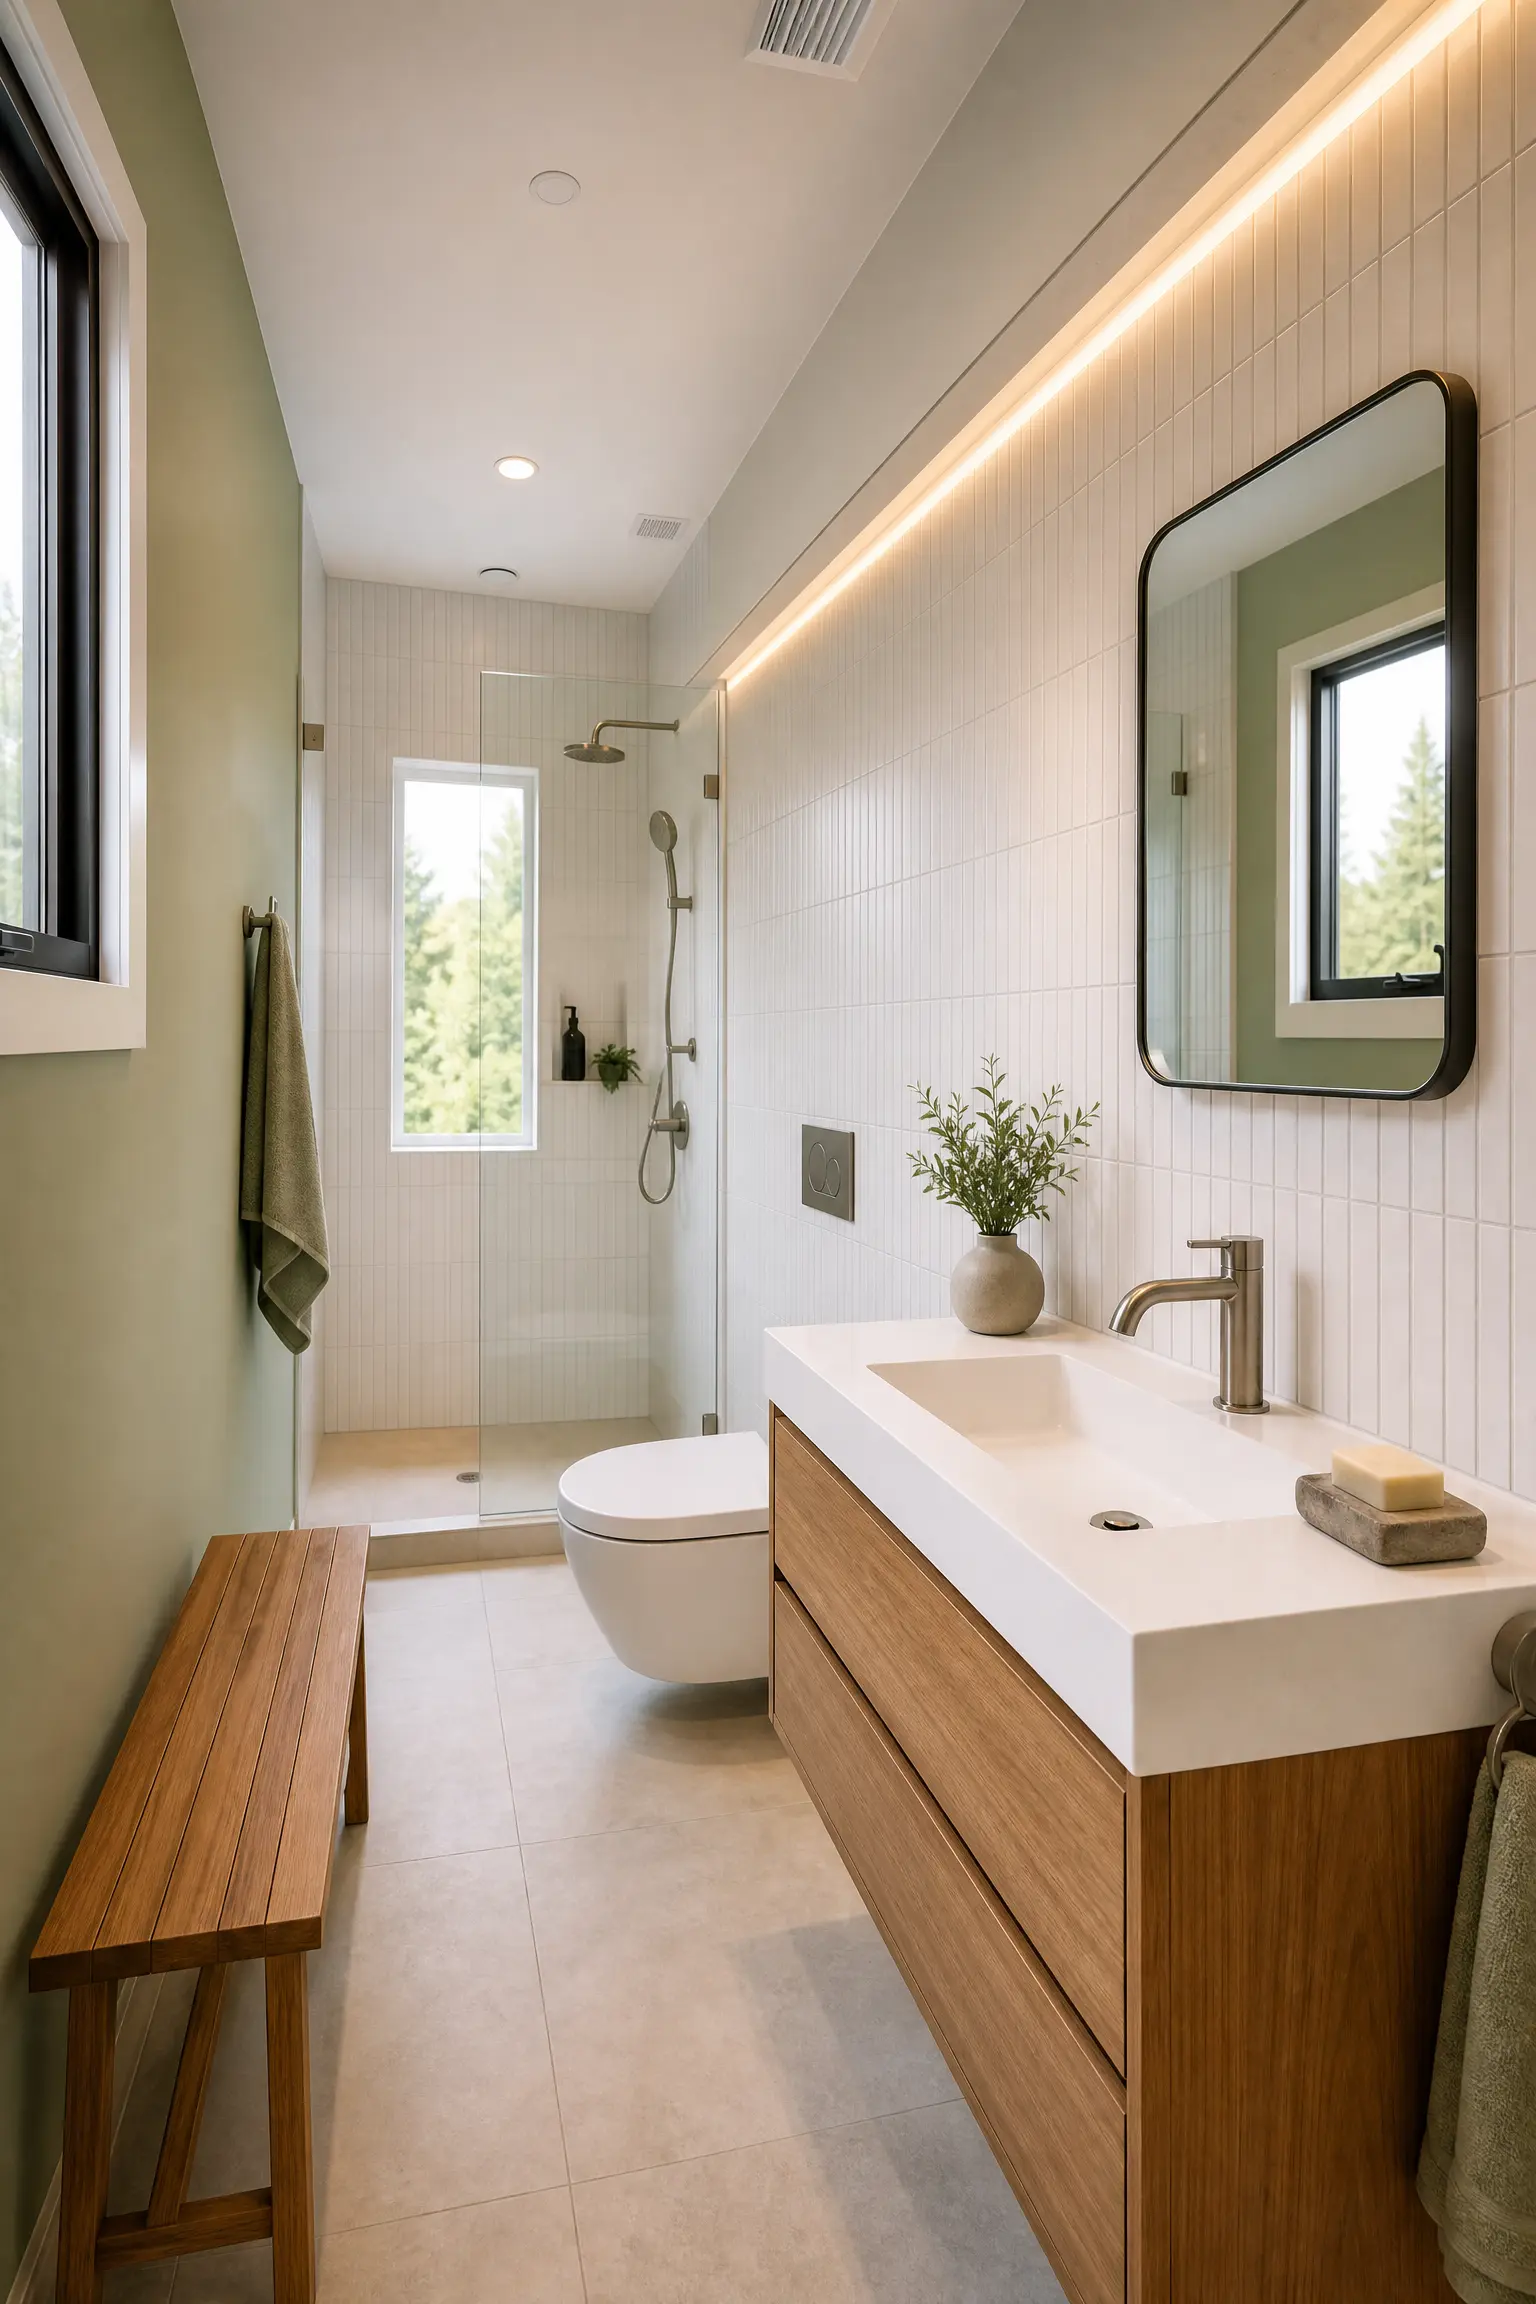
Aligning your sink, toilet, and shower along a single wall is one of the simplest and most construction-friendly layouts for tiny homes because it keeps all plumbing concentrated in one chase. This is especially practical in tiny homes on wheels where plumbing needs to be compact and easy to maintain. Use white subway tiles or vertical-stacked porcelain rectangles on the plumbing wall to create a clean, unified backdrop, and paint the opposite wall a soft sage green or warm linen color for contrast. An overhead recessed LED strip running the length of the plumbing wall provides even, shadow-free light across all three fixtures. Add a narrow teak or bamboo bench at the shower end for both seating and a warm natural texture. One thing to keep in mind is that this layout works best in bathrooms that are at least 3 feet wide, as anything narrower makes the single-wall approach feel uncomfortably tight. Installation costs are lower because of simplified plumbing, typically saving $500 to $1,000 compared to a multi-wall layout.
Space-Saving Fixtures That Earn Their Place
There is a moment in every tiny home build when you realize that a standard-size toilet, vanity, and shower simply will not fit, no matter how creatively you rearrange them on paper. That is when you start looking at fixtures specifically designed for tight spaces. These five ideas focus on toilets, vanities, sinks, and shower options that are engineered to do more with less.
6. Wall-Mounted Toilet
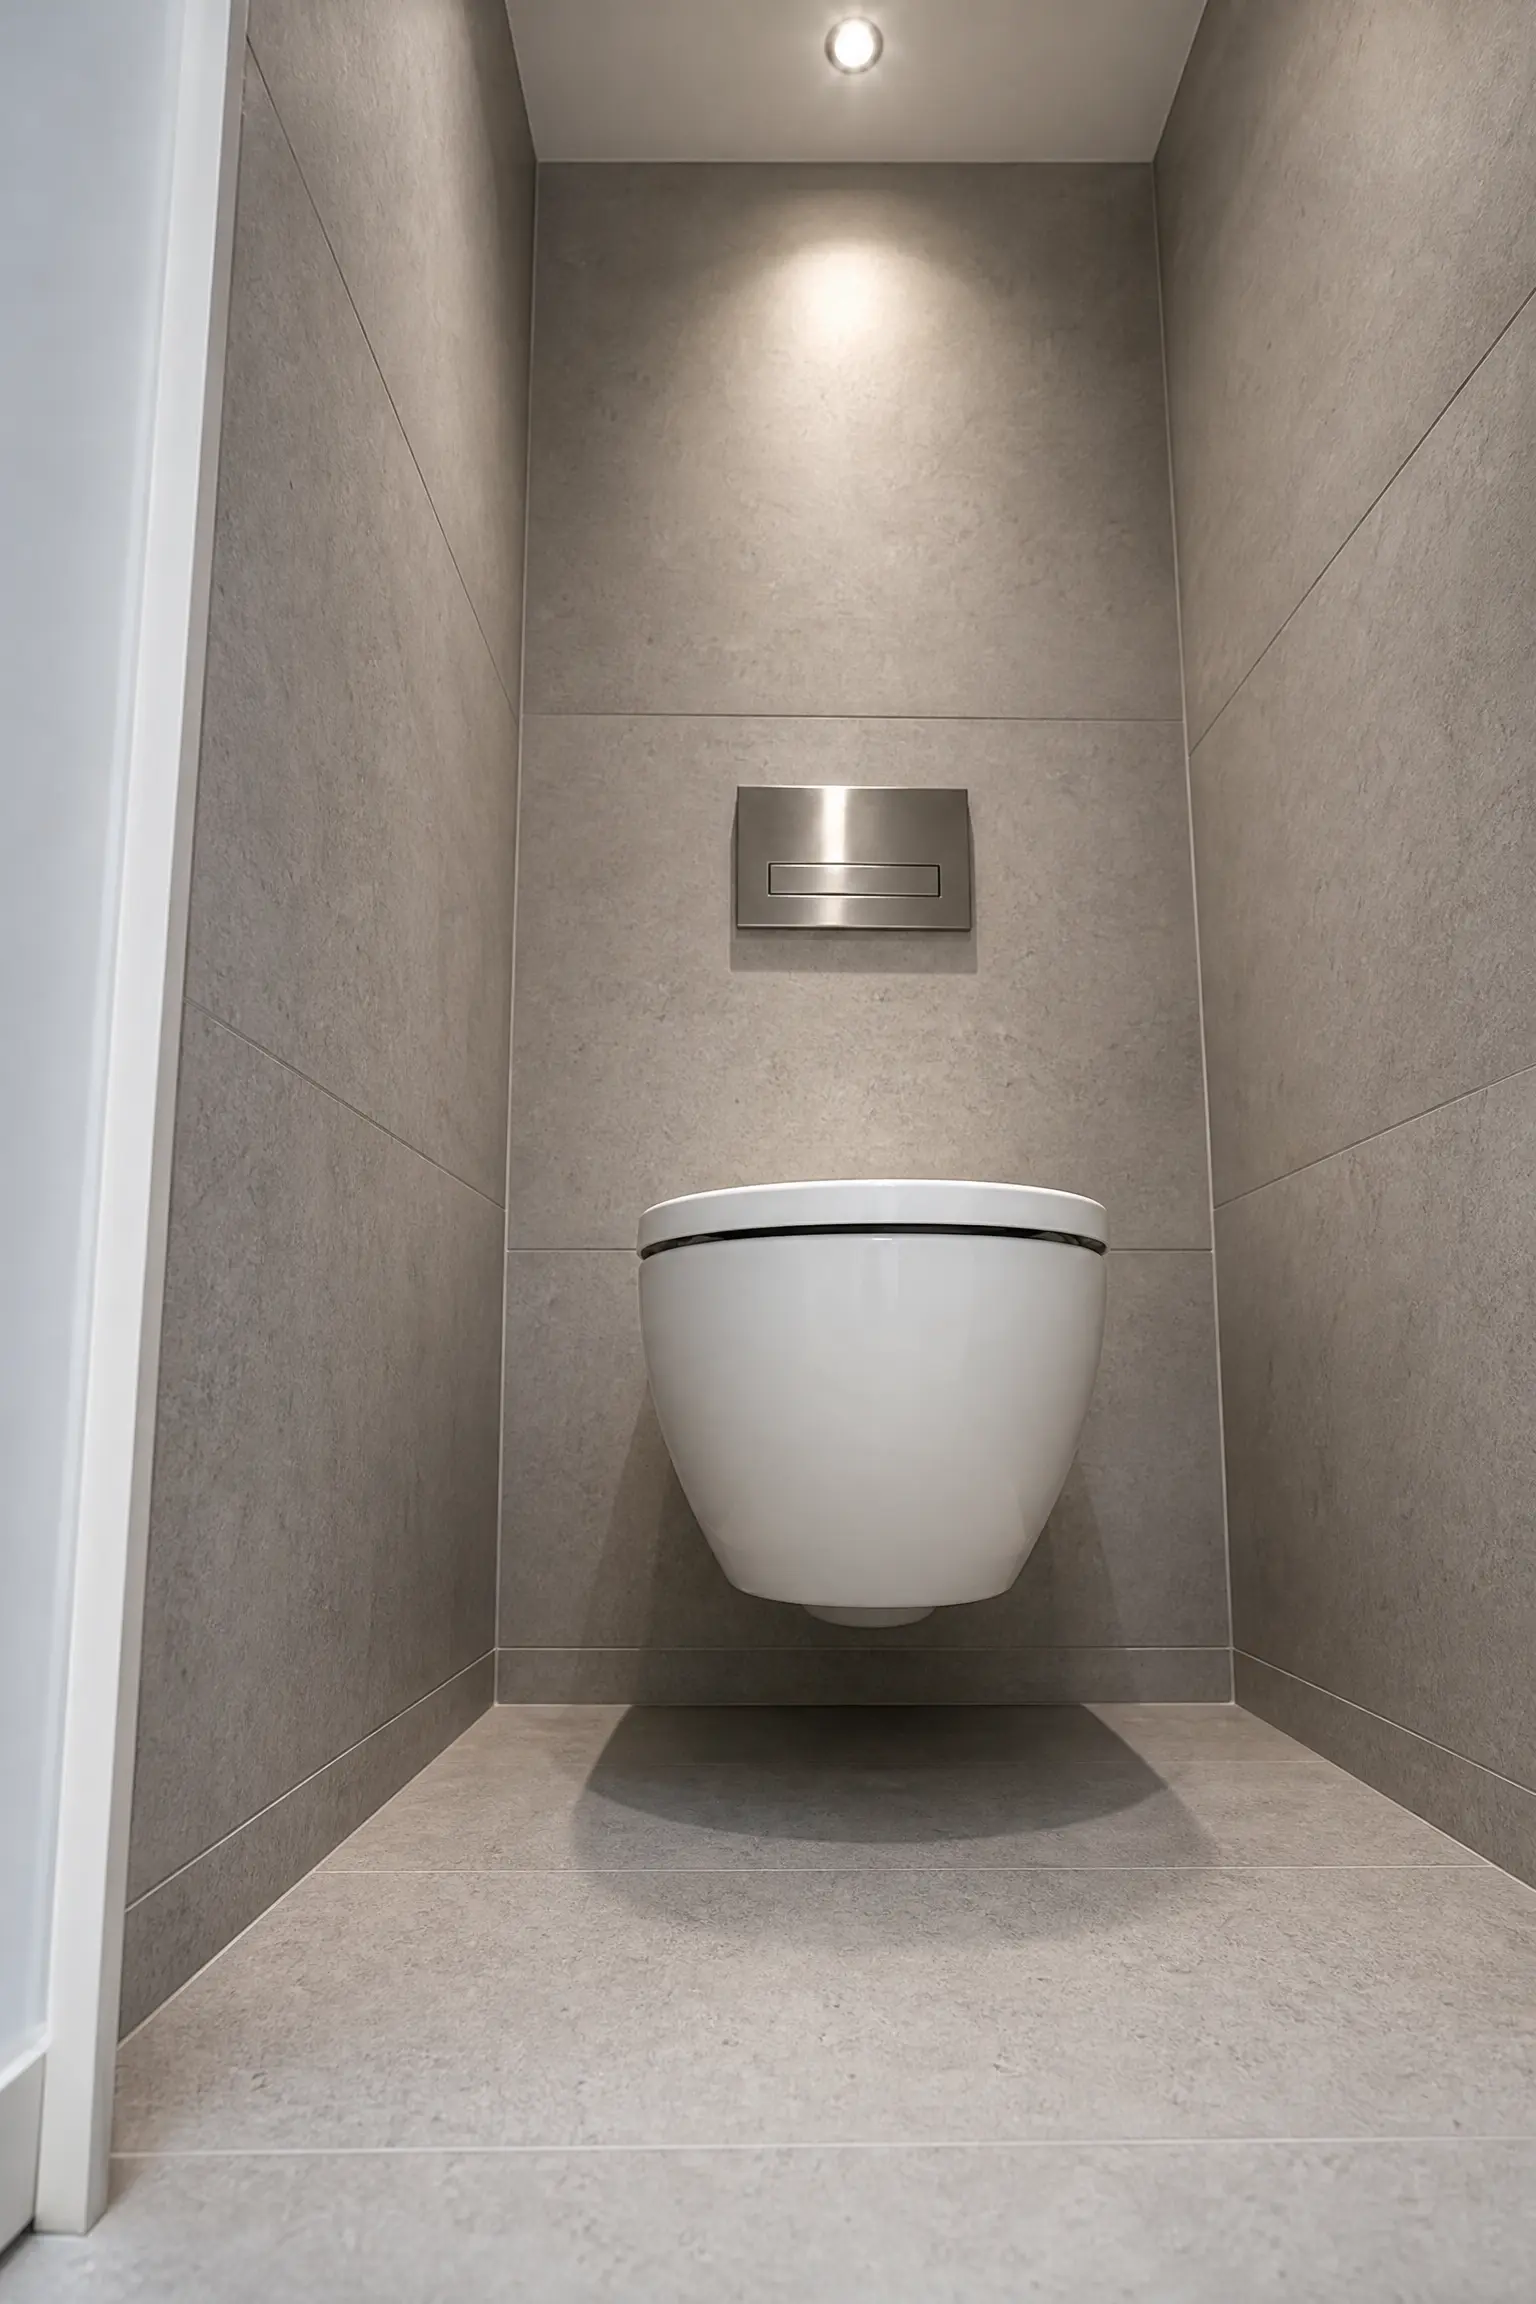
A wall-mounted toilet conceals the tank inside the wall and suspends the bowl above the floor, reclaiming 6 to 12 inches of depth compared to a standard floor-mounted model. The exposed floor underneath makes the bathroom feel more open and is much easier to clean, since you can mop directly underneath without working around a base. Choose a round-bowl model in a matte white finish and pair it with a sleek, flat flush plate in brushed stainless steel or chrome for a modern look. The wall behind the toilet can be finished in the same tile as the rest of the bathroom to keep the visual flow continuous. For lighting, a small recessed downlight above the toilet area provides functional illumination without adding visual clutter. The honest reality is that wall-mounted toilets are a significant investment, with total installed costs running $1,000 to $4,000 due to the in-wall carrier frame and specialized plumbing, and repairs to the concealed tank can be more complex down the road.
7. Floating Vanity with Integrated Basin
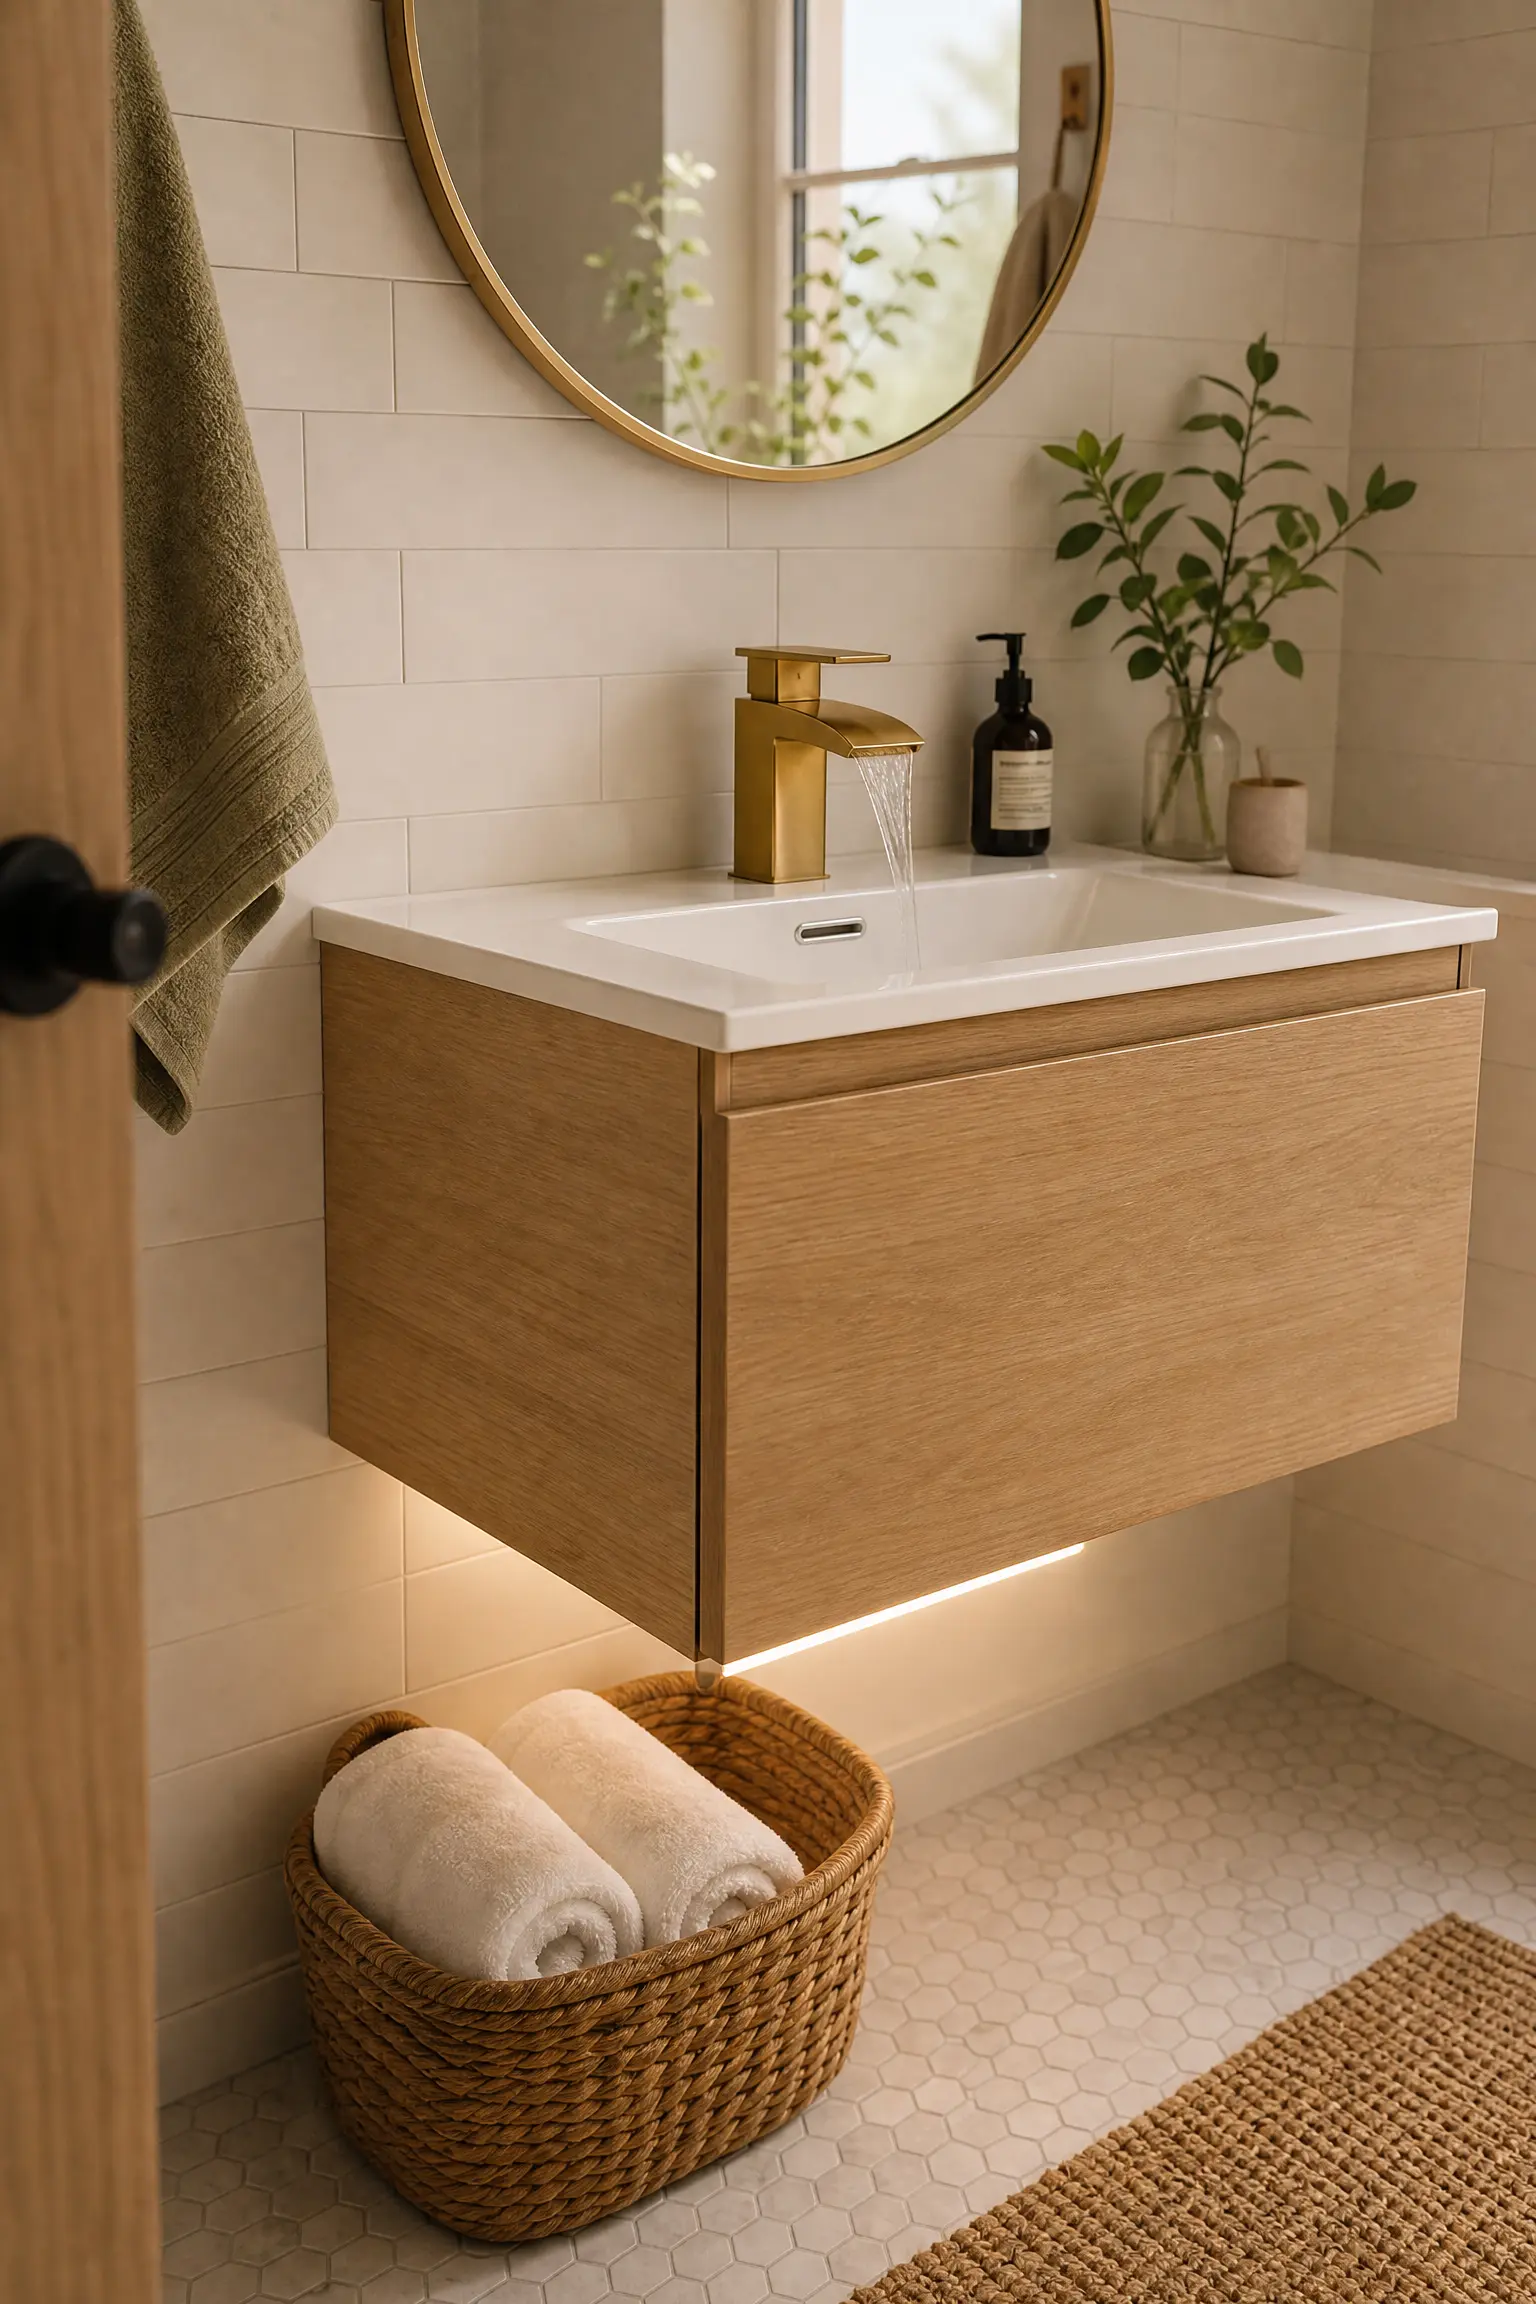
A floating vanity mounted to the wall at custom height exposes the floor below and creates a sense of airiness that a bulky cabinet simply cannot match. Opt for a compact 18 to 24-inch-wide unit in a natural white oak veneer or a clean matte white finish, with an integrated ceramic basin that eliminates the gap between countertop and sink where grime collects. A single-handle waterfall faucet in brushed gold or matte black adds a focal point without taking up counter space. Underneath the vanity, place a small woven basket for extra towels or toiletries, and install a slim LED light bar above or beneath the unit for soft ambient light. The main drawback is that floating vanities offer roughly 30 to 40 percent less storage than floor-standing models, so you will need to supplement with shelving or a medicine cabinet. Prices range from $200 for a basic model to $800 or more for higher-end finishes, putting this in the affordable-to-mid-range category depending on your selection.
8. Composting Toilet
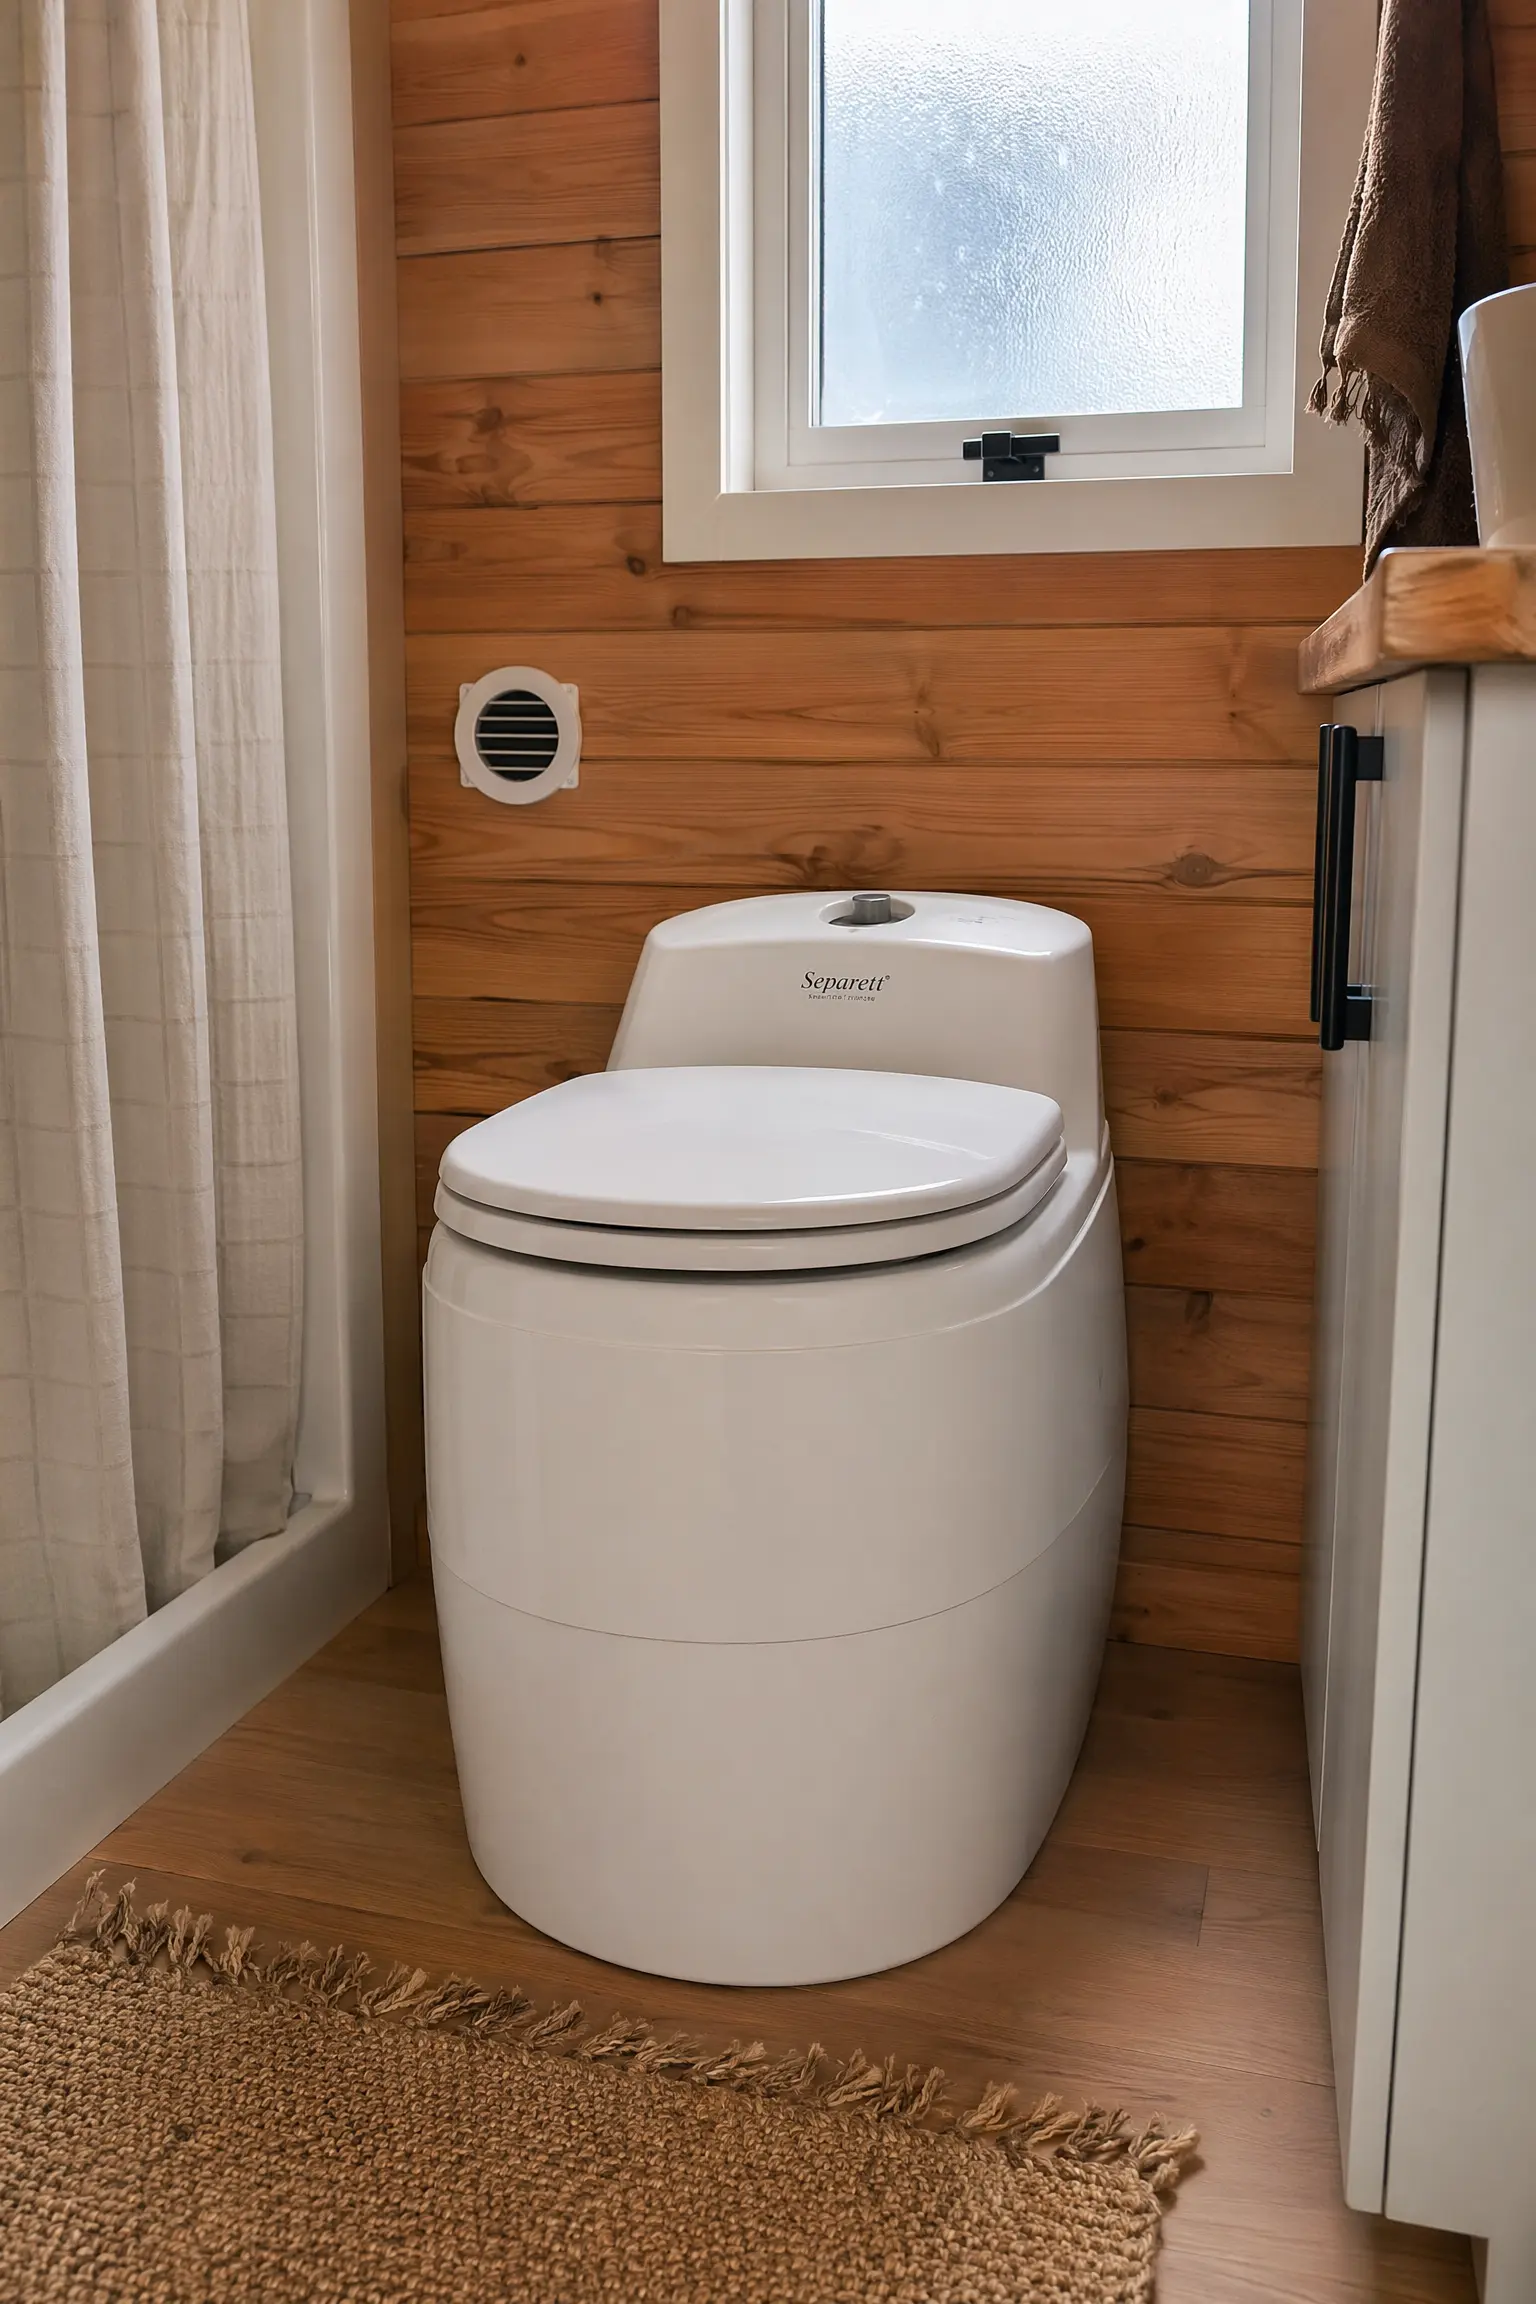
For off-grid tiny homes or builds where connecting to a septic system is not feasible, a composting toilet is a practical solution that eliminates the need for water-based plumbing entirely. Modern urine-diverting composting toilets from brands like Nature’s Head or Air Head are compact, nearly odorless when used correctly, and cost between $800 and $2,000 for a commercial unit. The unit itself sits directly on the floor and has a clean, marine-grade white plastic housing that looks more modern than most people expect. Pair it with warm-toned wood paneling or shiplap on the wall behind it and a small battery-powered exhaust fan vented to the exterior for airflow. A simple jute or cotton rug in front of the toilet adds warmth underfoot. The limitation you should know about is the maintenance commitment: you will need to empty the urine container every few days and manage the solids bin with bulking material like coconut coir, which is a hands-on process that not everyone is comfortable with. Also, check local building codes before installation, as regulations vary significantly by jurisdiction.
9. Vessel Sink on a Narrow Shelf Ledge
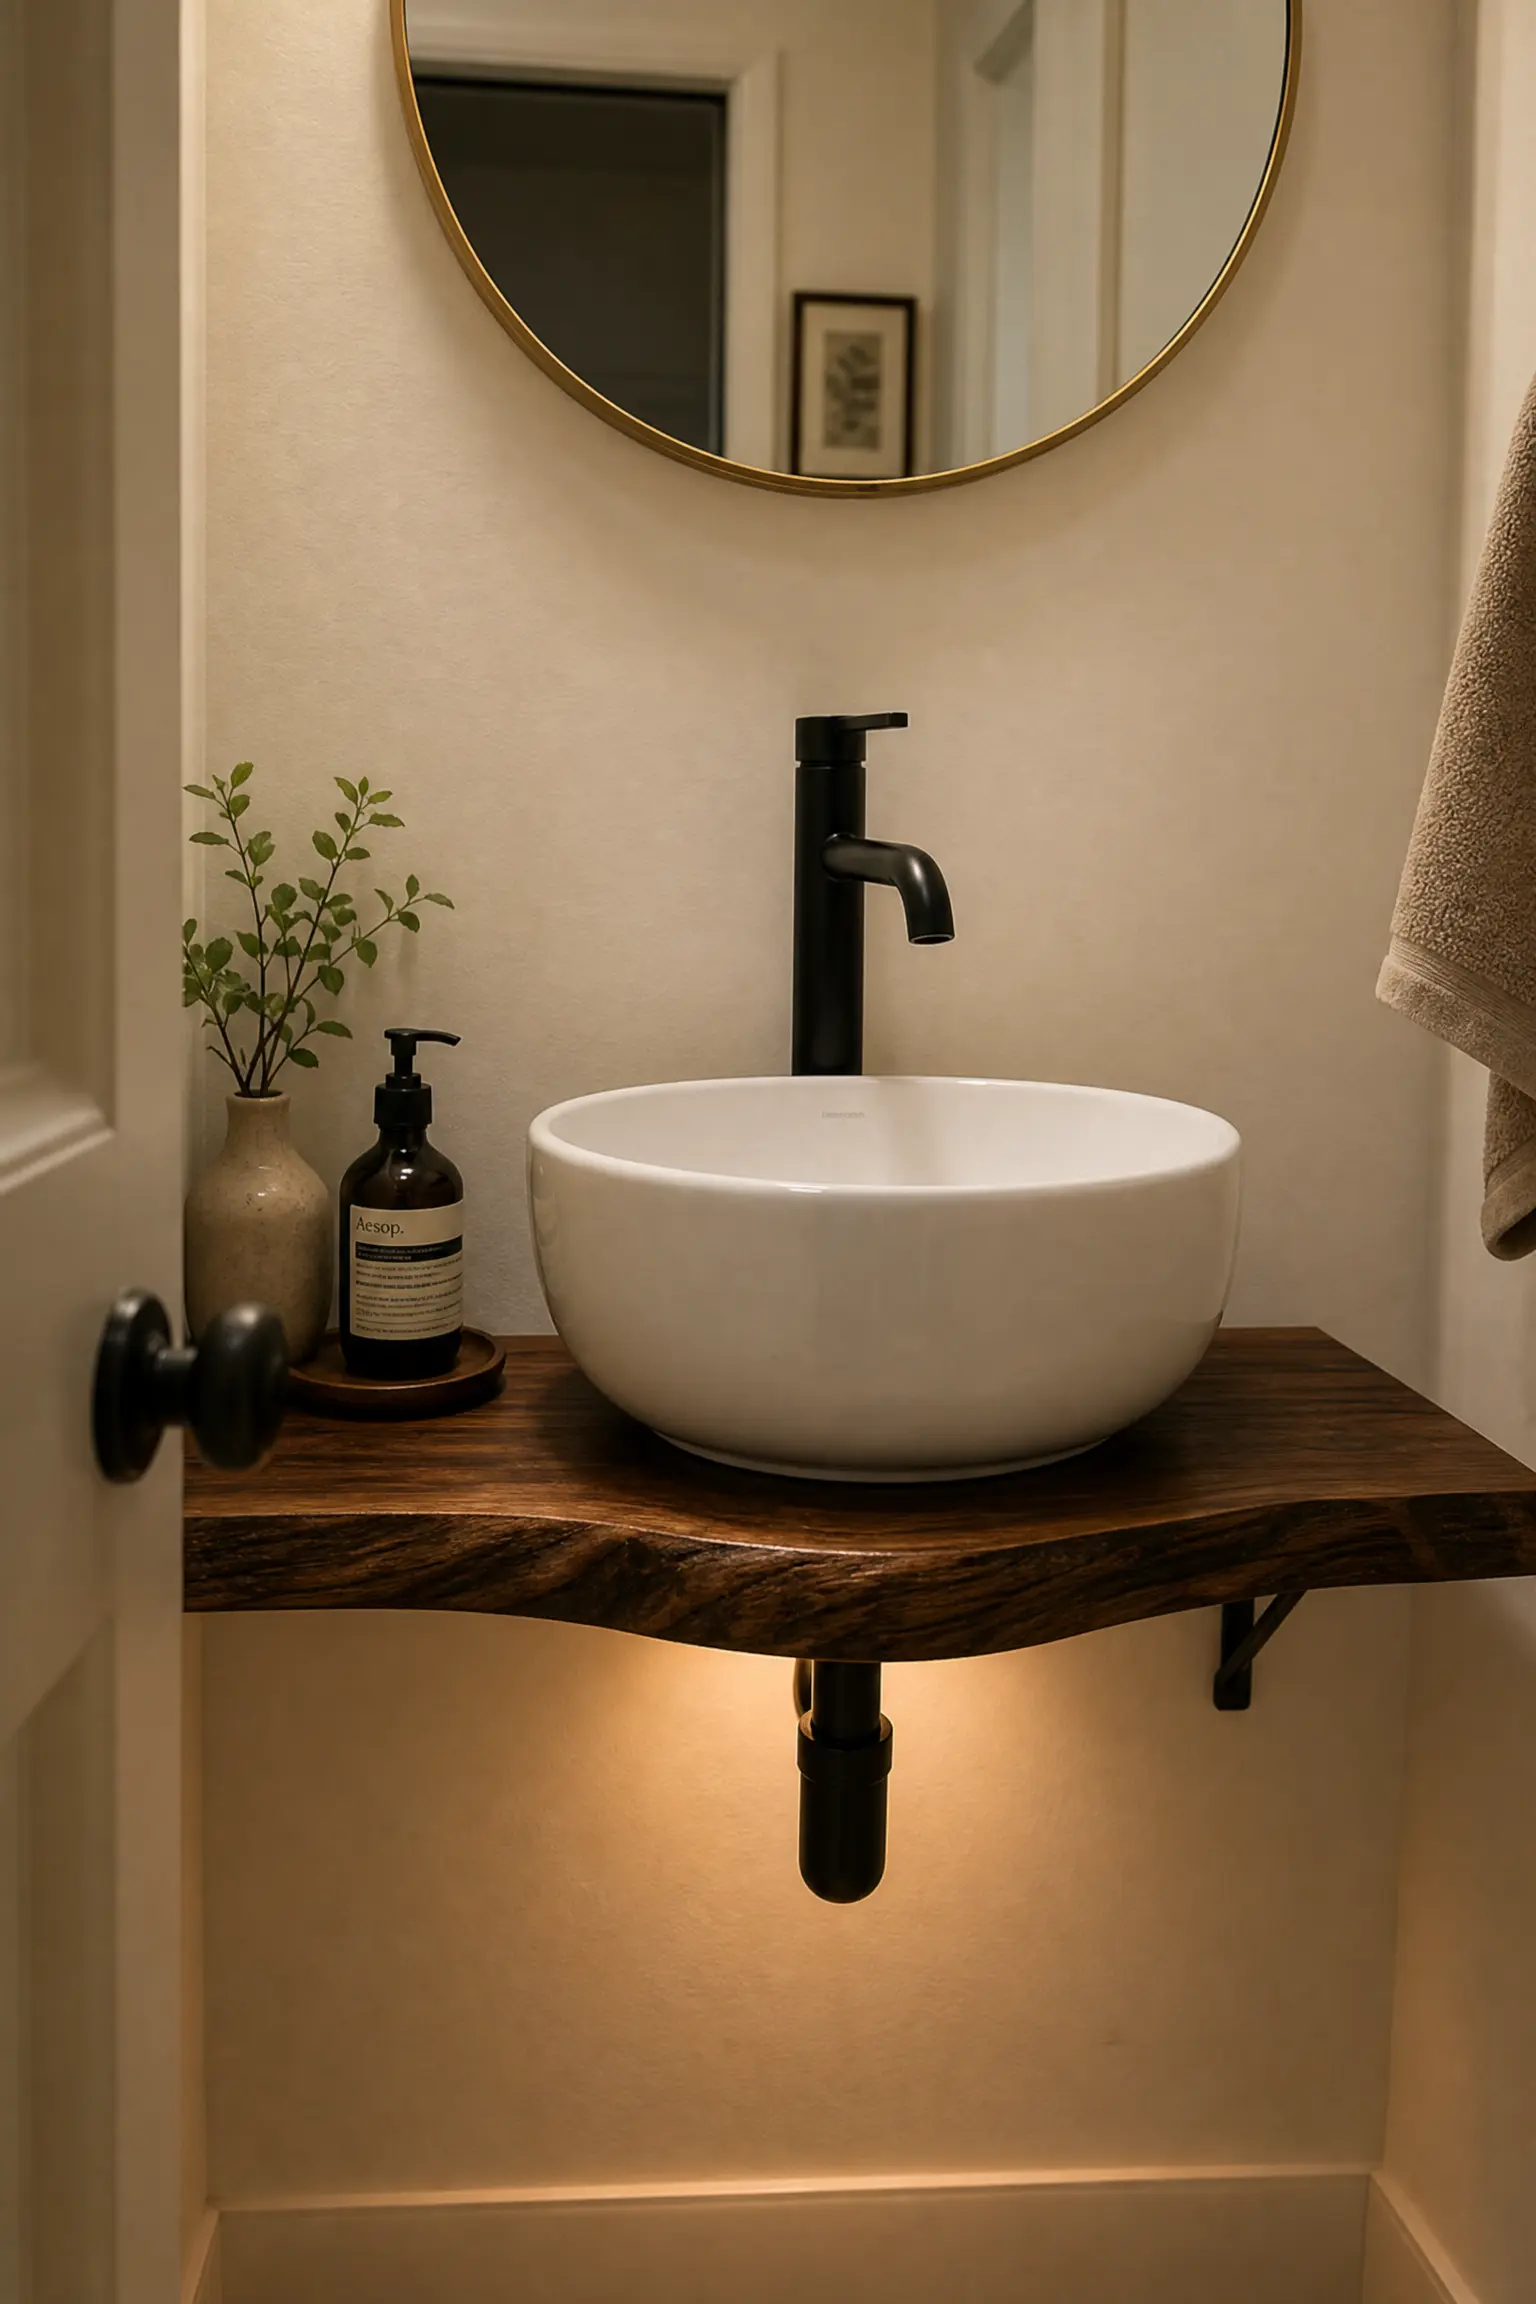
Instead of a full vanity, mounting a round or oval vessel sink on a narrow floating wood shelf or stone ledge gives you a washing station that takes up minimal depth. A white ceramic vessel basin sitting on a live-edge walnut shelf or a polished concrete ledge creates a beautiful contrast of materials and textures. Install a tall single-hole faucet in matte black directly behind the basin and mount a small round mirror with a thin brass frame above. A battery-operated puck light underneath the shelf creates a warm glow that highlights the wood grain and adds a layered lighting effect. This setup is genuinely affordable, with vessel sinks starting around $50 to $150 and a custom-cut shelf running $30 to $100 depending on material. The trade-off is zero counter space and no under-sink storage, so this works best when paired with wall-mounted storage solutions elsewhere in the bathroom.
10. Curved Glass Shower Enclosure
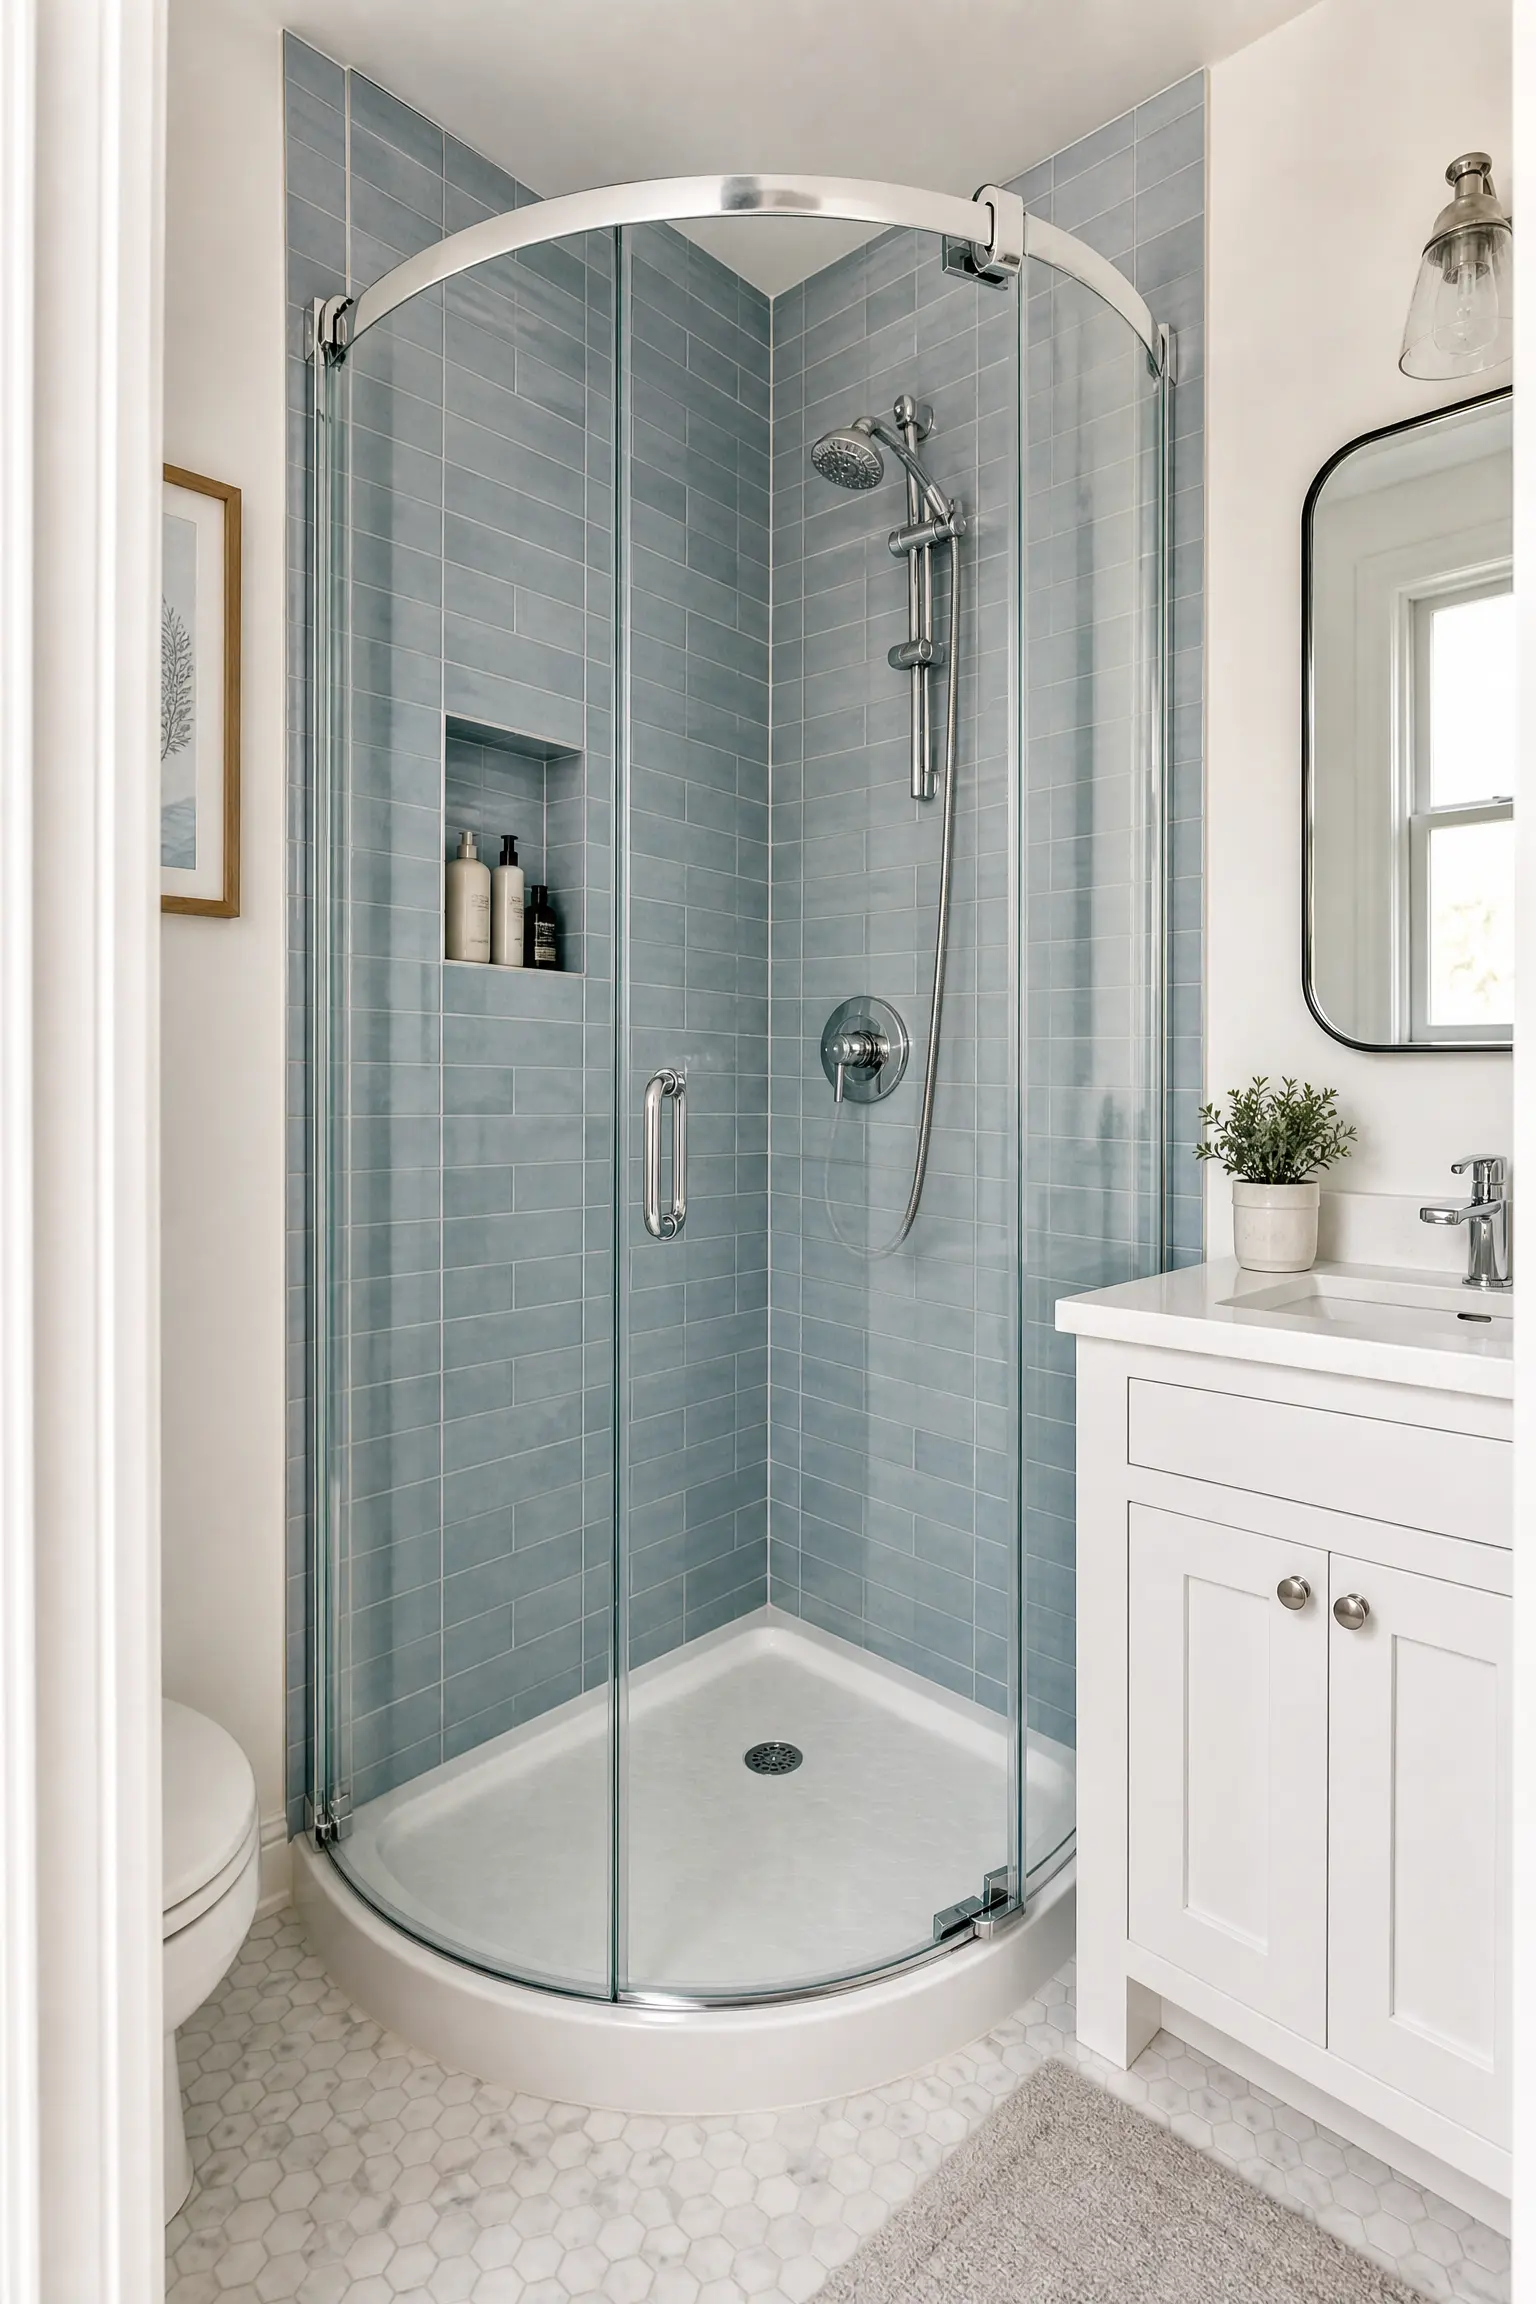
A quadrant or neo-angle shower enclosure with a curved glass door fits neatly into a corner while taking up less floor space than a rectangular stall. The curved glass eliminates sharp corners that you might bump into in a tight bathroom, and the transparency keeps the visual sightline open across the room. Choose a frameless or semi-frameless unit with clear glass and minimal chrome hardware to maintain that open, airy feeling. Inside the shower, use a consistent wall tile in a soft blue-gray or warm taupe from floor to ceiling, and install a recessed niche for shampoo bottles rather than a hanging caddy. An adjustable LED showerhead with warm-toned light can make the enclosed space feel spa-like during evening showers. Curved glass enclosures are a mid-range investment at $300 to $900, and the main thing to keep in mind is that the curved glass panels cannot be cut to custom sizes, so verify your corner dimensions match the available standard sizes before ordering.
Clever Storage That Keeps Clutter Invisible
You know that feeling when every surface in your tiny bathroom is covered with bottles, brushes, and towels because there is literally nowhere to put them? That is the storage problem almost every tiny home owner faces eventually, and it usually happens faster than you expect. The trick is building storage into the architecture of the room itself, rather than adding freestanding furniture that eats up floor space.
11. Vertical Ladder Shelf
A slim wooden ladder shelf leaning against a wall or mounted in place takes advantage of vertical space that would otherwise go unused. Choose a ladder made from light bamboo or unfinished pine with 4 to 5 tiers, and use it to hold rolled towels, small potted plants, a candle, and a woven storage basket on the lower shelves. The natural wood texture adds warmth against white or light-colored bathroom walls, and the open frame keeps the visual weight low so the room does not feel crowded. Position the ladder near the toilet or beside the door where it is easy to reach but out of the main traffic path. A clip-on LED reading light attached to the top rung can double as ambient accent lighting in the evening. These ladder shelves are one of the most budget-friendly storage solutions at $25 to $80, though the open design means everything on display needs to look intentional and tidy.

12. Recessed Shower Niche
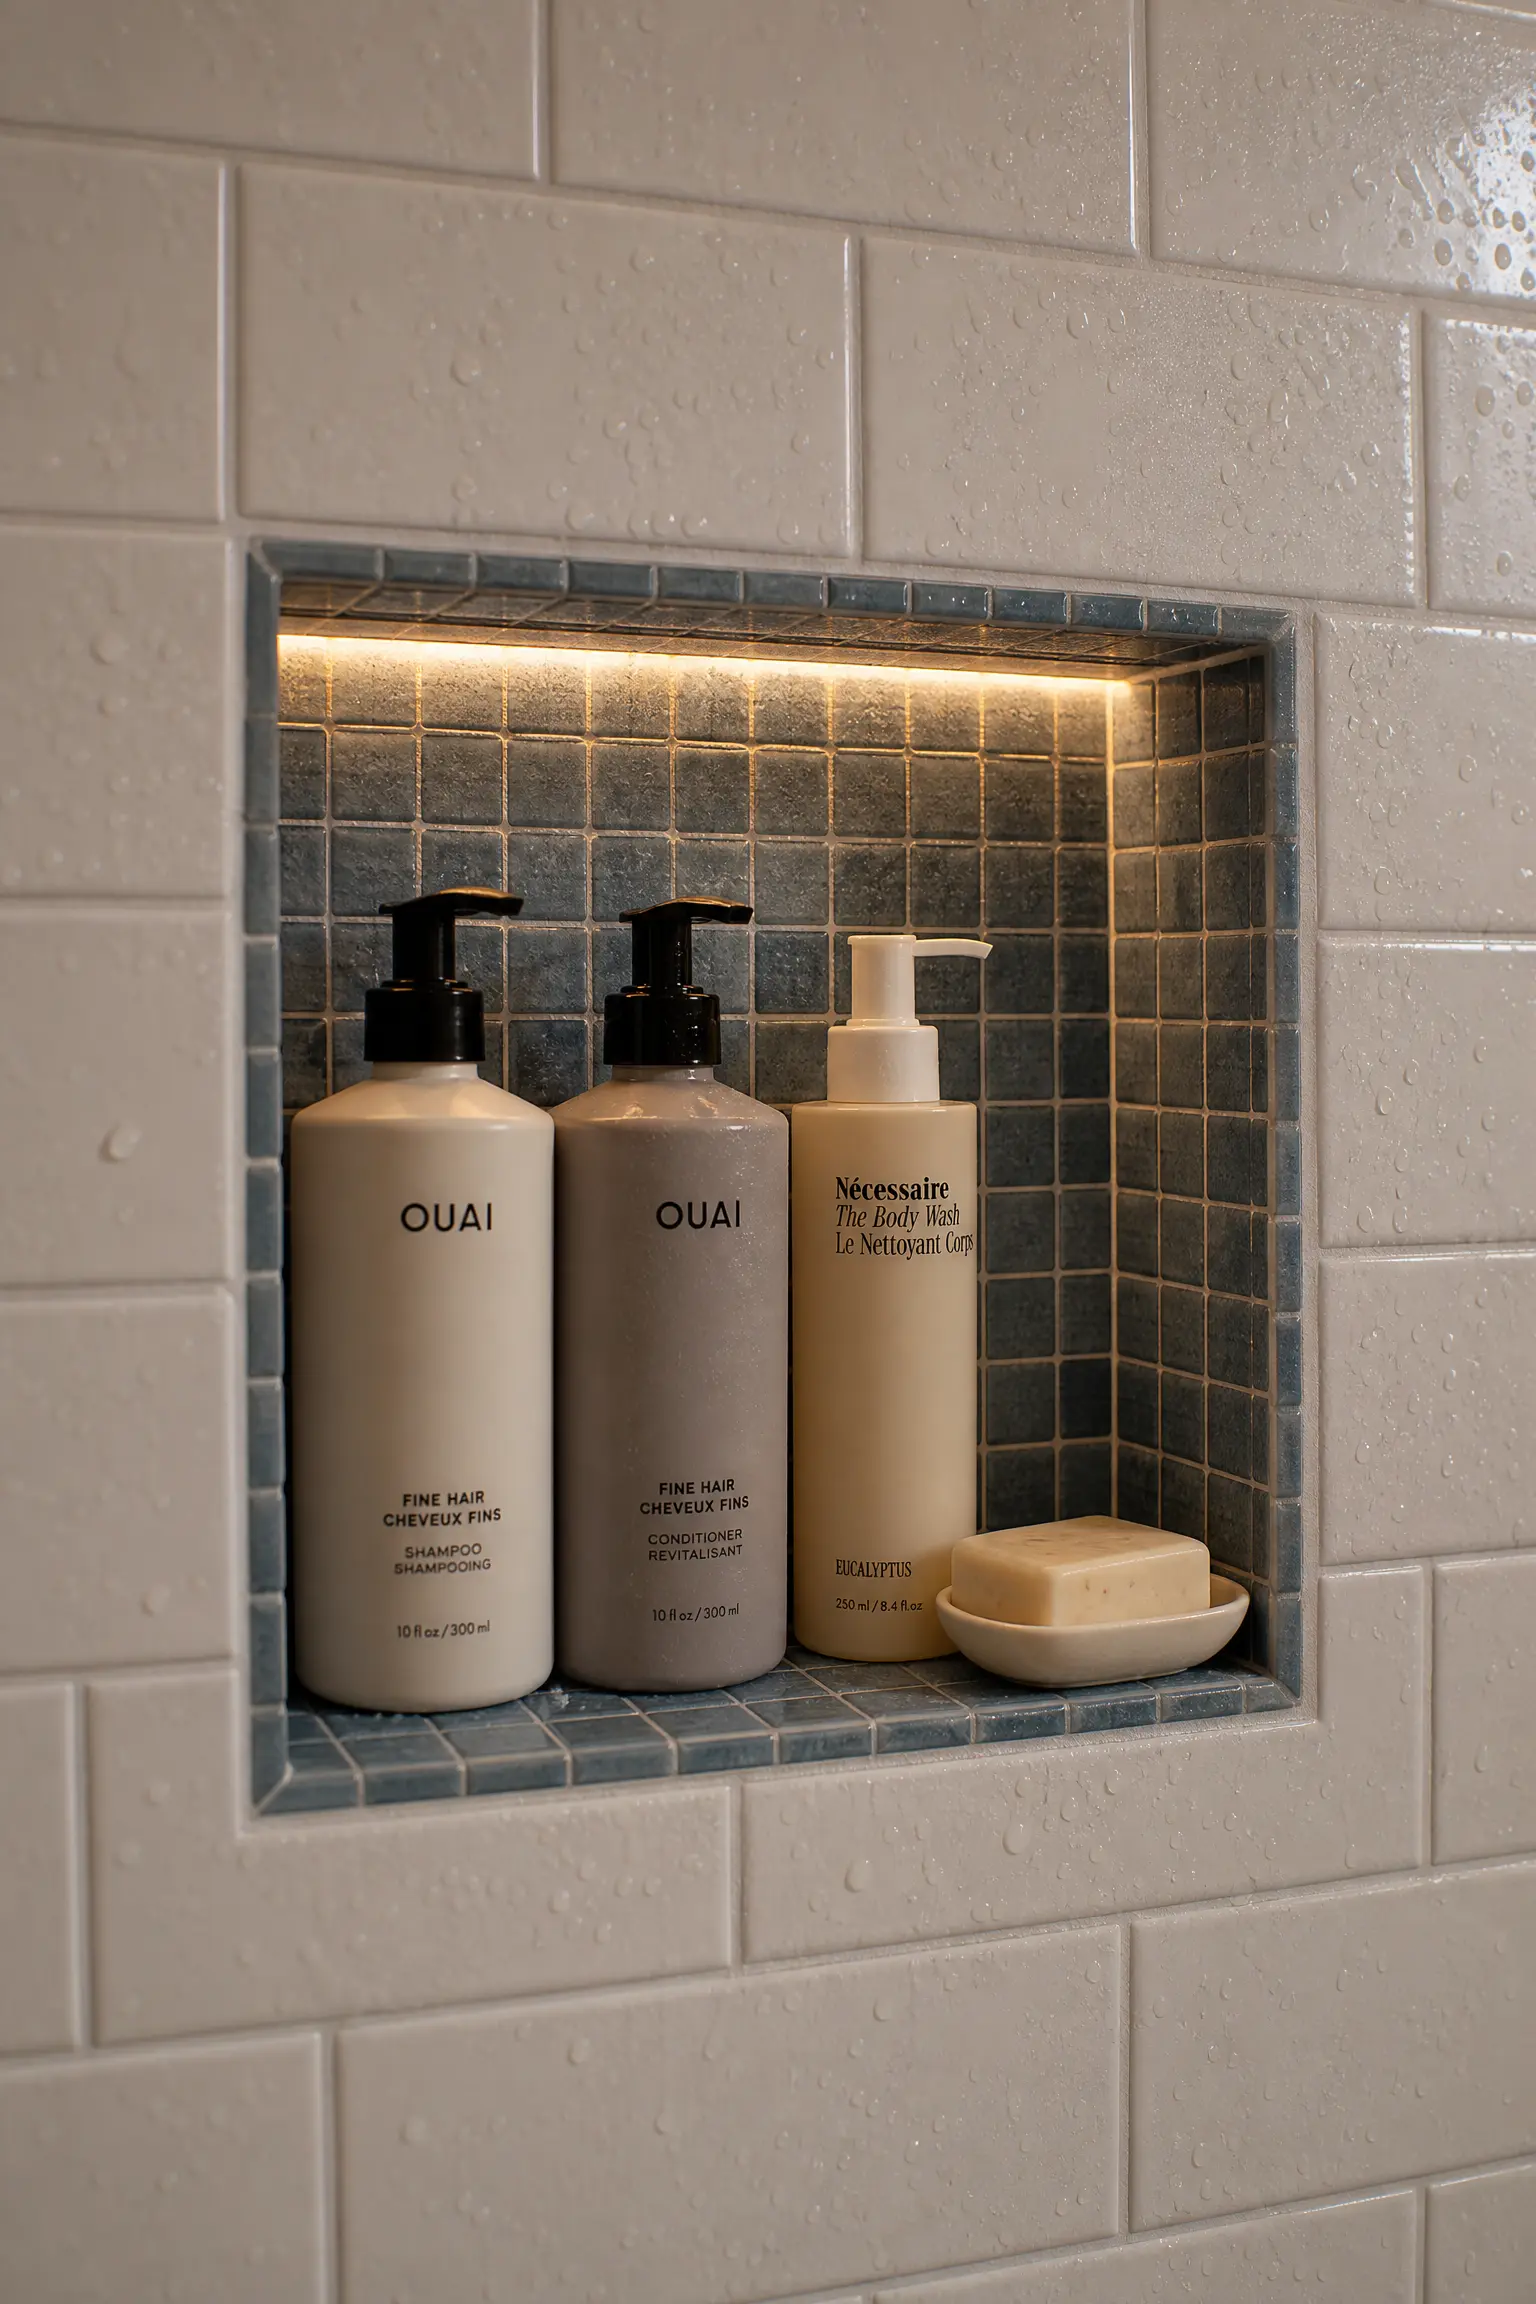
A recessed niche built into the shower wall provides dedicated storage for shampoo, conditioner, soap, and a razor without protruding into the shower space at all. The standard size is 12 inches wide by 24 inches tall by 3.5 inches deep, which fits comfortably between wall studs. Line the interior of the niche with the same tile used on the surrounding shower wall, or create a deliberate contrast with a mosaic accent tile in a coordinating color like dusty blue or warm gold. A small strip of LED tape light along the top interior edge of the niche adds a subtle glow that highlights your products and creates depth. Make sure the bottom of the niche has a slight outward pitch so water drains out rather than pooling inside, because standing water in a niche leads to mildew buildup. Material and labor costs for a properly waterproofed niche run $150 to $400 depending on tile selection, making this a practical mid-range upgrade that eliminates the need for shower caddies entirely.
13. Over-the-Door Hanging Organizer
An over-the-door organizer with clear pockets or metal hooks turns the back of your bathroom door into usable storage without requiring any wall holes or permanent modifications. This is especially valuable in rental tiny homes or builds where you want to keep walls damage-free. Choose a slim metal or canvas organizer in white, gray, or natural linen to match your bathroom color scheme, and use it to store hairbrushes, skincare products, cleaning supplies, or even a small first aid kit. The door itself can be painted in a complementary color like soft navy or forest green to make the organizer blend in visually. Because the door area tends to be dimly lit, adding a small adhesive-backed LED strip along the top of the door frame helps you find what you need quickly. At $10 to $30, this is one of the cheapest solutions on this list, but the limitation is weight capacity, as most over-the-door organizers support only 5 to 10 pounds before they start sagging or damaging the door.

14. Under-Sink Pull-Out Drawers
Installing slim pull-out drawers or sliding trays inside an existing vanity cabinet turns the awkward space around plumbing pipes into organized, accessible storage. Custom-fit drawer inserts made from water-resistant melamine or sealed birch plywood in a white or light gray finish keep the interior looking clean and protect against moisture damage. Use dividers within the drawers to separate categories like dental supplies, skincare products, and cleaning items so nothing gets jumbled together. Soft-close drawer slides in a nickel finish add a small touch of quality and prevent slamming in the middle of the night. The area above the drawers, where plumbing typically runs, can hold a small plastic bin for backup toilet paper or cleaning sponges. Pull-out drawer kits cost $30 to $100 for a DIY installation, or $200 to $500 if you have them custom-built, making this an affordable-to-mid-range upgrade that dramatically improves how your vanity functions day to day.

15. Surface-Mounted Medicine Cabinet
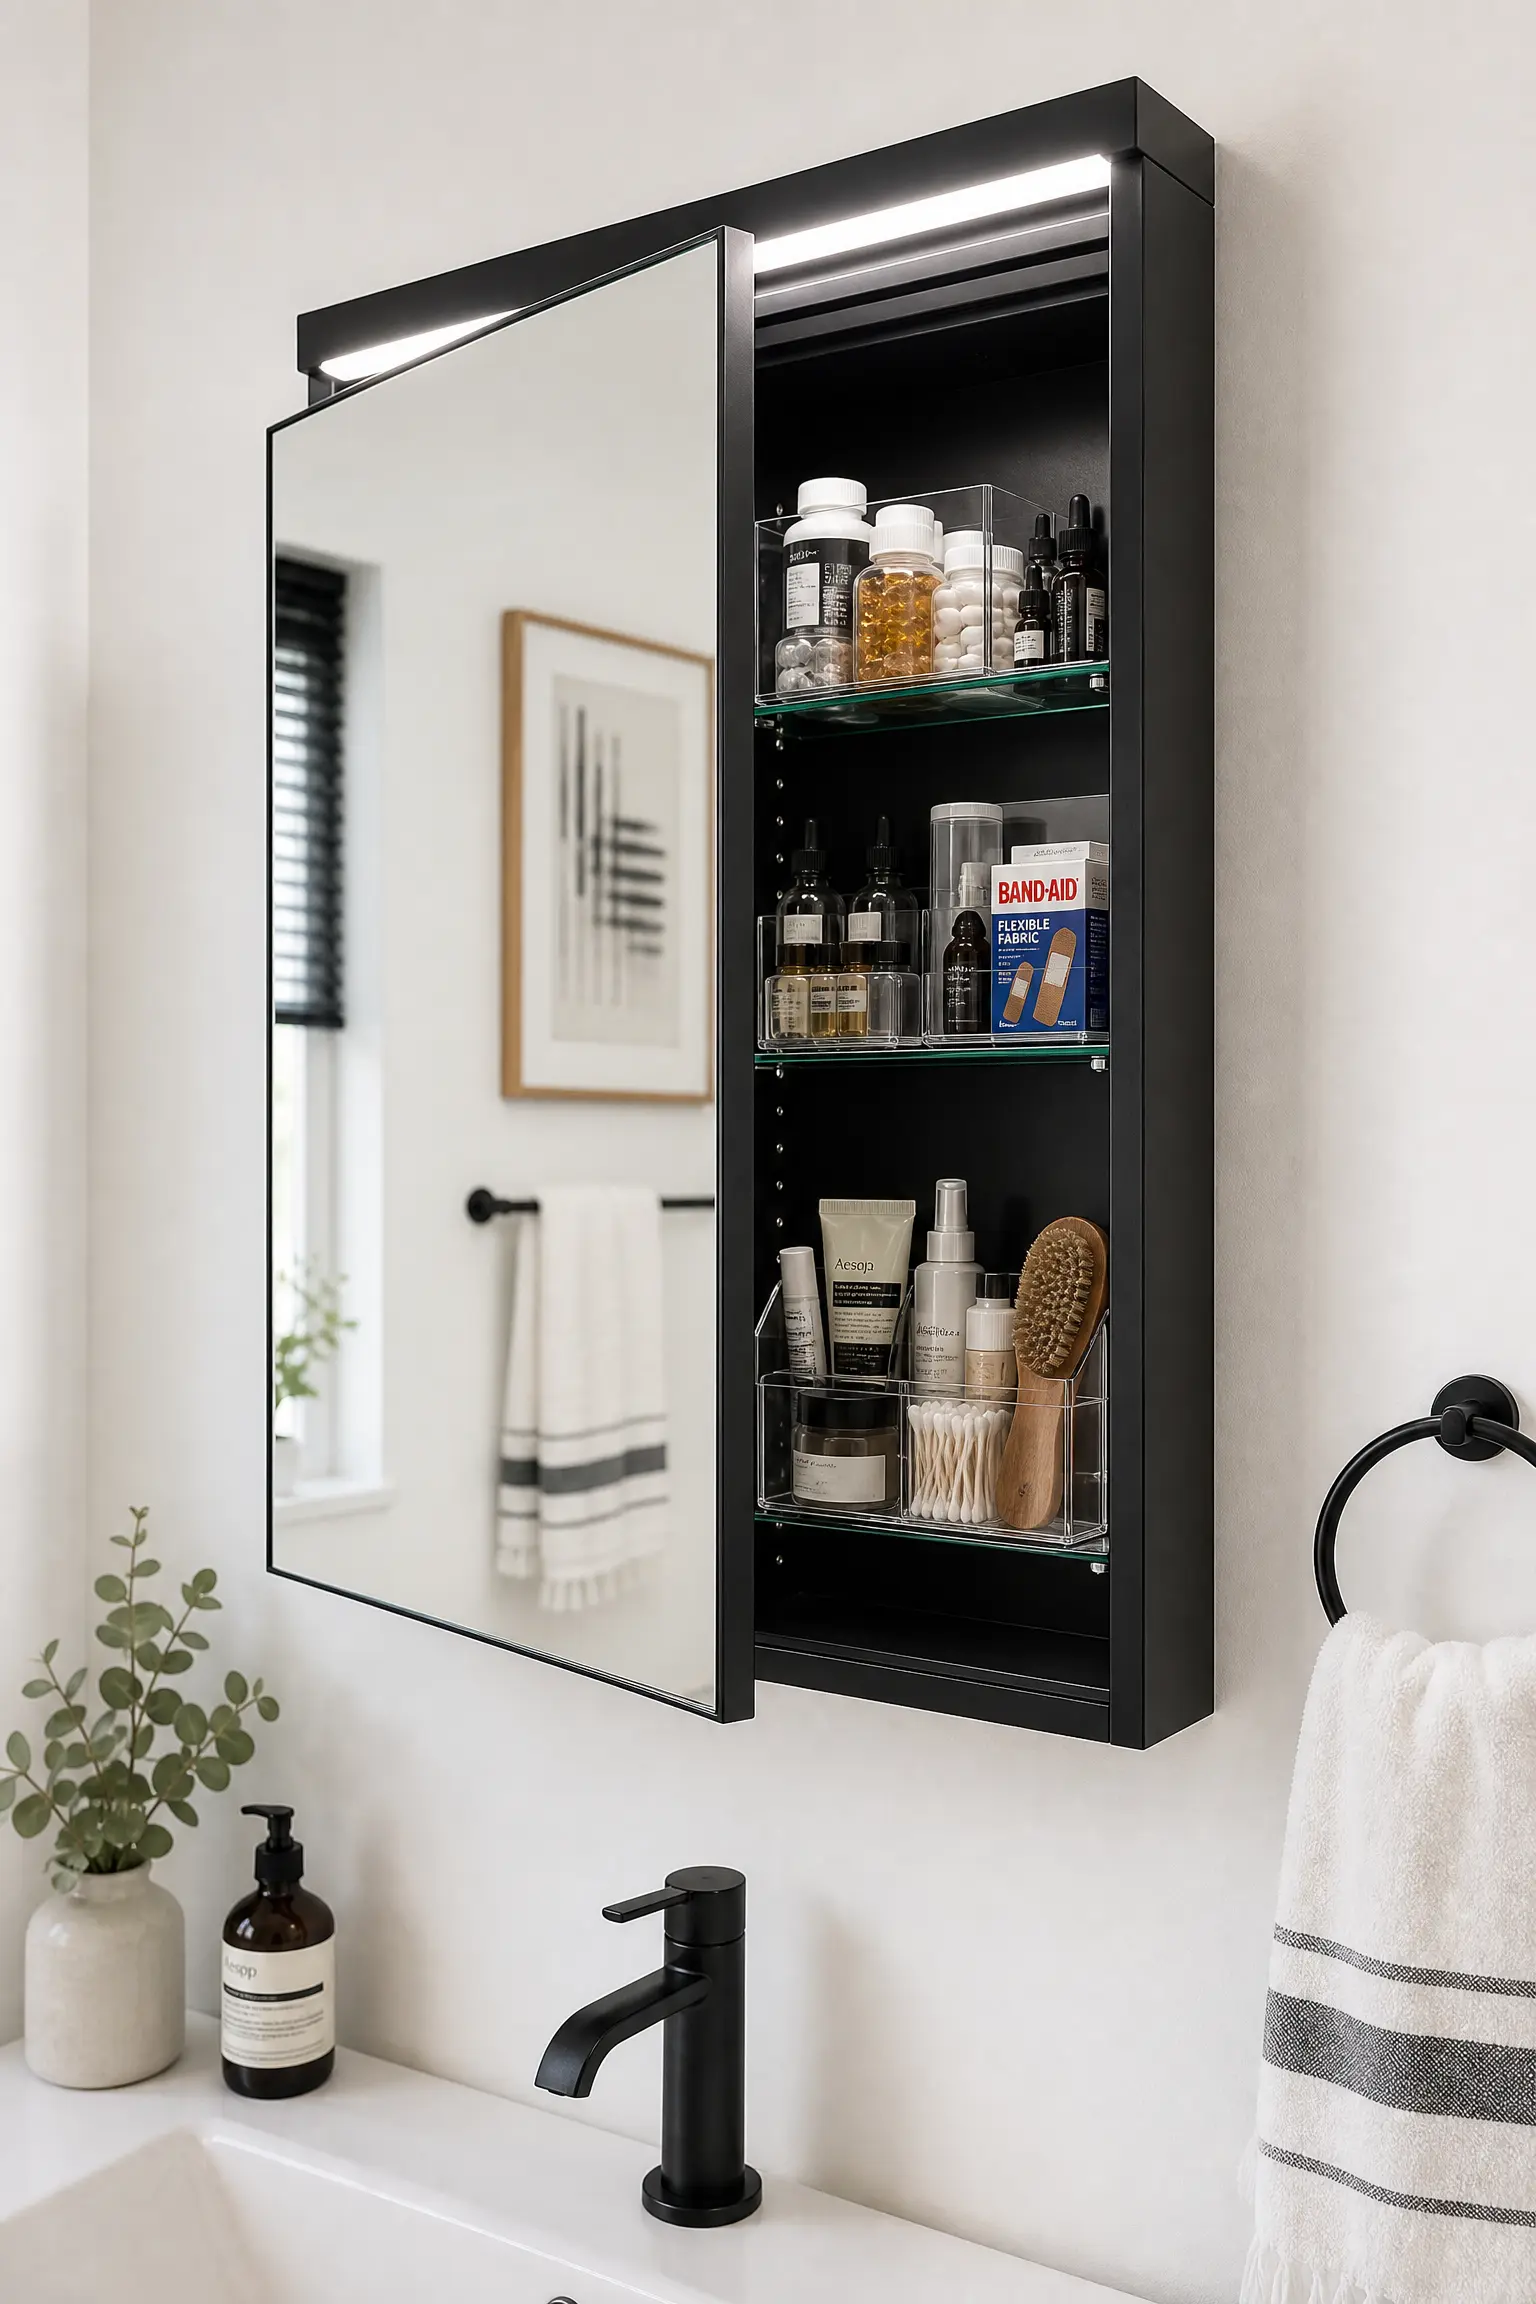
A surface-mounted medicine cabinet with a mirrored front door serves double duty as both your primary mirror and your most valuable concealed storage space. Choose a cabinet sized to match the width of your sink, typically 15 to 20 inches, with adjustable interior shelves in white or mirrored glass to maximize visibility and light reflection inside. A unit with integrated LED side lighting or a top-mounted light bar eliminates the need for a separate vanity light fixture, which simplifies the wall and reduces visual clutter. Stock the shelves with small clear acrylic organizers to keep medications, dental supplies, and grooming tools visible and sorted. The cabinet frame itself can come in matte white, brushed gold, or black aluminum to coordinate with your other bathroom hardware. Medicine cabinets range from $50 for basic models to $300 for LED-integrated units, and the only real downside is that surface-mounted models do protrude about 4 to 5 inches from the wall, which can feel tight if your bathroom is extremely narrow.
Visual Tricks That Make a Tiny Bathroom Feel Twice Its Size
You have probably walked into a hotel bathroom that was technically small but somehow felt perfectly spacious, and walked into a similarly sized bathroom at home that felt like a closet. The difference almost always comes down to visual strategy. Color, light, reflection, and material continuity can fundamentally change how your brain perceives the size of a room, and these five ideas show you exactly how to apply those principles.
16. Oversized Frameless Mirror
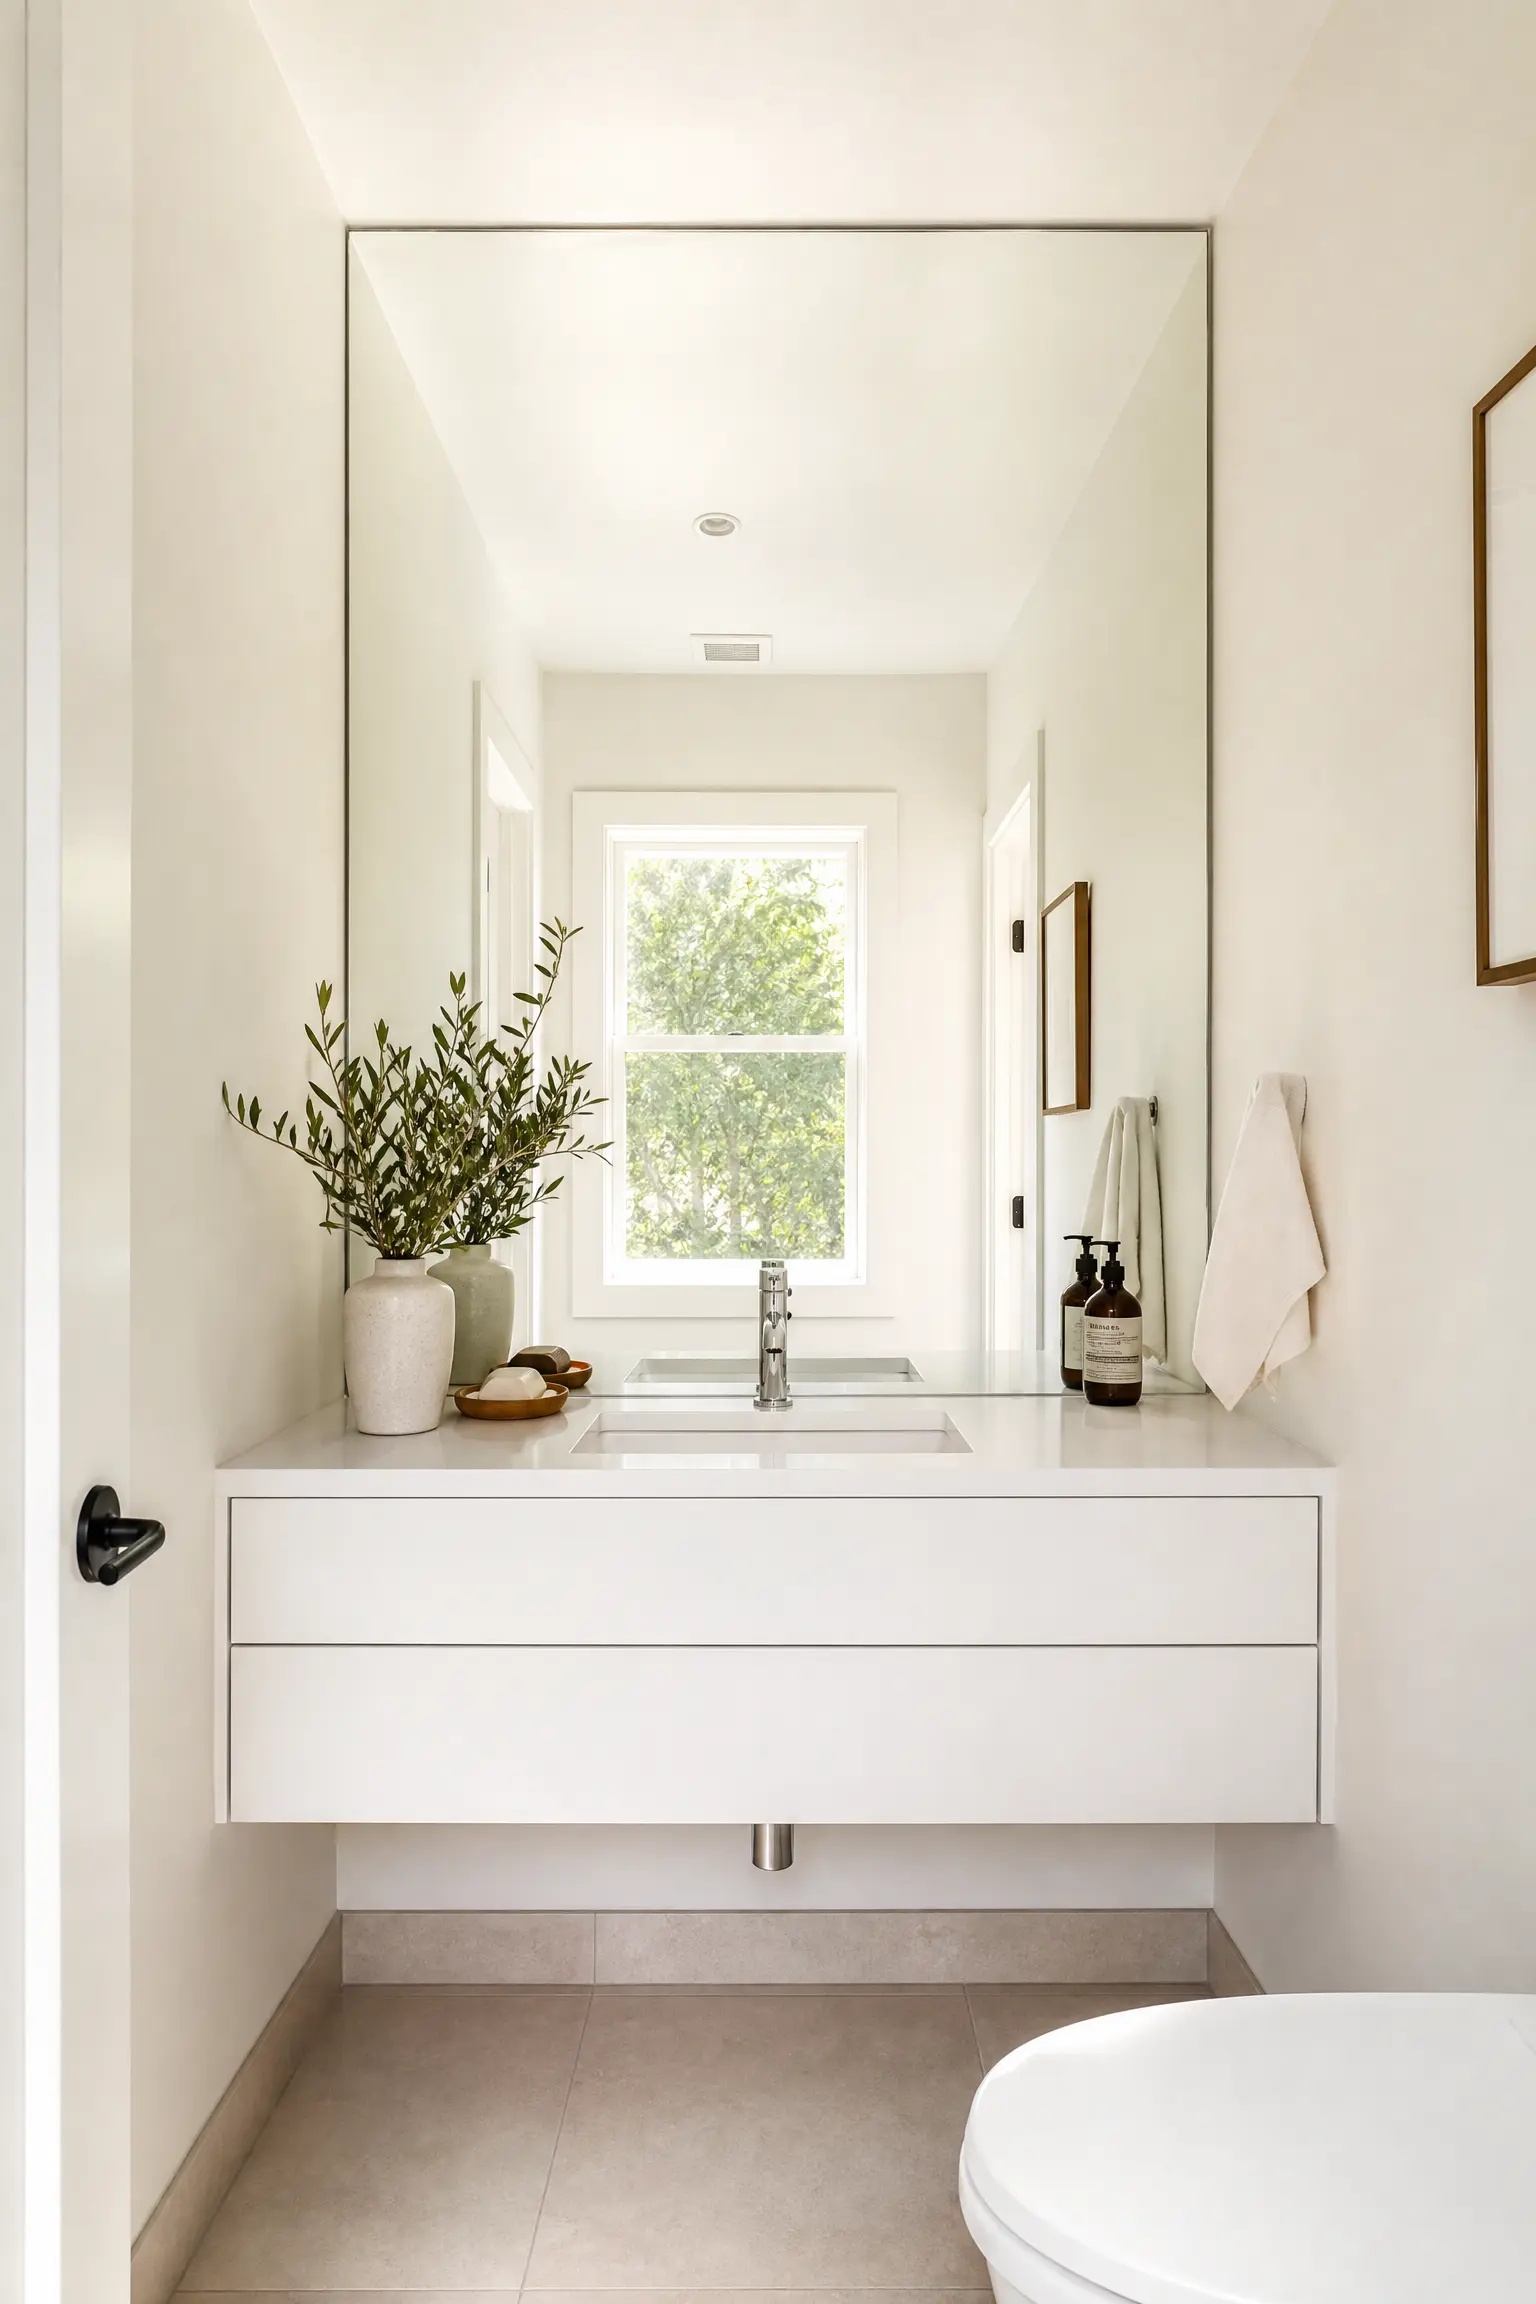
Installing a single large frameless mirror that spans the full width of your vanity wall is one of the most effective ways to visually double the perceived depth of a tiny bathroom. Position the mirror directly across from a window or your brightest light source so it bounces light into the darker corners of the room and eliminates the shadowy, closed-in feeling. A frameless edge keeps the transition between wall and mirror clean, which removes one more visual boundary that would otherwise make the space feel chopped up. If your bathroom lacks natural light, choose a mirror with a built-in LED backlight that provides a soft halo effect around the edges. Keep the wall beneath and beside the mirror in a consistent light color, like warm white or pale cream, so the reflection extends the space without interruption. Frameless mirrors in the 36 to 48-inch range typically cost $80 to $250, making this an affordable upgrade with one of the highest impact-to-cost ratios on this entire list.
17. Light Neutral Color Palette
Painting your tiny bathroom walls, ceiling, and trim in a cohesive palette of light neutrals creates a continuous visual envelope that makes boundaries fade and the room feel significantly larger. Choose one base shade, like Benjamin Moore’s Simply White or Sherwin-Williams Alabaster, and carry it across all surfaces including the ceiling, which is a detail that most people overlook but makes a real difference. Pair the paint with white or off-white porcelain fixtures and light-toned grout for the floor and wall tiles to keep the monochromatic flow unbroken. Add subtle texture through materials rather than color contrast, like a linen shower curtain, a ribbed ceramic soap dish, or a cotton waffle-weave hand towel in cream. For lighting, warm-white LED bulbs in the 2700K to 3000K range prevent the all-white palette from feeling sterile or clinical. A gallon of quality paint runs $40 to $70, making this one of the most affordable and most impactful changes you can make, though the trade-off is that an all-neutral palette can feel bland without textural variety.

18. Floor-to-Ceiling Continuous Tiling
Running the same tile from the floor all the way up to the ceiling eliminates the horizontal break line where tile meets paint, which is a visual boundary that makes walls look shorter and rooms feel smaller. Use a large-format porcelain tile in a soft white, light gray, or creamy beige in a 12-by-24-inch or larger size, and install it with thin grout lines in a matching color for maximum visual continuity. This approach works particularly well in wet baths where the entire room needs waterproofing anyway, because it kills two birds with one stone. A single recessed LED downlight or a slim linear fixture at the ceiling keeps the tiled surface looking smooth and uninterrupted from top to bottom. Fewer grout lines also mean less scrubbing during weekly cleanups, which is a practical bonus in a bathroom that gets heavy daily use. The cost for floor-to-ceiling tiling in a small bathroom runs $500 to $1,500 for materials and installation, so this is a mid-range commitment, but the result is a polished, professional look that holds up for years.

19. Frameless Glass Shower Panel
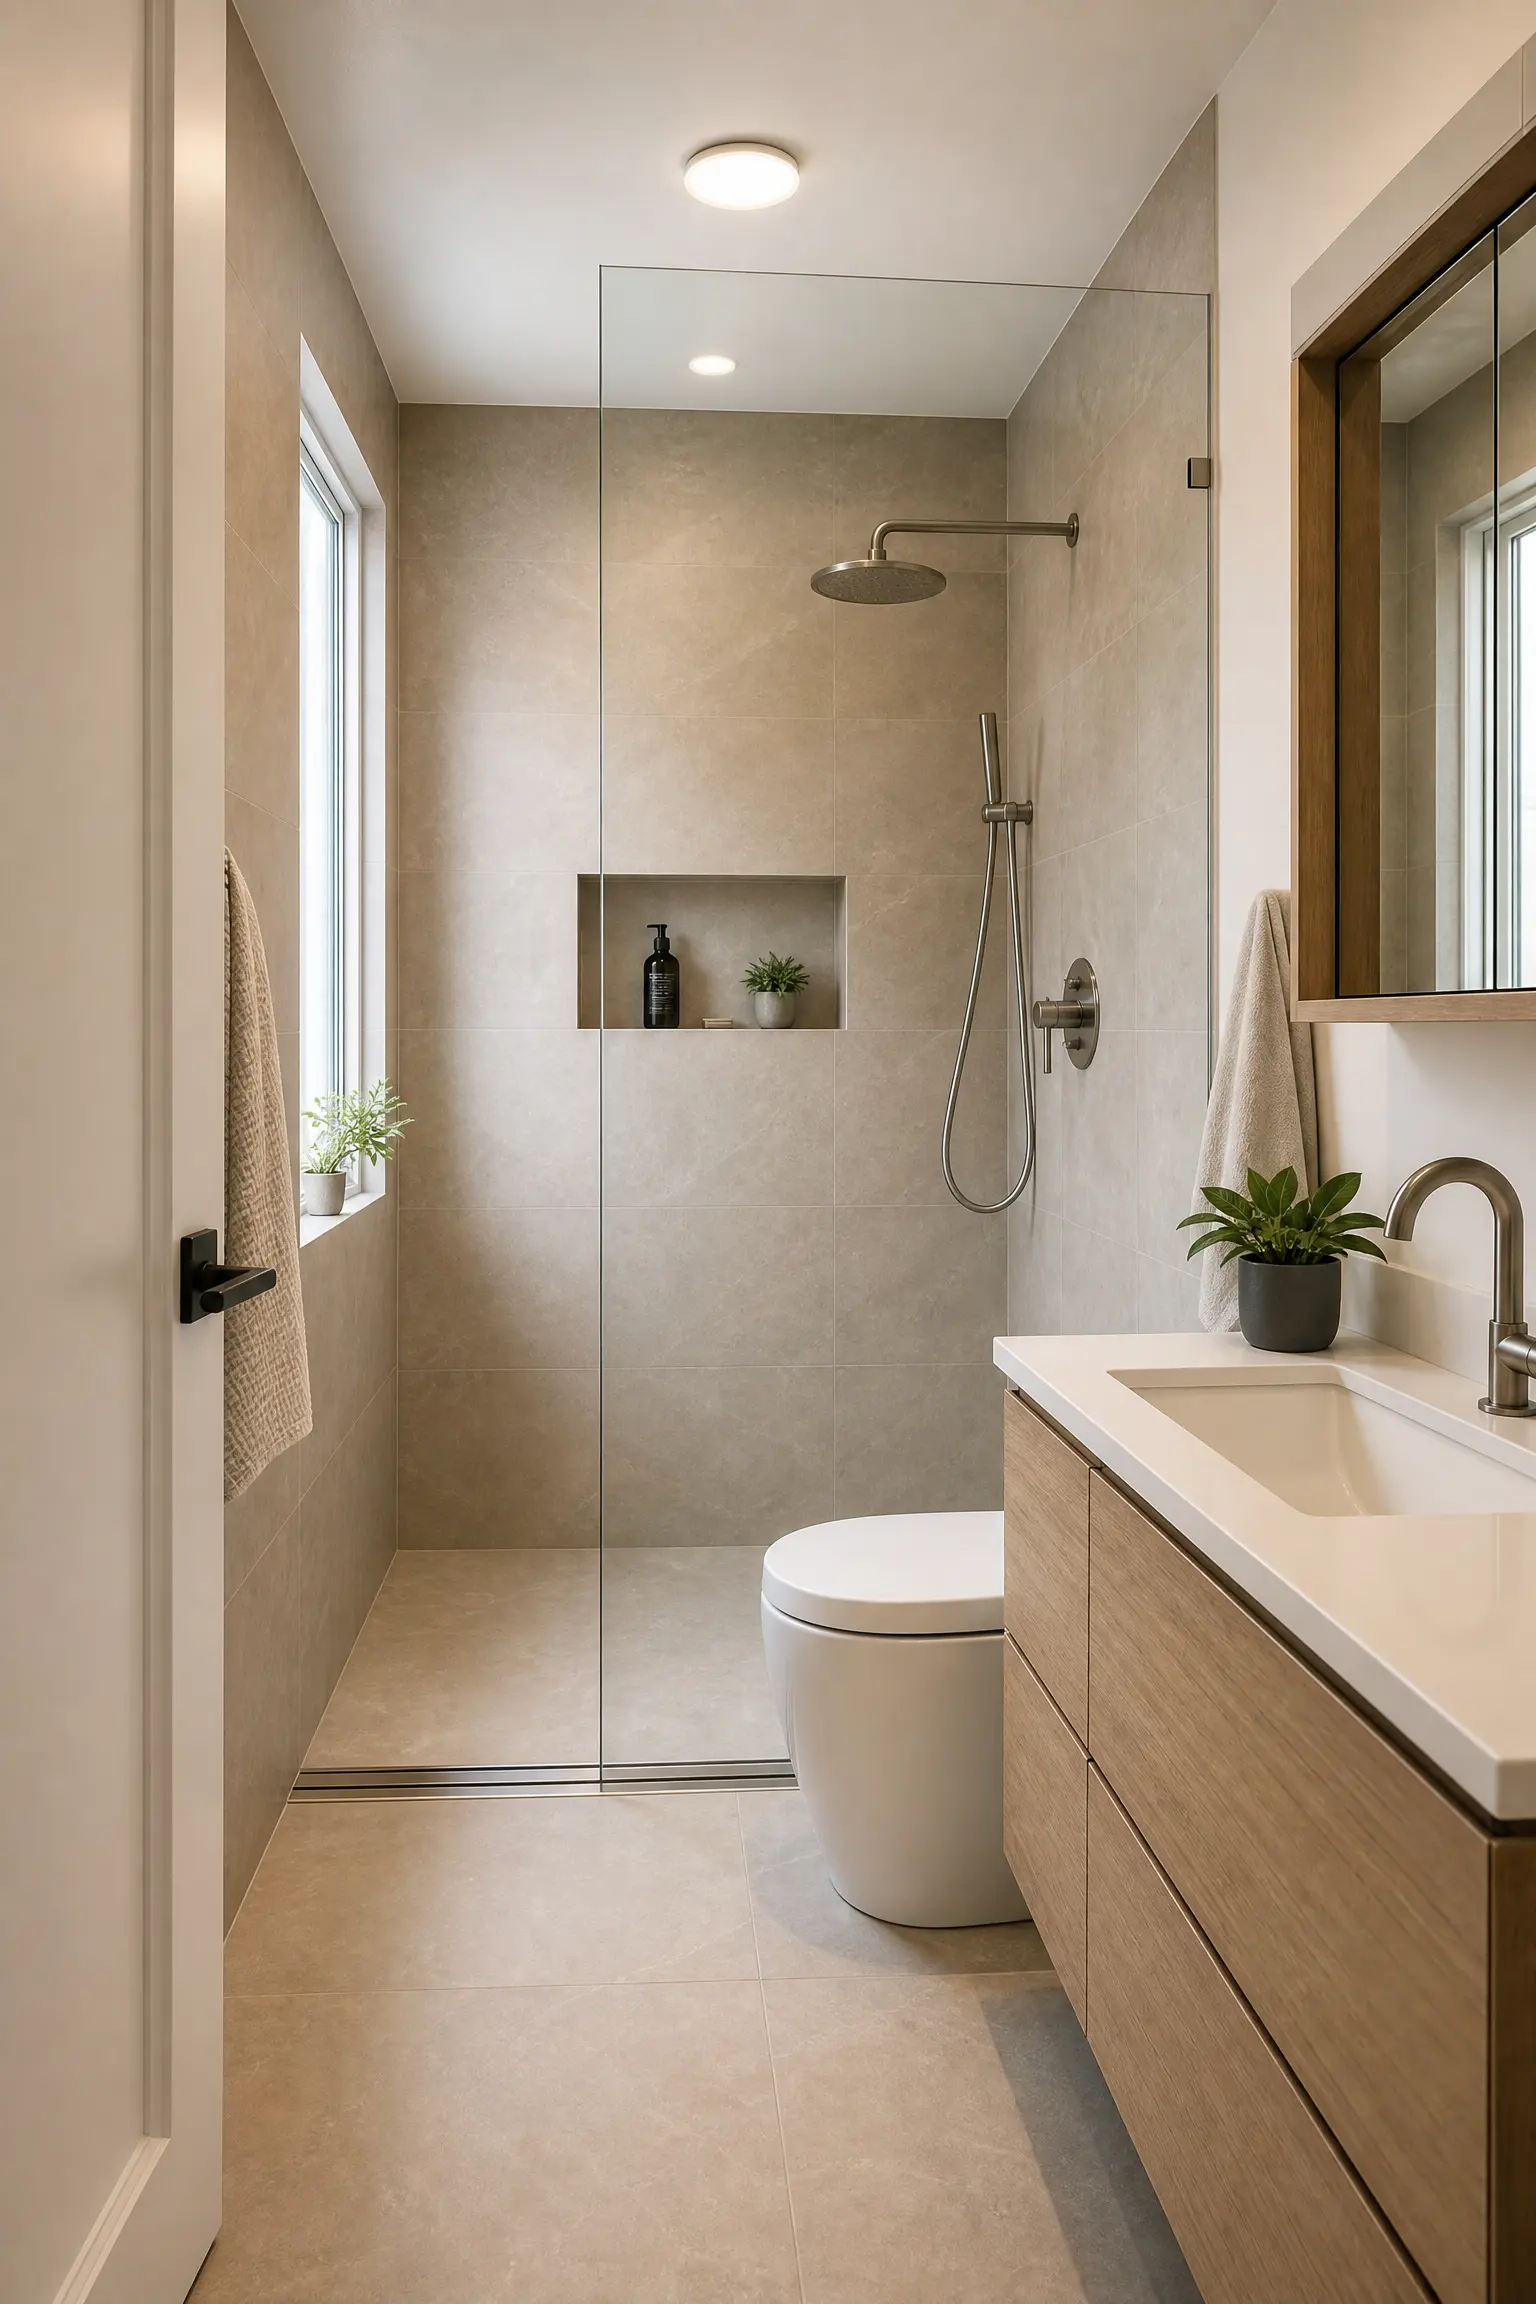
Replacing a shower curtain or frosted glass enclosure with a single frameless glass panel keeps the sightline open across the entire bathroom, making the shower area feel like part of the room rather than a separate box. A fixed panel of clear tempered glass, typically 30 to 36 inches wide and 72 inches tall, mounted with minimal stainless steel hardware provides a water barrier for the rest of the bathroom without visually dividing the space. Pair it with large-format wall tiles in a consistent color inside and outside the shower area so the glass almost disappears. A linear floor drain at the threshold of the shower, rather than a raised curb, reinforces the seamless visual flow between wet and dry zones. Warm pendant lighting or a flush-mount ceiling fixture on the non-shower side of the glass reflects beautifully through the panel and amplifies the feeling of depth. Fixed glass panels run $200 to $600 installed, which is a mid-range investment with the honest caveat that a single panel does allow more water overspray compared to a fully enclosed stall, so your ventilation and floor drainage need to be on point.
20. Layered Lighting Design
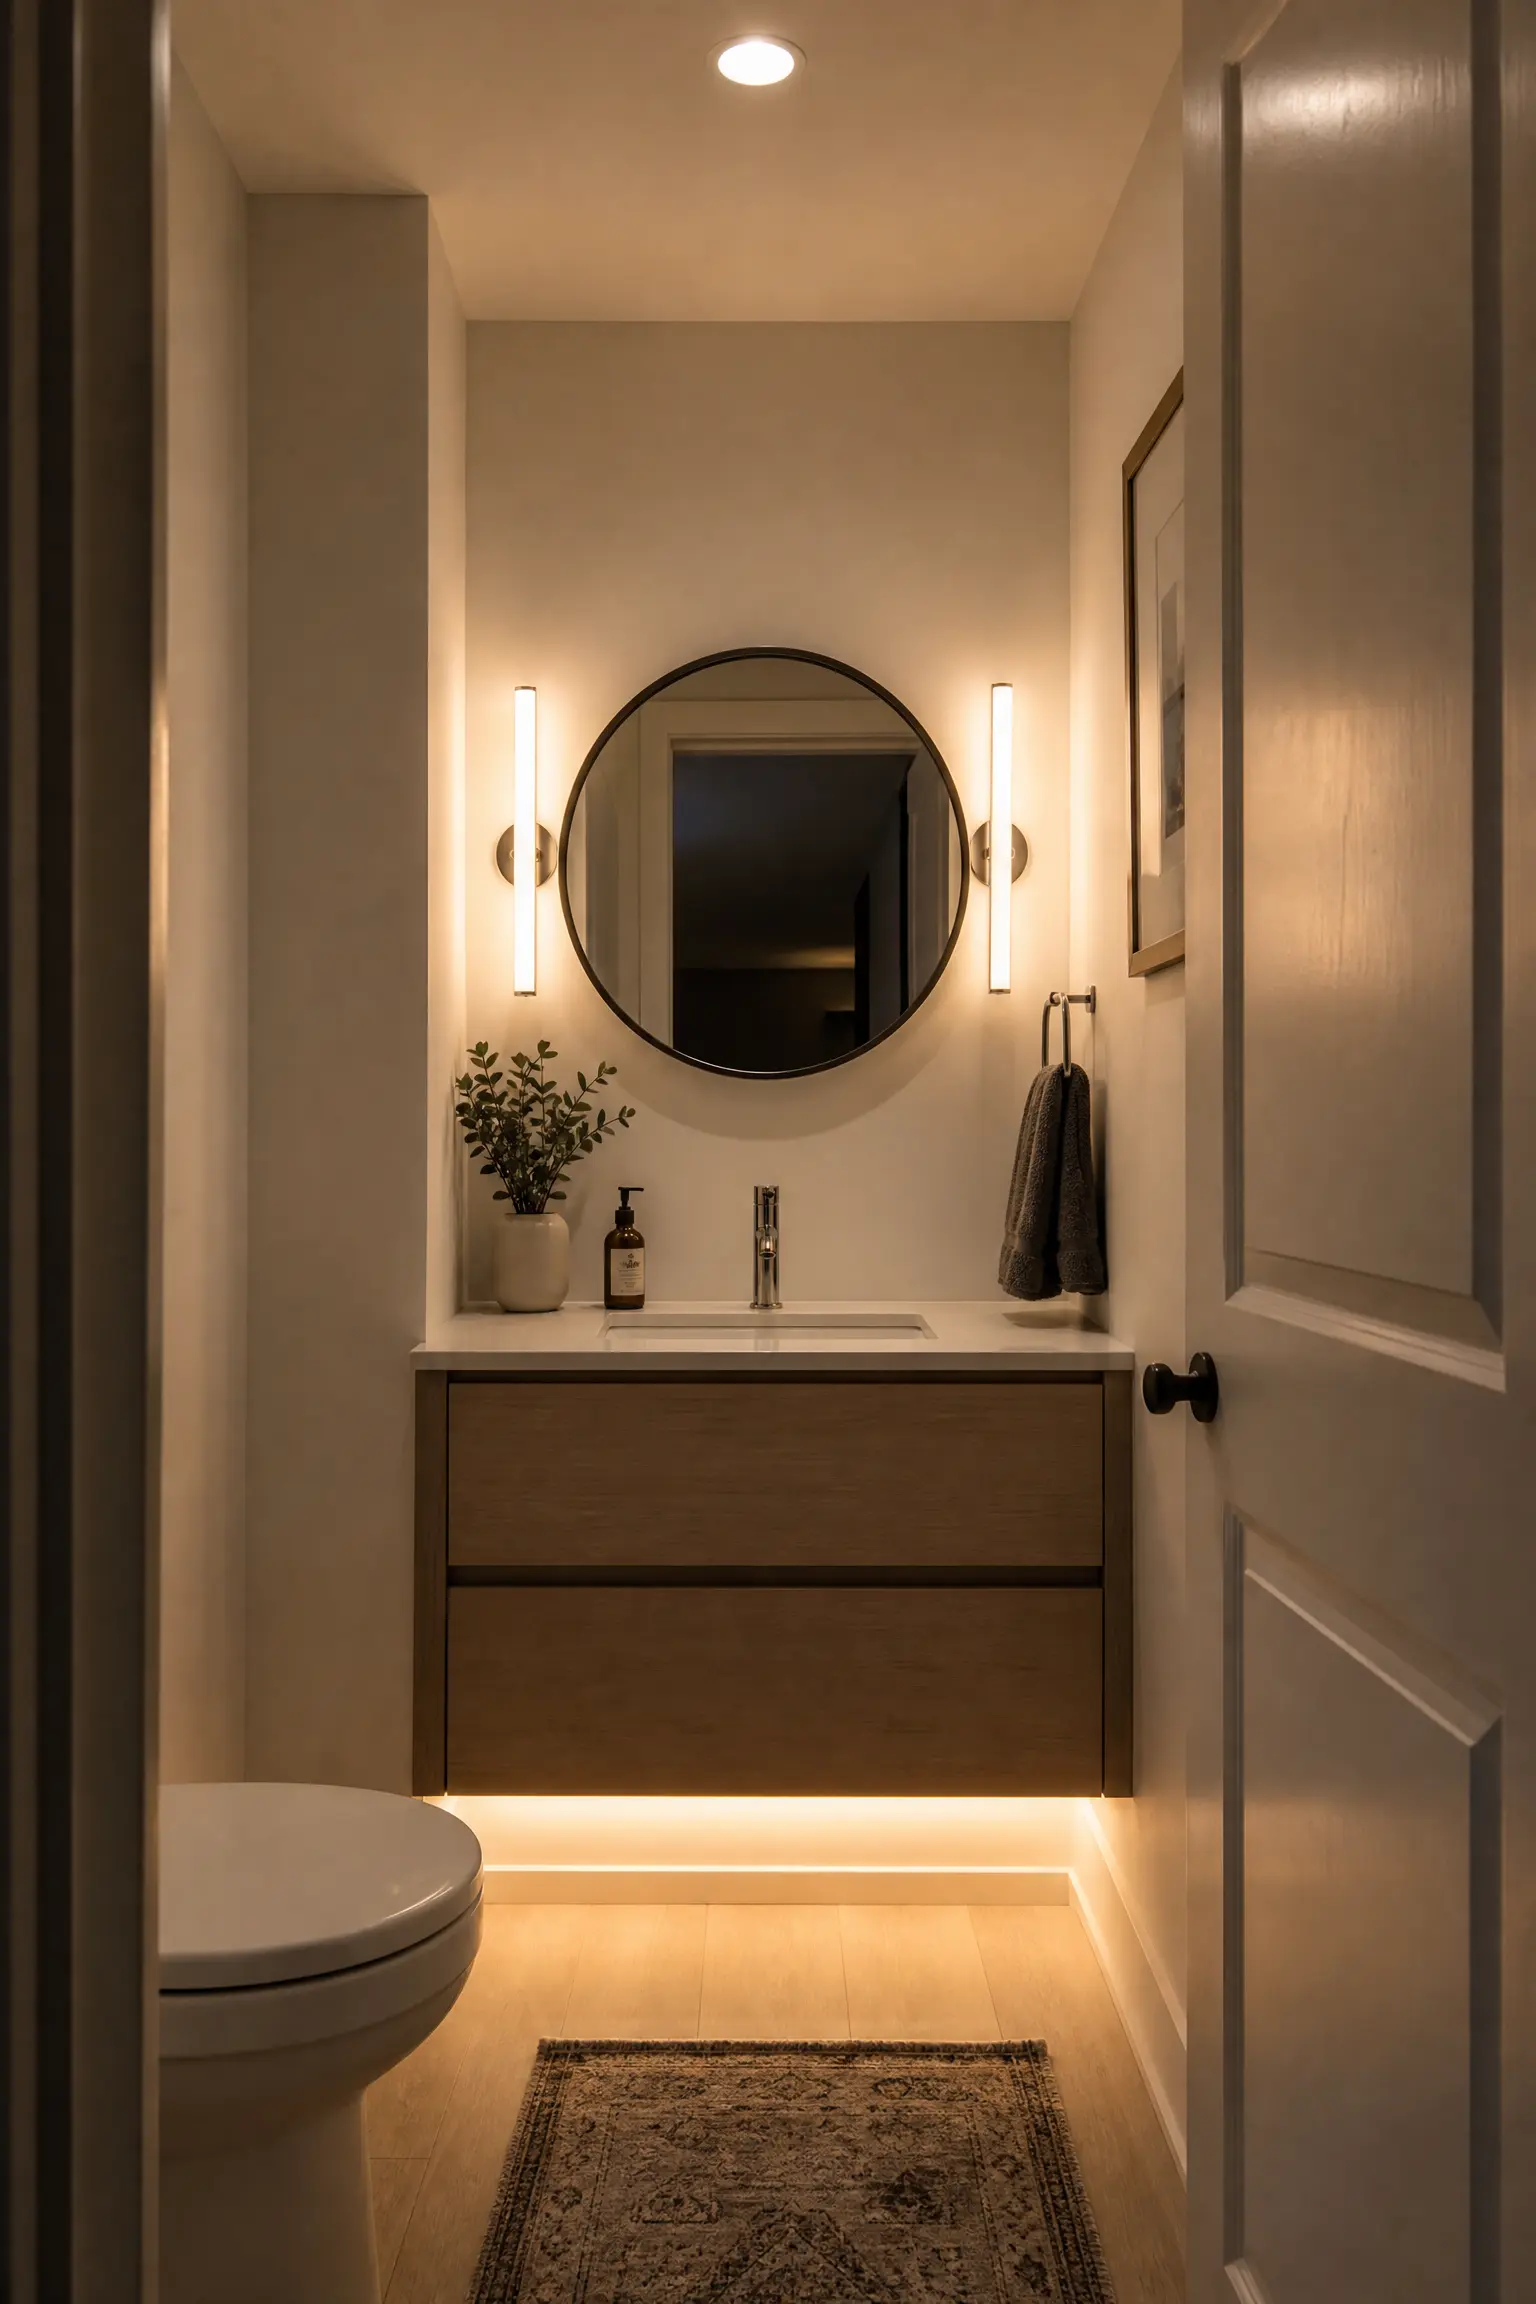
Using multiple light sources at different heights creates depth and dimension in a tiny bathroom, replacing the flat, unflattering effect of a single overhead fixture. Start with a flush-mount or recessed ceiling light for general illumination, then add vertical LED sconces flanking the mirror for even, shadow-free task lighting at face level. A small strip of warm LED tape tucked under the vanity or along the toe kick creates a floating glow that lifts the furniture visually and adds a third layer of ambient light near the floor. If you have a shower niche, a waterproof LED strip along its top edge adds yet another point of interest. Each layer can be controlled independently with dimmer switches, which lets you adjust the mood from bright morning routines to soft evening wind-downs. The full layered lighting setup costs $100 to $400 depending on the fixtures and whether you need an electrician, making this an affordable-to-mid-range project, though the limitation in tiny homes is that running multiple electrical circuits in a small wall cavity can be tricky if the framing is not pre-planned for it.
Bold Design Moves That Add Real Personality
There is a common misconception that tiny bathrooms need to be plain, neutral, and devoid of personality just because they are small. But the opposite is actually true. A small bathroom is one of the best rooms in a home to take a design risk, precisely because the space is compact enough that bold choices feel intentional and contained rather than overwhelming.
21. Bold Patterned Wallpaper Accent Wall
Applying a bold peel-and-stick vinyl wallpaper to one accent wall, typically the wall behind the toilet or the wall you see when you open the door, adds instant personality without shrinking the visual space. Choose a large-scale botanical print, a graphic geometric pattern, or a dramatic dark floral on a deep navy, emerald, or charcoal background. Keep the remaining three walls in a solid light color like white or pale gray to let the accent wall be the clear focal point. Pair the wallpaper with simple, understated fixtures in matte black or brushed brass so the hardware complements without competing. A small frameless mirror on the accent wall and a slim glass shelf below it create function without covering too much of the pattern. Peel-and-stick vinyl wallpaper rated for humidity costs $25 to $60 per roll and is easy to remove if you want to change it later, but keep in mind that it should not be installed inside the shower area or anywhere that gets direct, sustained water contact. Always run your bathroom exhaust fan during and after showers to protect the adhesive bond.
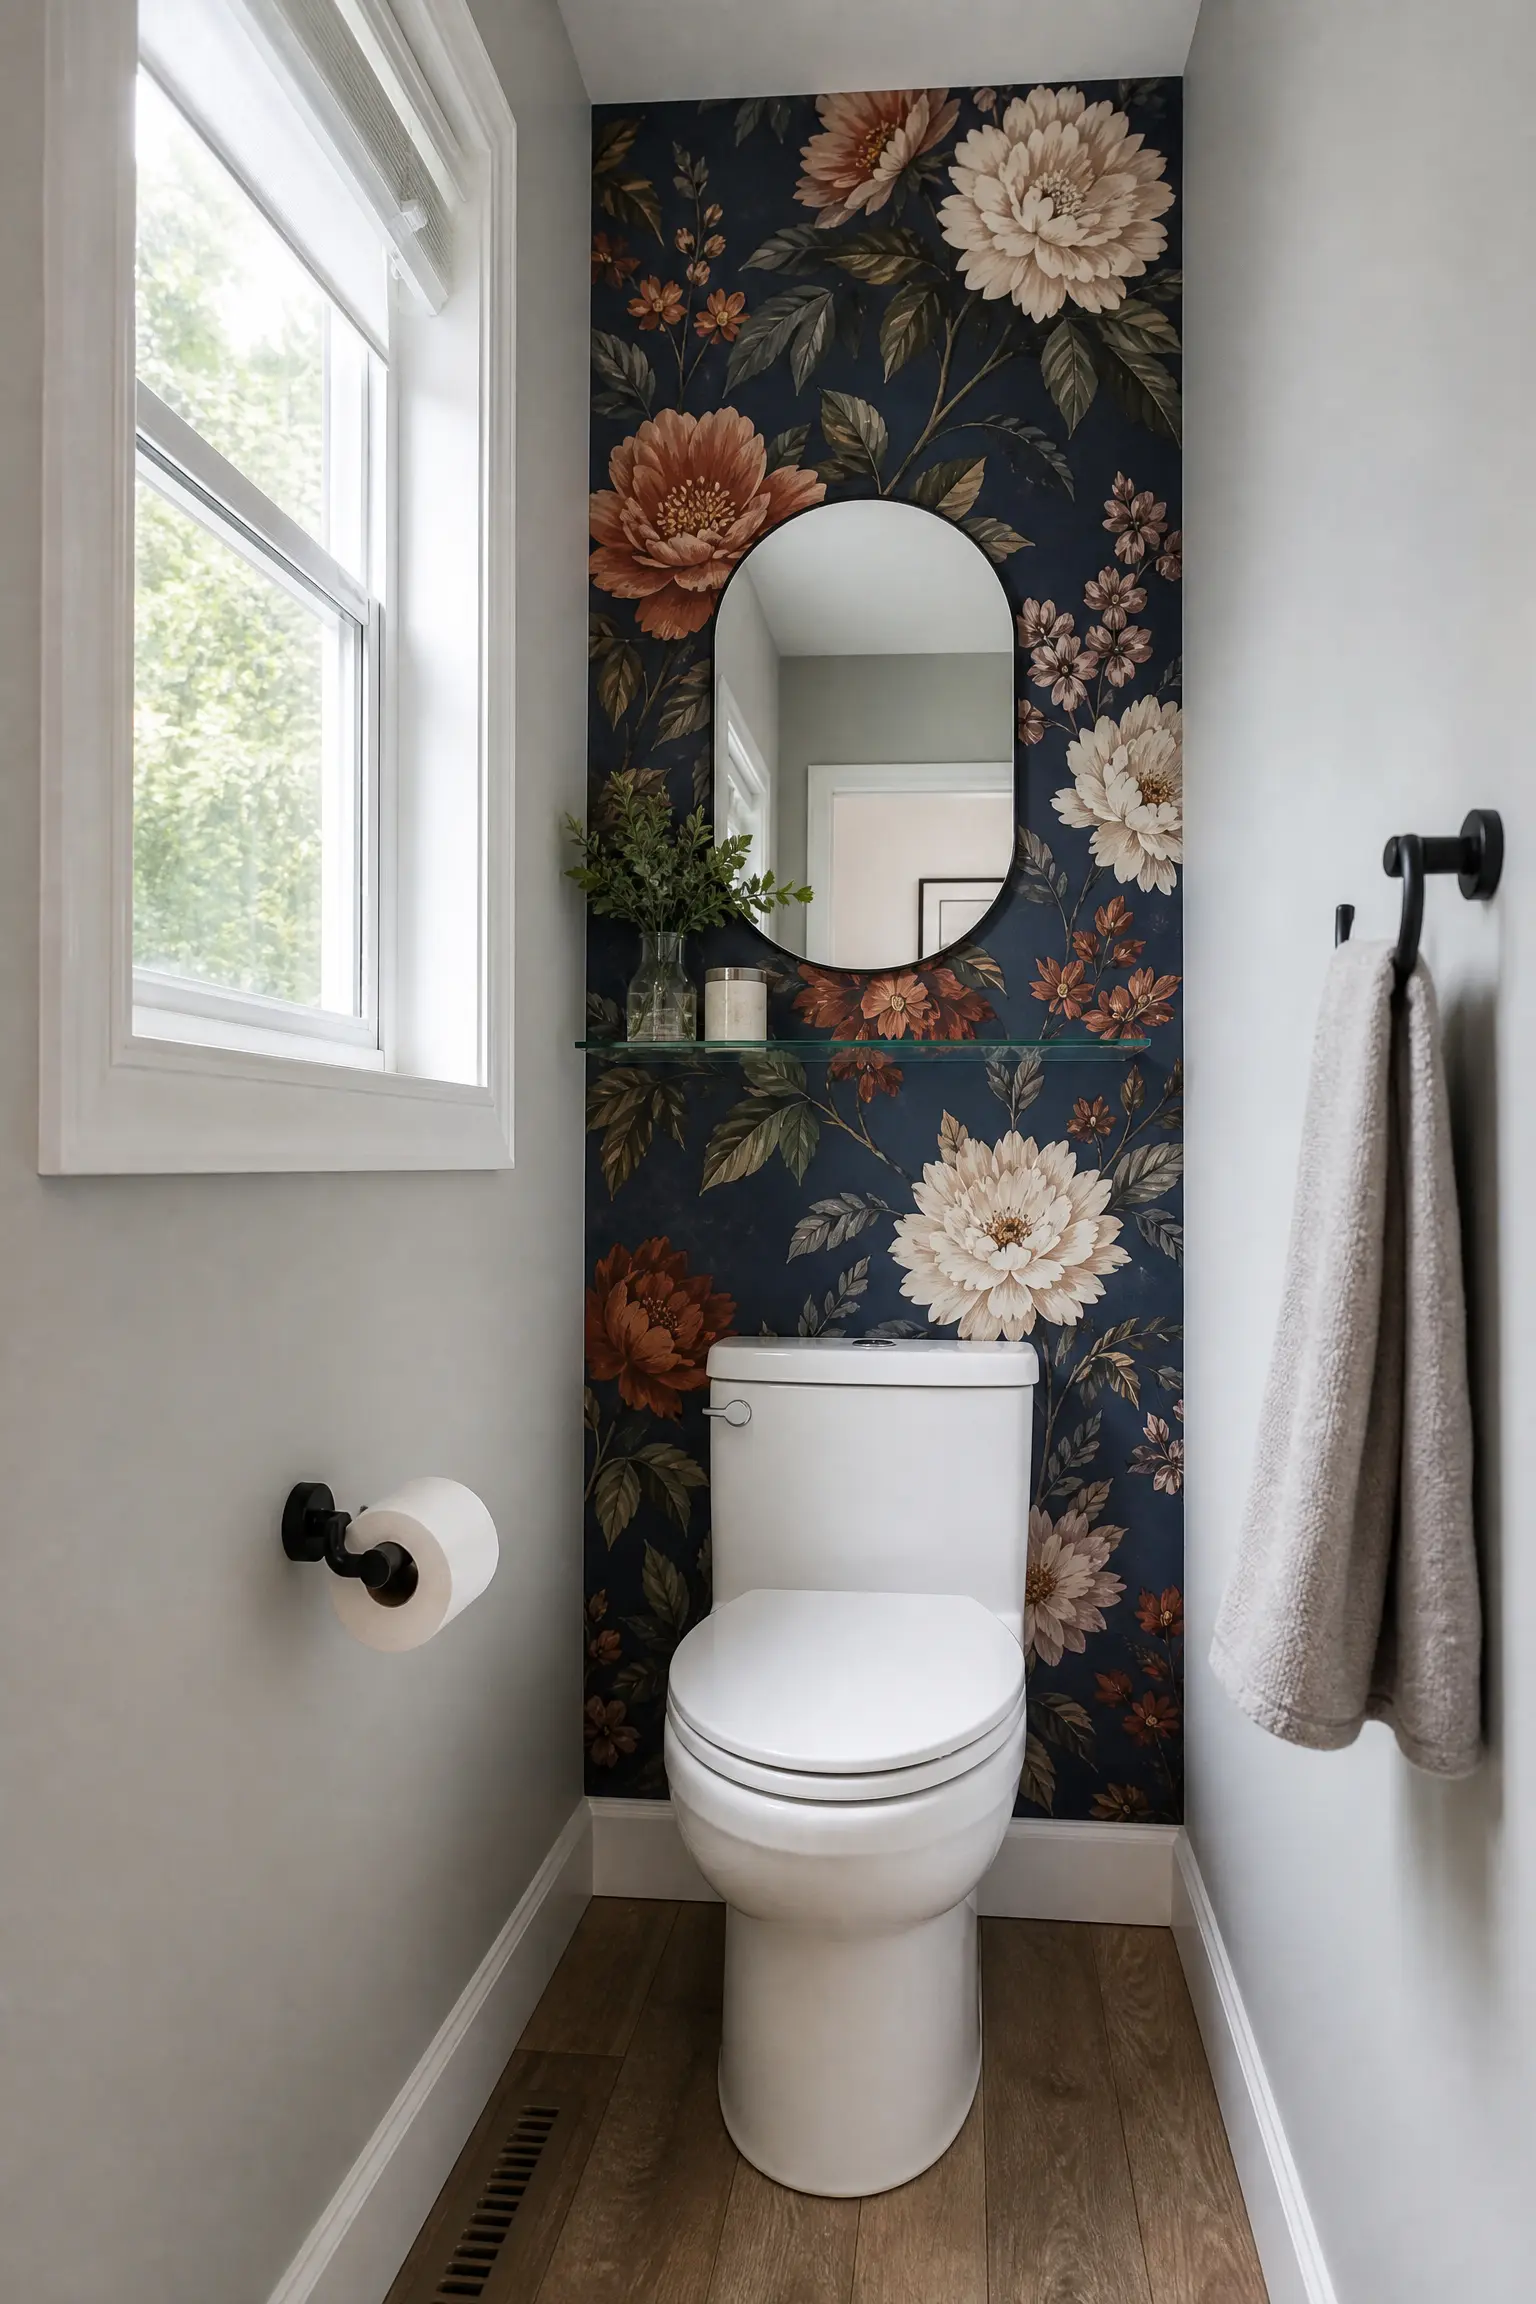
22. Patterned Cement Floor Tiles
Black-and-white patterned cement tiles, or porcelain tiles that replicate the cement look, give a tiny bathroom floor a striking visual anchor that draws the eye downward and adds architectural interest. Classic patterns like encaustic stars, Moroccan quatrefoils, or simple checkerboards in matte black and white create a strong graphic statement underfoot. Balance the busy floor by keeping the walls plain and light, using white subway tile or flat white paint so the pattern does not compete for attention. Chrome or polished nickel fixtures and a frameless mirror overhead keep the upper half of the room clean and reflective. A single pendant light or flush-mount fixture with a clear glass shade lets you see the floor pattern without casting distracting shadows. Porcelain replicas of cement tiles cost $4 to $10 per square foot, making this an affordable choice, while authentic cement tiles run $10 to $25 per square foot and require periodic sealing, which adds to the long-term maintenance commitment.
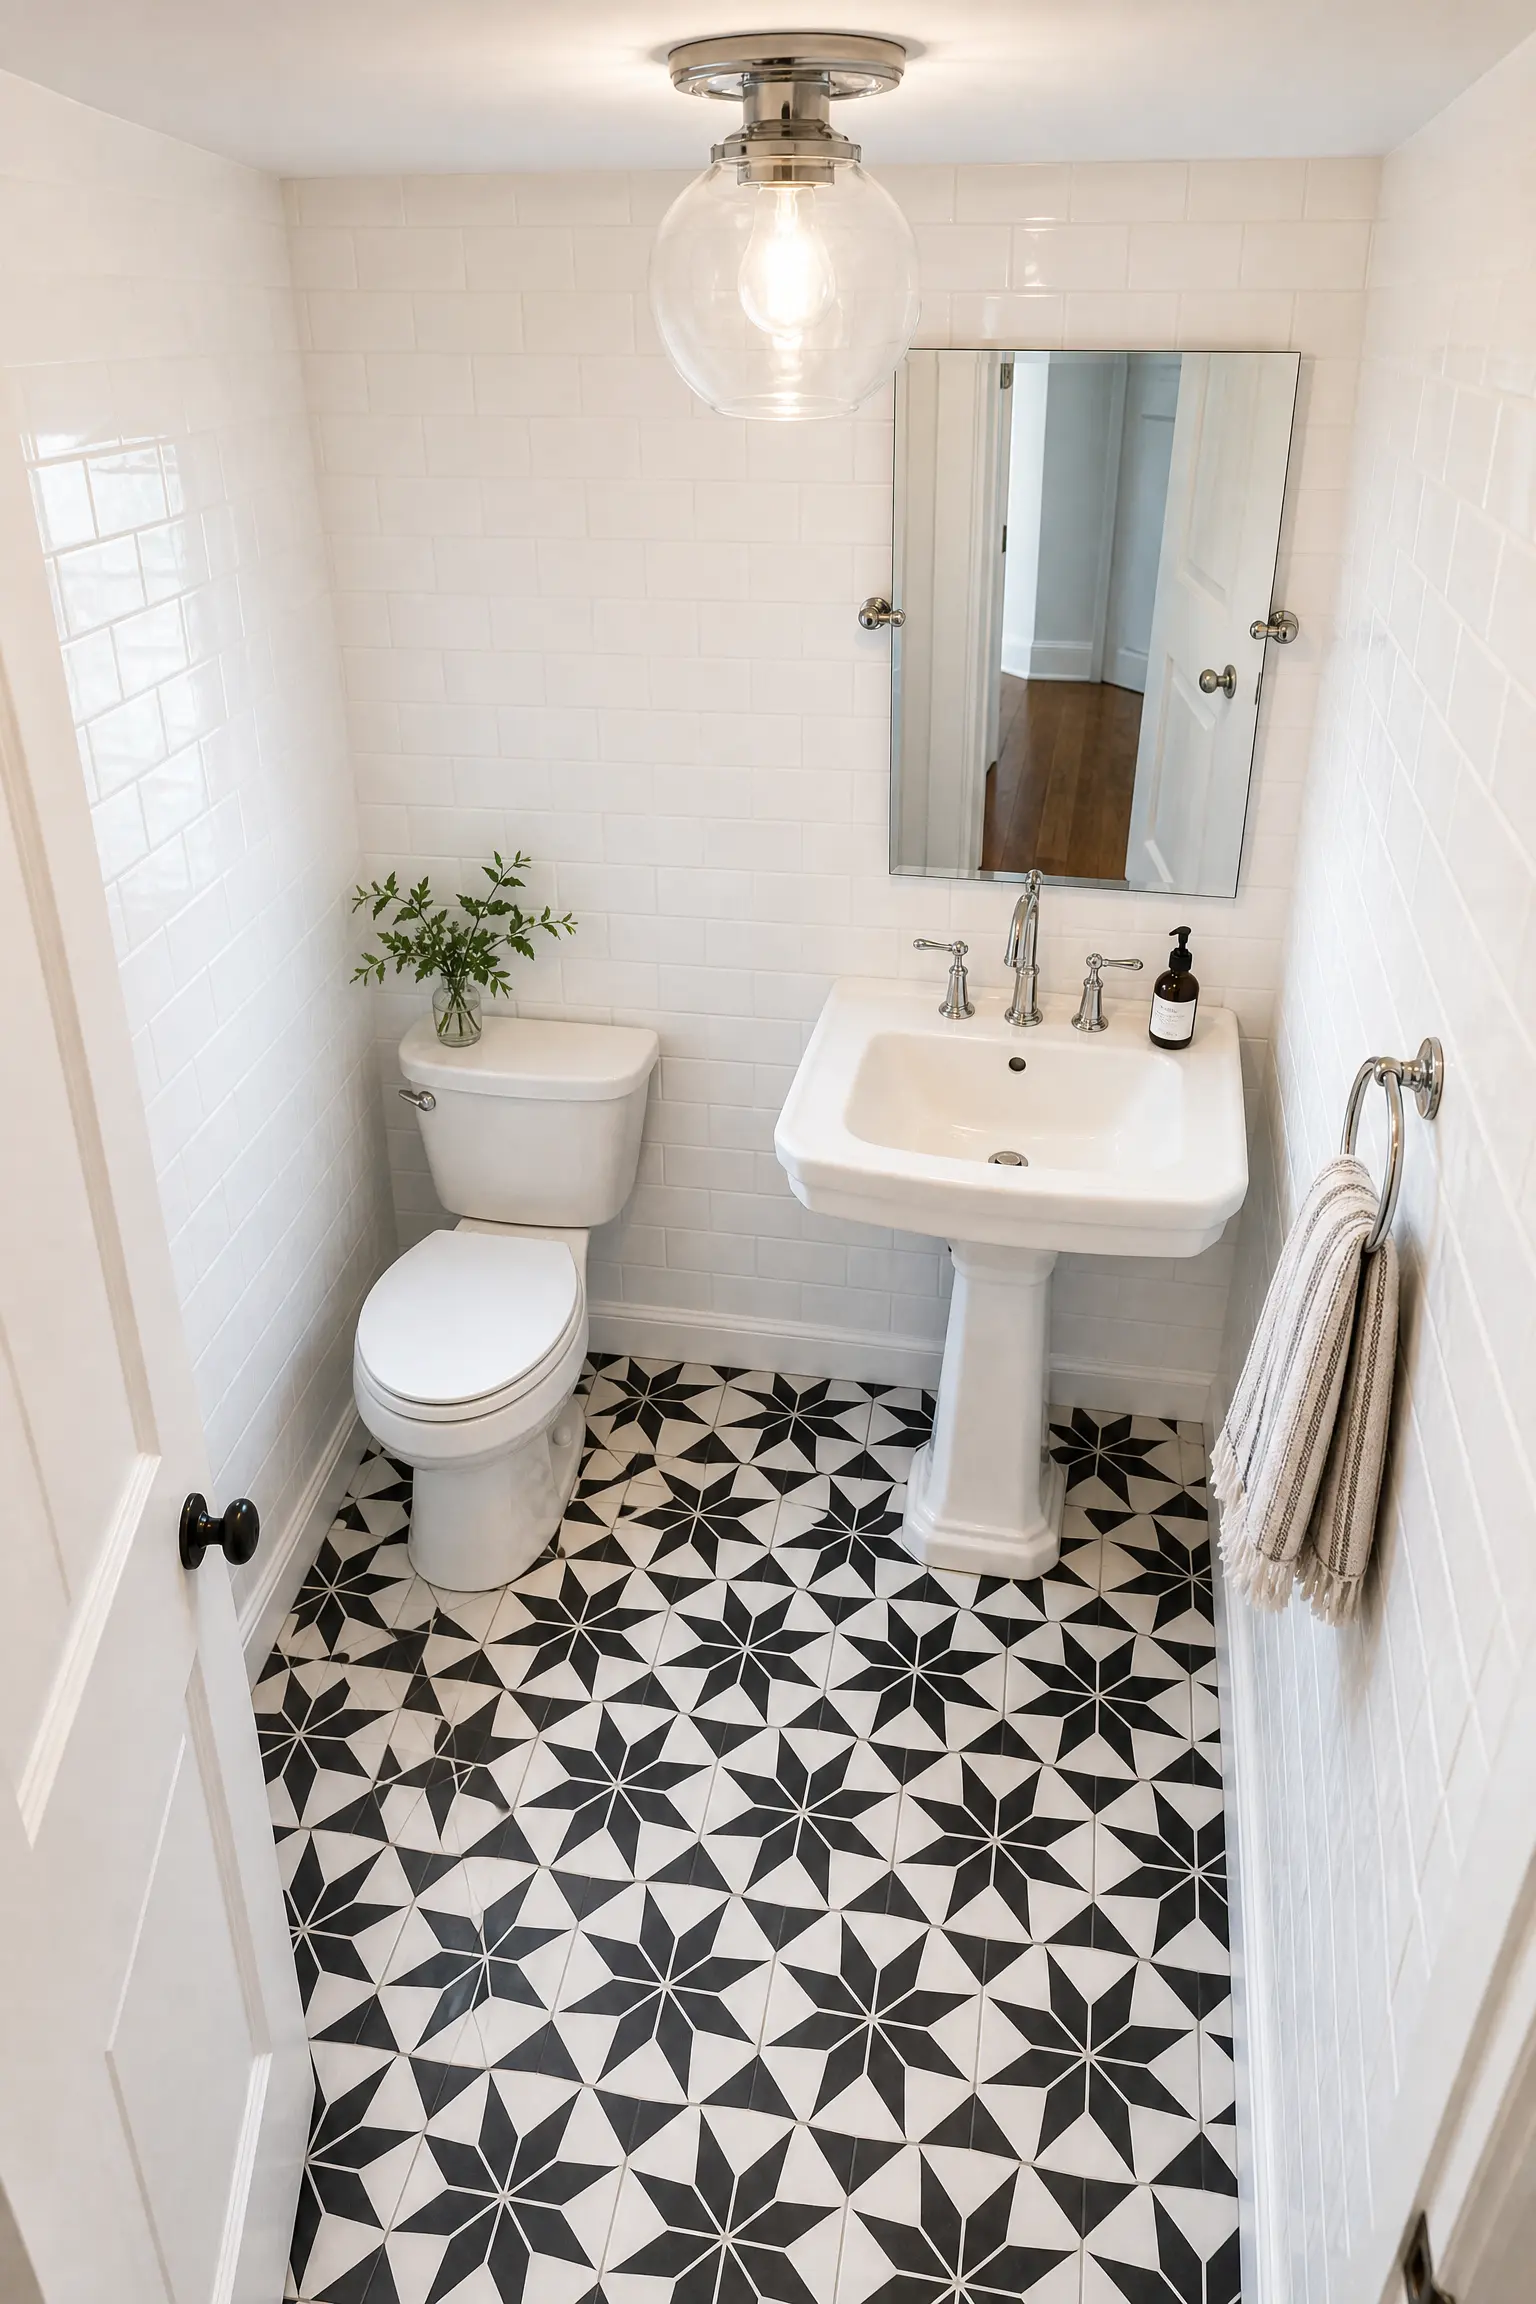
23. Natural Wood Accent Ceiling
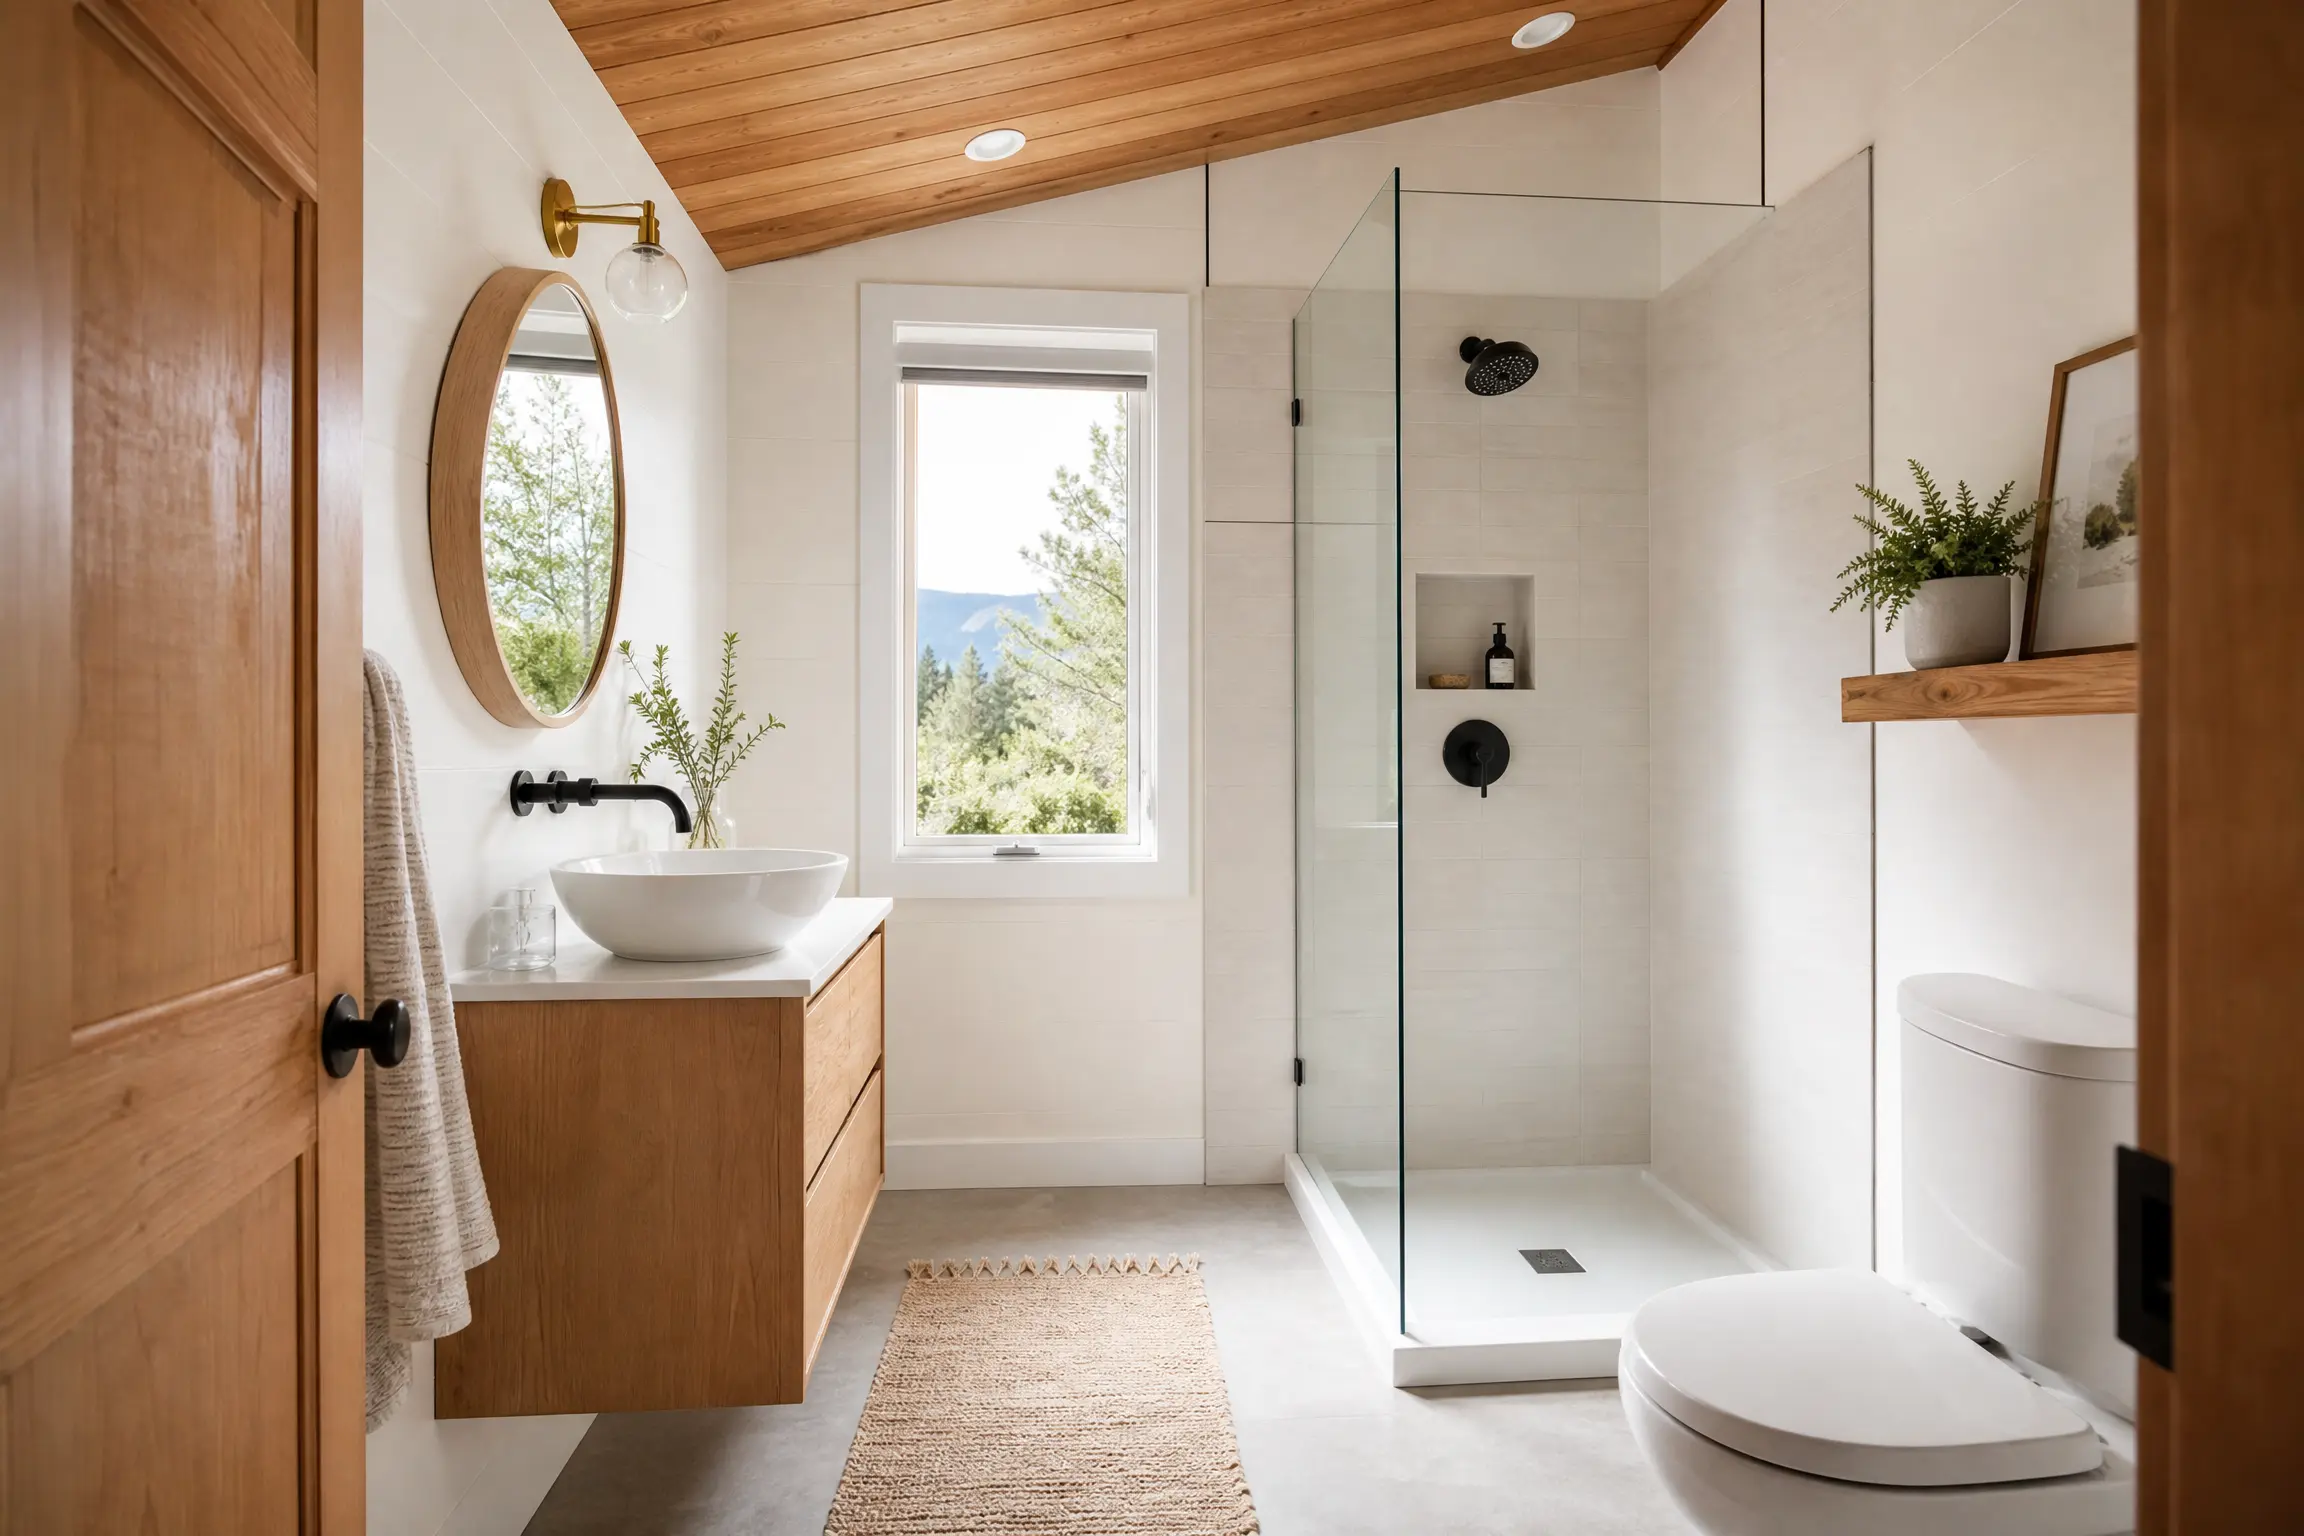
Cladding the bathroom ceiling with tongue-and-groove wood planks in a light cedar, whitewashed pine, or pale ash draws the eye upward and creates a warm, organic contrast to hard tile and porcelain surfaces. The wood grain pattern adds visual texture and an outdoors-inspired quality that makes the small room feel more comfortable and less like a sterile box. Seal the wood with a marine-grade polyurethane or waterproof wood oil to protect it from bathroom humidity, and make sure your exhaust fan is powerful enough to remove moisture quickly. A pair of small recessed downlights in the wood ceiling provide warm illumination while maintaining the clean plank lines. Complement the wood ceiling with white walls and white fixtures below to maximize the contrast and prevent the room from feeling dark or heavy. Tongue-and-groove planks cost $2 to $6 per square foot for materials, making this a surprisingly affordable accent, but the honest limitation is that wood ceilings in high-humidity environments demand consistent ventilation and periodic re-sealing to prevent warping or mold.
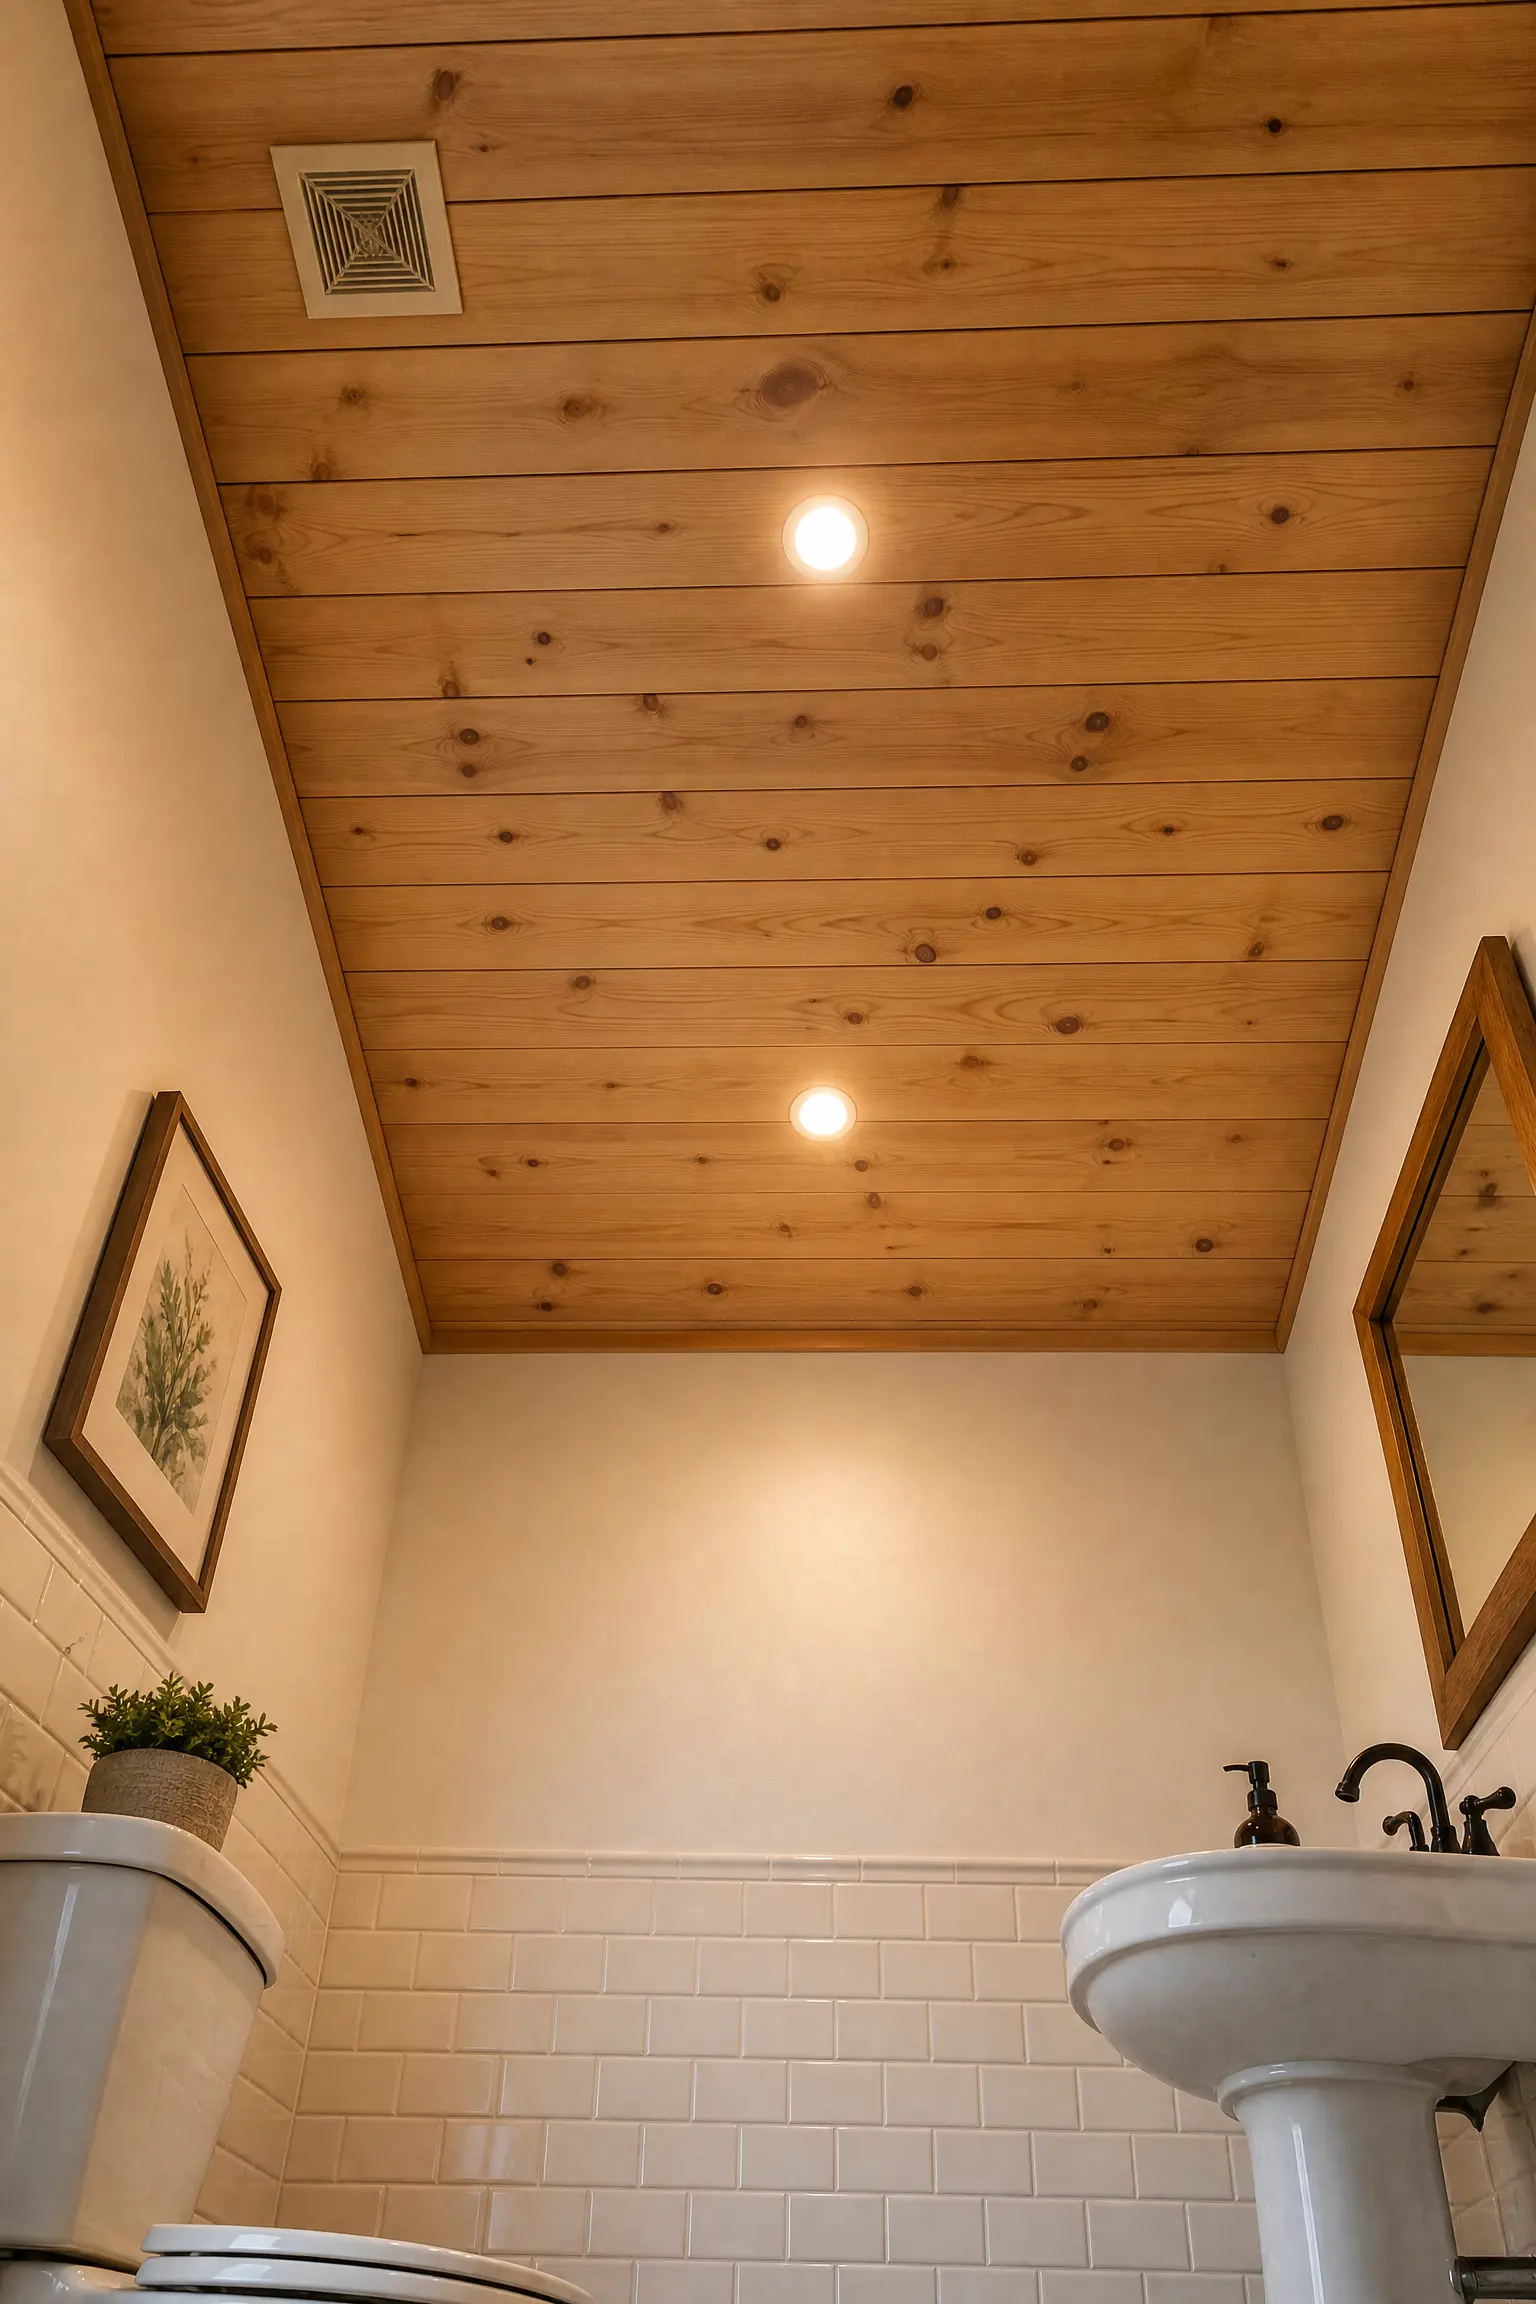
24. Matte Black Hardware Suite
Swapping all of your bathroom hardware, including the faucet, showerhead, towel bar, toilet paper holder, cabinet pulls, and robe hooks, to a coordinated matte black finish creates a striking, gallery-like contrast against light walls and fixtures. The matte black finish absorbs light rather than reflecting it, which gives each piece a sculptural quality that adds visual weight and intentionality to the room. Pair the black hardware with white subway tile walls, a white porcelain sink, and a light wood vanity to let the dark metal stand out without darkening the space. A round matte black-framed mirror ties the look together and creates a subtle echo of the hardware finish. For lighting, a black metal wall sconce with an exposed Edison-style bulb on either side of the mirror reinforces the industrial-modern vibe. A full matte black hardware suite can be assembled for $100 to $350 depending on the brands you choose, making this an affordable update, but be aware that matte black finishes show water spots and fingerprints more easily than chrome or brushed nickel, so you will need to wipe fixtures down regularly to keep them looking clean.

25. Living Wall Planter Display
Mounting a small vertical planter or a row of wall-mounted ceramic pots filled with humidity-loving plants like pothos, ferns, or air plants brings genuine life and color into a tiny bathroom. Position the plants on the wall opposite the shower or near a window where they can benefit from natural light and the ambient moisture created by daily showering. White or terracotta wall-mounted pots against a sage green, soft white, or pale blue wall create a fresh, natural palette that makes the room feel like a small greenhouse. Supplement natural light with a small clip-on grow light or a warm-spectrum LED strip mounted above the planter row to keep the plants healthy in darker bathrooms. A small brass plant mister on the vanity shelf doubles as both a functional tool and a decorative accessory. This is one of the most affordable ideas on the list at $15 to $60 for a few wall planters and starter plants, though the limitation is that bathrooms without any natural light or adequate ventilation will struggle to keep live plants thriving long-term, in which case high-quality faux plants are a perfectly acceptable alternative.

Conclusion
Designing a tiny home bathroom is an exercise in creative problem-solving where every inch needs to earn its place. The 25 ideas covered in this article show that small does not have to mean boring, cramped, or uncomfortable. From the raw efficiency of a full wet bath layout to the visual drama of patterned cement floor tiles or a bold wallpaper accent wall, there are real solutions for every budget and every style preference. The most successful tiny bathrooms tend to combine several of these strategies together. A light neutral color palette paired with an oversized frameless mirror and layered lighting, for example, creates a foundation that feels open and airy, while a floating vanity and recessed shower niche handle the practical storage needs without cluttering the space. Start with the layout and fixture decisions that are hardest to change later, then layer in the visual tricks and personality touches once the bones of the room are set. Be honest with yourself about maintenance commitments, especially with options like composting toilets or natural wood ceilings that require ongoing attention. With thoughtful planning and realistic expectations, your tiny home bathroom can be one of the most satisfying rooms in your entire home.
FAQ
What is the smallest functional size for a tiny home bathroom?
The smallest practical tiny home bathroom is around 15 to 16 square feet, roughly 4 feet by 4 feet. At this size, a wet bath design where the shower, toilet, and sink share the same waterproofed space is usually the only layout that works comfortably. Anything smaller than this starts to compromise basic functionality like being able to bend down or turn around without hitting a fixture. If your floor plan allows for 20 to 24 square feet, you gain enough room to separate the shower with a glass panel or curtain, which significantly improves the daily experience.
Should I choose a wet bath or a dry bath for my tiny home?
It depends on your priorities. A wet bath, where the entire room is waterproofed and the shower has no enclosure, is the most space-efficient option and works well in bathrooms under 20 square feet. The downside is that the toilet, sink, and any stored items get wet during showers, which requires wiping everything down afterward. A dry bath separates the shower from the rest of the bathroom with a partition or curtain, keeping fixtures and storage dry. If you have at least 24 square feet, a dry bath offers a more conventional experience. Many tiny home owners who have tried both report preferring the dry bath for daily livability, even though it requires more space.
Are wall-mounted toilets worth the extra cost in a tiny home?
Wall-mounted toilets can reclaim 6 to 12 inches of floor depth, which is significant in a bathroom where every inch matters. They also make the floor easier to clean and create a more modern, open appearance. However, the total installed cost of $1,000 to $4,000 is substantially higher than a standard toilet at $250 to $600 installed. You also need to ensure your wall framing can support the in-wall carrier frame, and repairs to the concealed tank are more involved. If you are on a tight budget, a compact elongated floor-mounted toilet with a low-profile tank can save nearly as much space at a fraction of the cost.
What is the best color to paint a tiny home bathroom?
Light neutrals like soft white, warm cream, pale gray, and light greige consistently perform best in tiny bathrooms because they reflect light and make boundaries between walls less noticeable. If you want a single recommendation, a warm white like Benjamin Moore Simply White or Sherwin-Williams Alabaster works in nearly any tiny bathroom style. That said, do not be afraid to add one bold accent wall in a deeper color like navy, forest green, or charcoal, as long as the remaining walls stay light. The contrast actually adds depth and can make the room feel more interesting without closing it in.
How do I prevent mold in a tiny home bathroom?
Mold prevention in a tiny home bathroom comes down to three things: ventilation, waterproofing, and material choices. Install a high-CFM exhaust fan and run it during every shower and for at least 20 minutes afterward to remove moisture. Make sure all shower surfaces, including behind tiles, are properly waterproofed with a membrane system rather than relying on grout alone. Choose mold-resistant materials like porcelain tile, PVC trim, and marine-grade sealants wherever possible. Avoid putting standard drywall in high-moisture areas, and opt for cement board or waterproof wall panels instead. Wipe down wet surfaces after each use if your ventilation is limited.
Can I install a regular bathtub in a tiny home bathroom?
Standard-sized bathtubs are generally too large for most tiny home bathrooms, but compact soaking tubs in the 48 to 54-inch range can fit in bathrooms that are at least 24 to 30 square feet. Japanese-style deep soaking tubs, which are shorter in length but deeper, are another option for tight spaces. Keep in mind that a filled bathtub adds significant weight, often 300 to 500 pounds, which can be a structural concern in tiny homes on wheels. If a full tub is not practical, a deep shower pan with a built-in seat can provide a similar soaking experience in a much smaller footprint.